Introduction
Retirez le GPU et son dissipateur thermique en une seule unité.
Ce dont vous avez besoin
-
-
Desserrez les deux vis Phillips par lesquelles la trappe d'accès est fixée à votre iMac.
-
Retirez la trappe d'accès.
-
-
-
Retirez les vis suivantes le long du bord inférieur de votre iMac :
-
Trois vis Torx T8 6 mm
-
Une vis Torx T8 8 mm
-
-
-
Pour soulever le cadre avant hors de l'iMac, effectuez les opérations suivantes simultanément :
-
À l'aide de vos pouces, enfoncez les clips de fixation de la RAM et maintenez l'iMac vers le bas.
-
À l'aide de vos index, soulevez le bord supérieur du cadre avant, situé au dessus des emplacements de la RAM.
-
Soulevez le cadre avant avec vos deux index.
-
Après avoir dégagé les clips de fixation de la RAM, soulevez le bord inférieur du cadre avant suffisamment pour libérer le bas du boîtier arrière.
My iMac did not have the "small bridge of material" mentioned, however the bezel just lifted off easily.
-
-
-
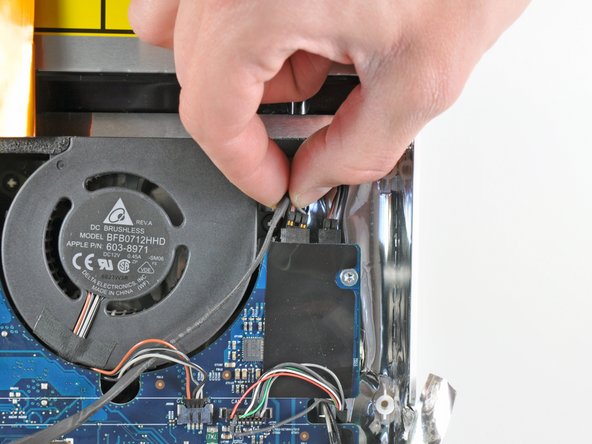
Débranchez le câble du microphone.
-
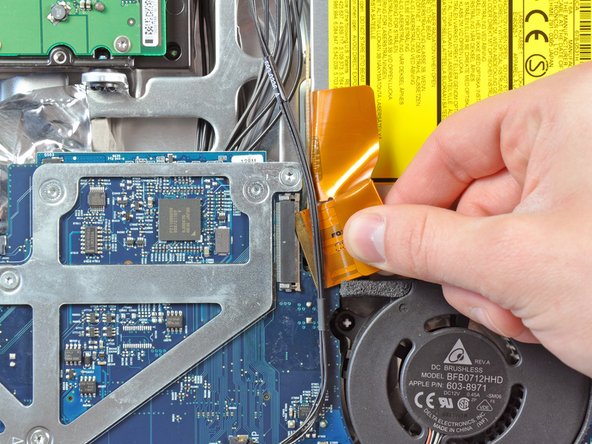
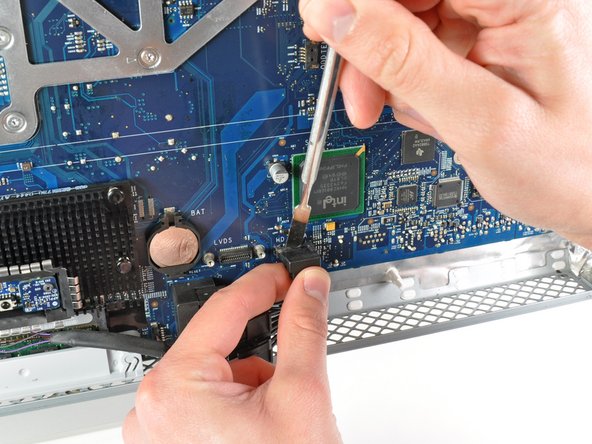
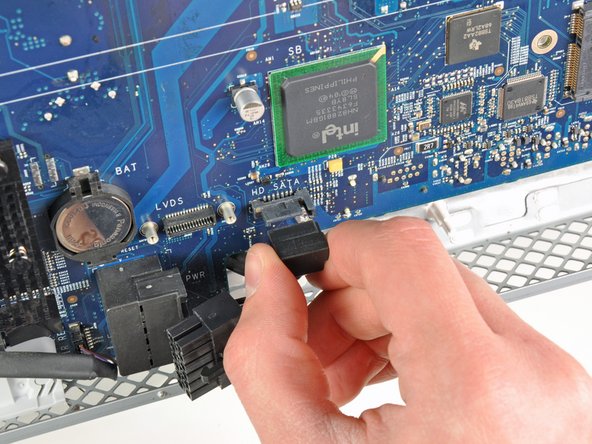
Débranchez le câble vidéo en retirant le connecteur de la prise sur le support vidéo.
I agree that for a simple, quick battery change, don't risk damaging those delicate wires. Ignore Step 6 and instead of disconnecting the mic and camera wires, keep them in place and just have a friend hold the plastic frame up while you change the battery, or prop it up as mentioned by Stefano C above.
Make sure you double check the new logic board for the presence of the GPU assembly before installing. I stupidly installed a new board without moving the GPU from the old one first. So i guess you can say this guide worked for me twice. :)
-
-
-
Décollez les deux attaches du blindage EMI encadrées en rouge du cadre de l'écran LCD.
-
-
-
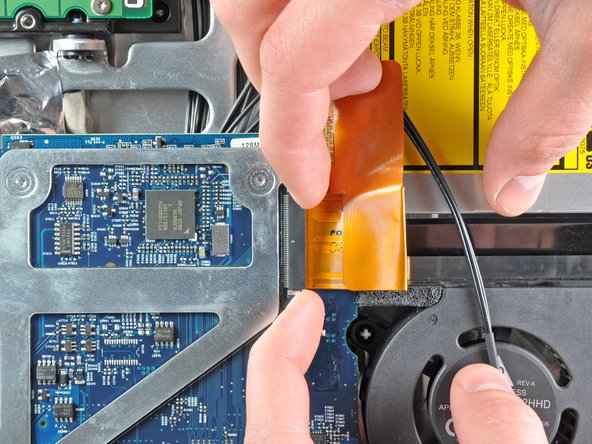
Retirez les deux vis Torx T6 par lesquelles le câble de données de l'écran est fixé à la carte mère.
Wait, we need a T6 screwdriver as well?
I purchased the T8 and T10 from your site as per the parts list above and now am here with an opened iMac on the dining room table unable to continue :/
-
-
-
Retirez les huit vis Torx T8 par lesquelles l'ensemble écran est fixé au boîtier arrière.
It would be useful to use a torx screw driver with a long, narrow shank… some of these screws are in tight places.
It may also be useful to prop up the back so it is level. This will prevent the screws from falling inside. They can be retrieved once the scene is off.
-
-
-
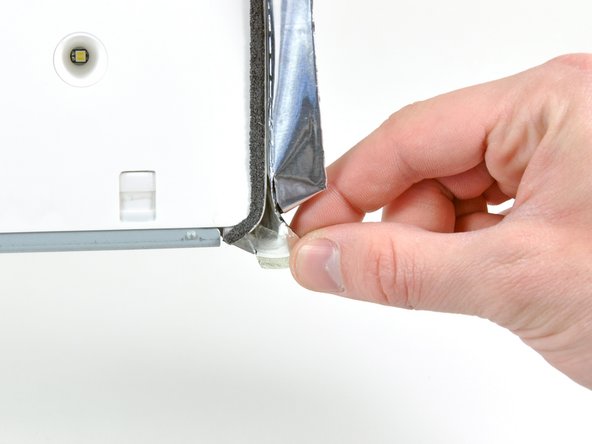
Décollez le morceau de ruban EMI reliant le bord inférieur du haut-parleur droit au cadre métallique de l'iMac.
-
Décollez la bande du coin inférieur du haut-parleur droit.
-
-
-
-
Utilisez l'extrémité plate d'une spatule (spudger) pour soulever les deux connecteurs d'antenne hors de leurs prises sur la carte AirPort.
-
-
-
Eloignez légèrement le bord droit de la carte mère du boîtier arrière pour déloger les ports d'E / S arrière de leur joint.
-
Inclinez le bord supérieur de la planche pour l'éloigner du boîtier arrière, et soulevez l'ensemble de la carte mère du boîtier arrière, en faisant attention aux les câbles qui pourraient se coincer.
-
-
-
Retirez la vis Torx T10 courte fixant le dissipateur de chaleur GPU à la structure métallique de la carte mère.
-


Pour remonter votre appareil, suivez ces instructions dans l'ordre inverse.
Pour remonter votre appareil, suivez ces instructions dans l'ordre inverse.
Annulation : je n'ai pas terminé ce tutoriel.
26 autres ont terminé cette réparation.
Merci à ces traducteurs :
100%


Ces traducteurs nous aident réparer le monde ! Vous voulez contribuer ?
Commencez à traduire ›

7 commentaires
Competed the GPU replacement following this excellent guide. My iMac is as good as new, after weeks/months of randomly fragmented windows. Would not rate the repair as difficult, though, since no soldering/desoldering was required. Took between 4.5 and 5 hours (forgot to check the exact start time).
thx for yout reply. And i have a question.
I have done all these works. But i can't get the replacement of the GPU.
can i ask you where to get the replacement of the GPU?
it is very hard to find the GPU because it is pretty old model
hutch -
Having similar issues with fragmented windows and then freezing in some cases. Very certain it is the GPU - do I replace the paste or the board?
Fraser, I suggest checking a youtube video on how to reset the GPU's solder connections. Apparently, with the overheating the solder connections loosen causing the fragmented windows and then freezing. Normally one would replace the GPU assembly, but since these are extremely hard to find and costly, resetting the solder connections might be the only option to try.
At YouTube.com search for "Casual iMac Video Card Repair".
I've been meaning to try this repair for two years now . . . finally going to give it a try.
Ewald -
Finally got round to looking at my late 2006 iMac, and GPU overheating is the major problem now.
A temporary fix is to disable the GPU, but obviously with all video processing via the CPU, the performance is poor.
https://www.youtube.com/watch?v=1GDSolVl...
Next step - see above….got some new thermal paste - maybe it will work.
I’ll let you know
Just finished this refurb…. fantastic site and great guide.
The GPU was overheating, and initially, I used SMFan to increase minimum fan speeds and disabled the GPU by following this video
https://www.youtube.com/watch?v=1GDSolVl...
but obviously this limited performance, so I thought , maybe refreshing the thermal paste was help and it has - I decided to do the CPU and the GPU at the same time and the only issue was the antenna terminals broke on the Bluetooth board as I remove the cable - being a bit heavy handed.
A Bluetooth dongle later and this is all fine, the system still runs a little hot, but that’s to be expected and for a 13 year old Mac, its pretty good.
Thanks Folks - really wonderful.