Introduction
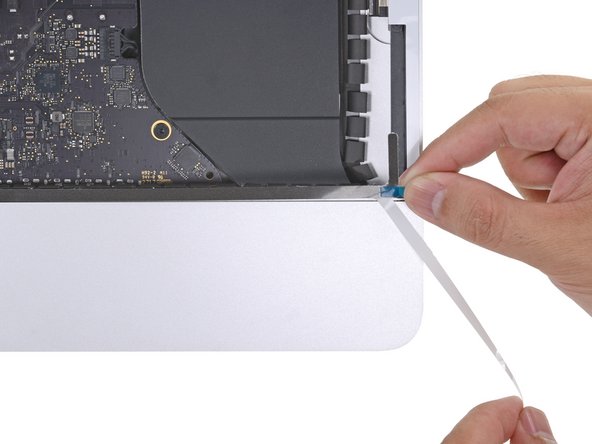
Le retrait de l'écran d'un iMac Intel 27 "Retina 5K nécessite de couper l'adhésif autour du périmètre de l'écran. Une fois l'adhésif coupé, il ne peut plus être utilisé pour ré-sceller l'écran en place, vous devez donc mettre un nouveau set de bandes adhésives.
Ce dont vous avez besoin
-
-
Si vous réutilisez votre écran, vous devez également retirer l'ancien adhésif à l'arrière de l'écran.
-
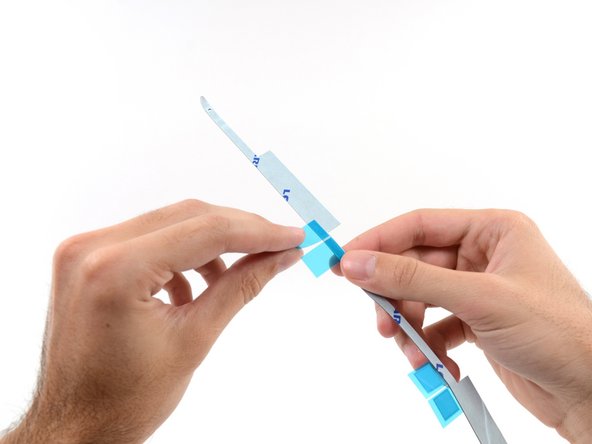
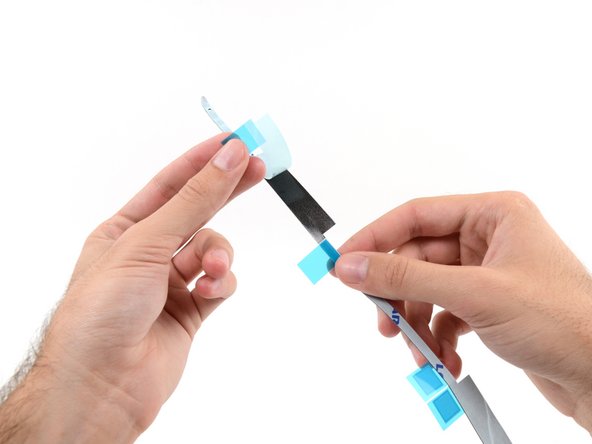
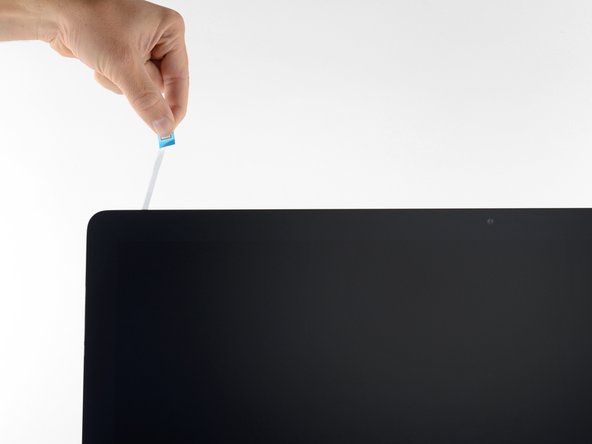
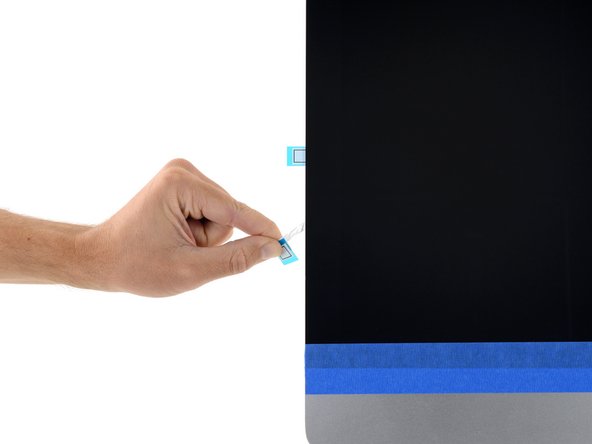
Décollez les bandes adhésives à l'aide d'une pincette ou de vos doigts. Commencez par le bas et décollez vers le haut de l'appareil.
-
Après avoir retiré tout l'ancien adhésif, nettoyez soigneusement la surface avec de l'alcool isopropylique à 90 % (ou plus) et un chiffon non pelucheux. Essuyez toujours dans la même direction, ne faites pas d'aller-retours.
-
-
-
Disposez les adhésifs au préalable afin de ne pas installer accidentellement une bande au mauvais endroit.
-
Bande 22 en haut à gauche
-
Bande 23 en haut à droite
-
Bande 21 côté droit
-
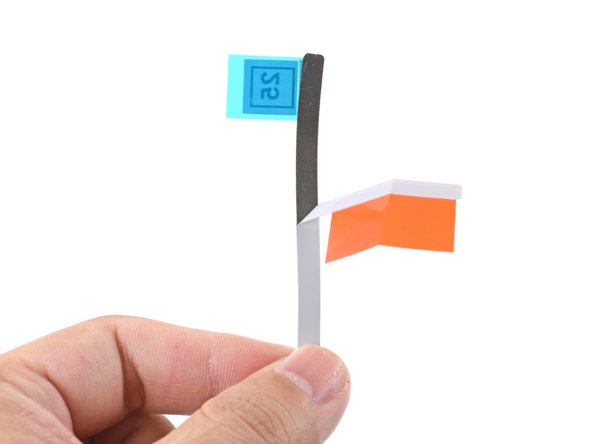
Bande 25 en bas à droite, côté sombre vers le haut.
-
Bande 26 en bas à gauche, côté sombre vers le haut
-
Bande 16 côté gauche
-
-
-
Commencez par la bande 21, qui va sur le bord vertical droit du châssis de l'iMac.
-
Décollez le film de protection au dos de la bande.
-
-
-
Avec la spatule toujours enfoncée dans le trou de la bande adhésive, alignez la pointe de la spatule dans le trou correspondant du châssis de l'iMac.
-
En utilisant le trou et la spatule pour positionner la bande adhésive, alignez la bande contre le bord droit, tirez doucement pour vous assurer que la bande est bien tendue et collez-la sur le châssis.
-
-
-
-
Travaillez dans le sens inverse des aiguilles d'une montre autour du périmètre de l'iMac, en ajoutant trois autres bandes adhésives de la même manière :
-
Bande 23 en haut à droite
-
Bande 22 en haut à gauche
-
Bande 16 côté gauche
-
Sur l'écran iMac Intel 27" Retina 5K, les languettes bleues de la bande supérieure droite ne s'aligneront pas avec l'antenne supérieure de la même manière que le modèle non 5K. Ceci n'est pas important et n'affectera ni l'utilisation des adhésifs ni les performances de l'antenne.
-
-
-
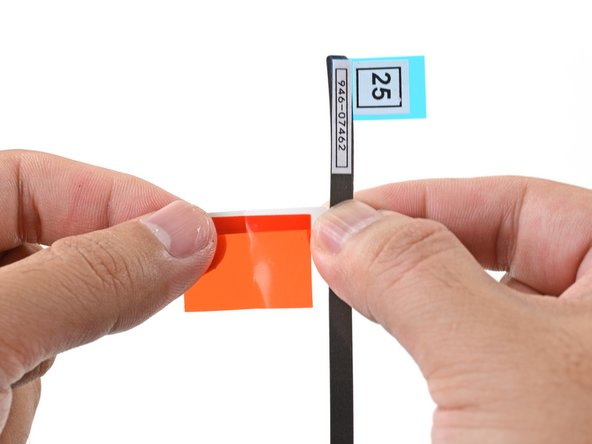
Saisissez la languette rouge sur la bande 25 et tirez pour décoller environ 5 cm de film de protection de l'adhésif.
-
-
-
Alignez la bande adhésive sur le bord inférieur en positionnant l'encoche du microphone sur le trou du microphone.
-
Si votre iMac n'a pas de trou pour microphone, alignez l'extrémité droite de la bande de sorte que le coude en L se trouve à côté de l'adhésif vertical droit. Le coude en L ne doit pas chevaucher l'adhésif vertical droit.
-
Une fois la bande alignée, placez soigneusement la partie gauche décollée de la bande sur l'iMac pour sécuriser l'alignement.
-
-
-
Placez délicatement l'écran sur l'iMac et alignez-le soigneusement.
-
-
-
Si vous avez déjà vérifié que votre iMac fonctionne correctement et que vous êtes prêt à coller l'écran, passez à l'étape 22.
-
Insérez délicatement le connecteur de données d'écran dans sa prise sur la carte mère. Assurez-vous de l'enfoncer bien droit dans la prise et de l'insérer complètement.
-
Clipsez le verrou du connecteur de données d'écran sur la prise.
-
Insérez le connecteur d'alimentation de l'écran dans sa prise sur la carte mère.
-
-
-
Après avoir vérifié que votre iMac fonctionne correctement, débranchez les câbles de l'écran et penchez doucement l'écran vers l'avant.
-
Retirez le film de protection des deux bandes inférieures en les attrapant par le haut avec une pincette, puis en tirant les languettes bleues vers le haut depuis le bord inférieur de l'écran.
-


Annulation : je n'ai pas terminé ce tutoriel.
186 autres ont terminé cette réparation.
Merci à ces traducteurs :
100%

Ces traducteurs nous aident réparer le monde ! Vous voulez contribuer ?
Commencez à traduire ›


24 commentaires
yes .it works
Does this work with iMac 27 2017?
Used these guides to replace the cpu and ssd’s in my 2015 iMac 27”. Super easy! And yes with a late 2015 model, the cpu is replaceable with a regular Skylake cpu. I bought a 3.2 i5 model and replaced with a 6700K ! And yes these also take 64GB of DDR3. For the PCIE SSD you can get an adapter off of ebay…look for m.2 to iMac adapter…since they’re cheap I recommend getting like 2-3 and figuring out which one works best with your m.2 ssd. So yeah, you can get a 1TB m.2 AND a 1TB 2.5” ssd in this and have a nice little box for peanuts.
Friends! This manual and accessories are compatible with the iMac 27 5K 2017?
Hi,
I done all of the above on my 2017 27inch iMac and now my microphone won’t work, when I tap the enclosure it reacts but it doesn’t hear my voice commands. Maybe the adhesive tape got stuck on the microphone somehow. where is the microphone located exactly? Help please……
Best regards, Henk
I have the same problem. Were you able to fix it?
I know this is an old question, but I wanted to post a followup so hopefully, no one else makes this mistake. The microphone is located on the lower edge. Here’s the thread that covers this better. Microphone very muffled after sealing up iMac
veenenen -
ottimo complimenti per i dettagli
guida superlativa e precisa grazie del vostro aiuto
I did it! Be very careful when you place the tape at the bottom of the screen. The screen can fall off! Also important to keep the imac standing and not laying on it’s back because it will make it hard to remove the bottom adhesives.
After following to the letter, the screen came off and went back on just fine. 5 days later (while setting in a cool environment) the screen just came unstuck and fell out sometime during the night, Of course it tore the two cables badly in addition to the antenna wires that must have gotten in the way somehow. Took most all day, but was able to the wifi and bluetooth wires back in place and the power cable (4 connector) plug back in. The hardest part was the ribbon cable. With high magnification hood on, was finally able to get it back in it’s socket. Had to tape it down to the rest of the board so it would stay. Used new sealant strips, then CLAMPED with spring clamps (around 12 of um) then laid it flat, screen up, then put it near a baseboard heater for two hours. Temp gun was around 100* all around it. Hopefully that won’t happen again!!
Excellent write up. Also, the detailed photos were super helpful in seeing the alignment.
The only hiccup I had was trying to remove the final tabs from strip 15 and 14 while the glass was blue taped down. I had to lift the weight of the glass panel off of the tab strips before they came off. Aside from that, a very smooth install, and very quality product. Thanks!
Make sure you totally clean both surfaces. The back of the display can be a real pain. I know someone who told me he replaced the PCI SSD and it all went smooth (same thing I did plus a SATA SSD and new thermal paste) but a few weeks later to his HORROR the 5k display was smashed on his office floor. Make sure to really clean and press on all sides. Keeping some painters tape on the top corners wouldn’t hurt either for a few weeks to make sure it seats well.
Thank you! Just completed this after an SSD upgrade to my 2015 iMac. Much appreciated Sam!
would be REALLY nice to have this linked on every single repair page. there was NO MENTION of replacing the adhesive strips at the end of the hard drive replacement guide, and i am now staring at a smashed LCD display that will set me back $600 to replace. very frustrating as I usually love ifixit guides. please consider adding a heavily red-flagged link to this guide and information to every guide that requires removing the display.
This was a super useful guide that formed the closing stage of repairing my old iMac 27” (late 2012). I replaced the power supply and upgraded to an SSD. Thank you so much for taking the time to prepare and improve these guides. They are invaluable and enabling.
Se me acaba de despegar a las 4 semanas de haberlo utilizado.
These instructions add a couple of steps that a well-known Mac accessory vendor's instructional video lacks: taping the screen closed to allow functional testing before you seal the adhesive, the upright positioning using the wedge, that makes it easier to set the bottom edge of the screen fully against the frame, and cleaning the backside of the camera opening before you close it up. All of these are valuable refinements.