Ce dont vous avez besoin
-
-
Dévissez les quatre vis de 6,5 mm à l'aide d'un tournevis cruciforme.
-
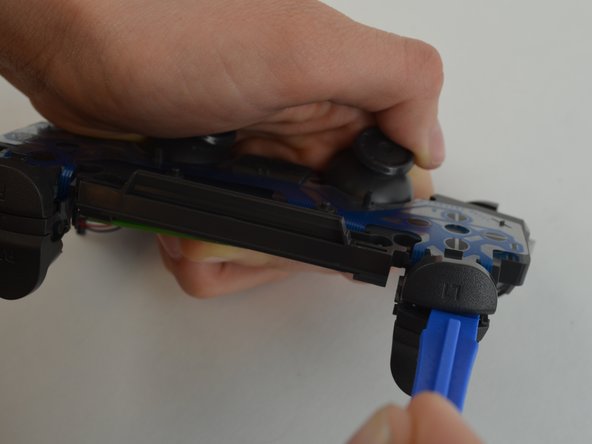
Écartez les deux moitiés de la coque à l'aide d'un outil d'ouverture en plastique.
-
-
-
Tirez le câble ruban hors du port de la carte mère pour séparer complètement les deux moitiés, à l'aide d'une paire de pincettes.
If you just want to change the battery, this step is not necessary; it can be done without disconnecting the ribbon cable.
-
-
-
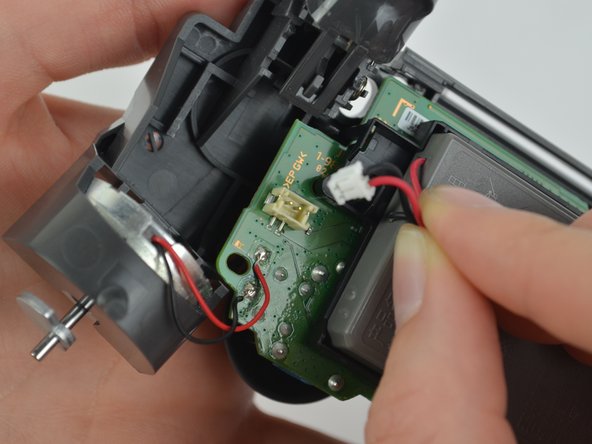
Débranchez les fils noir et rouge du port d'alimentation situé sur la carte mère.
-
Retirez l'ancienne batterie du contrôleur.
Be extra careful - the power port socket pulled loose from the motherboard for me. I would suggest holding down the socket itself with one tool and gradually loosening the plug from the port.
-
-
-
-
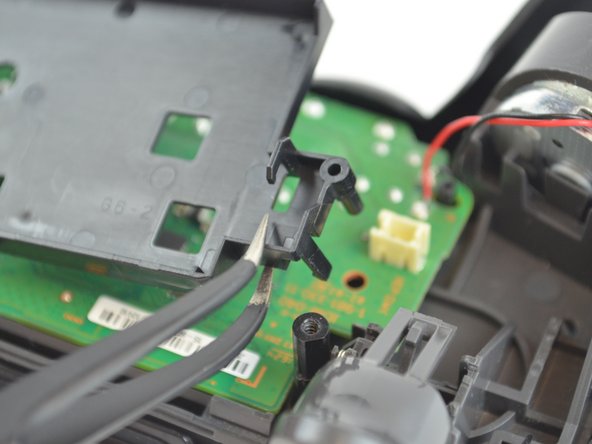
Retirez la vis de 6,43 mm reliant la carte mère au fonctionnement interne du contrôleur, à l'aide d'un tournevis cruciforme.
this and the last step arnt necessary you just put the battery back and connect all of it up
-
-
-
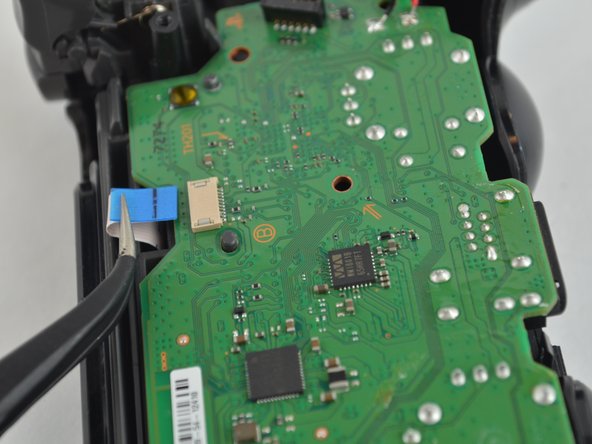
Tirez le deuxième ruban CPU pour séparer le fonctionnement interne du haut de la coque externe.
-


Pour remonter votre appareil, suivez ces instructions dans l'ordre inverse.
Pour remonter votre appareil, suivez ces instructions dans l'ordre inverse.
Annulation : je n'ai pas terminé ce tutoriel.
26 autres ont terminé cette réparation.
Merci à ces traducteurs :
100%
[deleted] nous aide à réparer le monde ! Vous voulez contribuer ?
Commencez à traduire ›

Équipe

USF Tampa, Team S1-G5, Leahy Fall 2017 Membre de l'équipe USF Tampa, Team S1-G5, Leahy Fall 2017
USFT-LEAHY-F17S1G5
3 membres
22 tutoriels rédigés
4 commentaires
Is it possible to replace the zct2u triggers with custom 1st gen triggers? It seems like the only major difference is the extra piece on the latest models to prevent losing the trigger.
Does this stops the issue I have that is when I press L2, my character sometimes goes forward, like the L2 would be creating contact with the left directional going forward option.
My controller lost the R1, so I need to buy one to replace it. After pulling apart my controller, I noticed the back of the L1 button looks different (the plastic connection pieces are completely different) than the photos in your directions. Are there different types of shoulder buttons available? Or is it that my controller is a different generation? If so, do you supply the pieces for this controller type?
Hey, can you explain the differences between the V1 and V2 Trigger buttons, they are different. I stepped on the R2 button and it ripped out the R2 button and damaged the housing (my father is the trades guy, obviously).
I don’t know if it’s worth fixing, or if I should just buy a new controller.
When re-asembling, be careful to check that all buttons/triggers are moving correctly. They can get misaligned when prying the two shell halves apart.
Tale Spinner - Réponse
This part is missing vital information on how to correctly pry the case open. In the 3rd picture you can see there is actually damaged/broken clip already. In order to open the case without damage to the plastic clips inside the controller holding the plastics together you need to insert thin piece of metal between the trigger buttons on each side and push the clip outwards before trying to separate the parts, and if done correctly there is no force needed to pry open the controller. There is actually no necessary need for the clips, but if you want to keep your controller in mint condition without voiding the warranty, take care not to break these clips.
Ville Närhi - Réponse
Your advice for opening shell was so bad and harmful.
It's not correct
Kiarash Moallemi - Réponse
And two more tiny clips to the left and right of the headphone & EXT port. They’re VERY delicate, reckless prying WILL break at least ONE of these.
Strings Cat - Réponse
I've written a guide for how to find and unlatch the clips
Important Step For Opening the DualShock 4 CUH-ZCT2U
Richard - Réponse