Introduction
Ce guide vous donnera des instructions étape par étape sur la façon de retirer et de remplacer les deux haut-parleurs dans un Samsung Galaxy Tab S 10.5.
Ce dont vous avez besoin
-
-
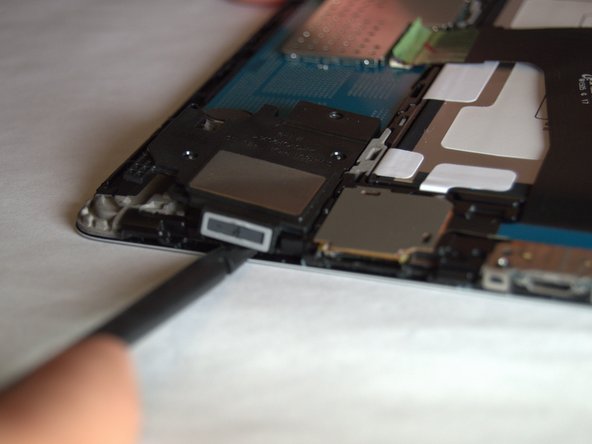
Placez l'outil d'ouverture en plastique dans la fente pour carte SD ou le port de chargement.
-
Soulevez dans un mouvement vers le haut jusqu'à ce que vous voyez une séparation entre la tablette et la couverture arrière.
-
-
-
Travailler autour de l'ensemble du dispositif en faisant glisser l'outil d'ouverture en plastique autour de la jante.
Both plastic tools broke within the first two minutes of use. Had to resort to a narrow conventional flat screwdriver.
-
-
-
Retirez le couvercle arrière une fois que tous les liens ont été séparés.
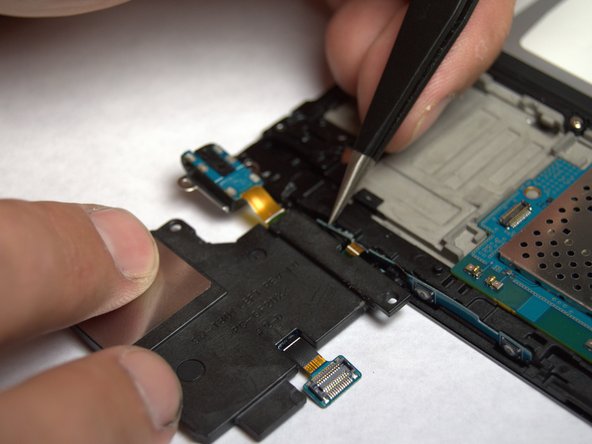
I’ve taken the back cover off my Samsung tablet, and in the process I have torn one of the little orange plastic connectors that are attached to the back cover. The connector I’ve damaged is the second one in on top left in the picture above. Can you please tell me if I need to replace this before I can get the tablet to work?
Thanks.
If you remove just the back cover - which to the uninitiated does look less scary than trying to get between the bezel and the display - you will destroy the tiny plastic rivets that lock the cover onto the bezel. More importantly, you will then find that getting to the parts you need to replace is rendered impossible because they will be hidden under the bezel, which of course will still be in place. So the correct way to take this tablet apart is the more challenging way i.e. separate the front display from the bezel and rear. But with care and the right tools this is still not too difficult. And if you are in any doubt about this, it is worth pointing out that in all of the photos below from Step 4 onwards, the work shown is taking place with the bezel removed. There is nothing written in this guide to indicate that this had to be done.
Have just gone through this process, successfully having read this and other guides and I totally agree with PhilipHN that the most reliable is the slightly scarier approach of removing the front display from the bezel and rear. It is easier overall, you just have to attack it confidently (but gently!).
-
-
-
-
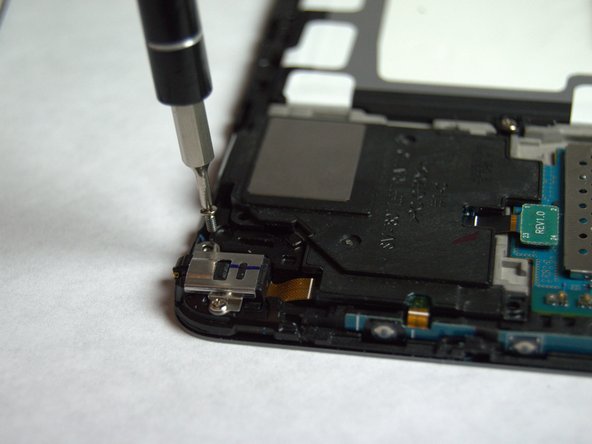
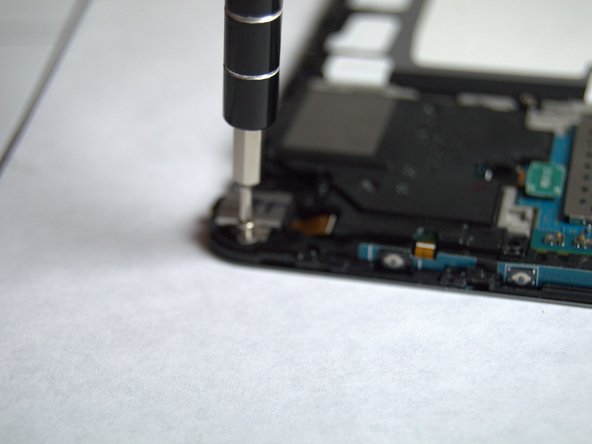
En commençant par le haut-parleur droit, retirez les 10 mm Phillips # 000 vis.
-
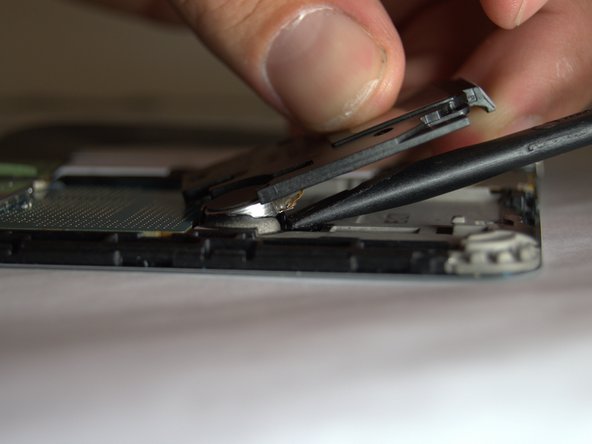
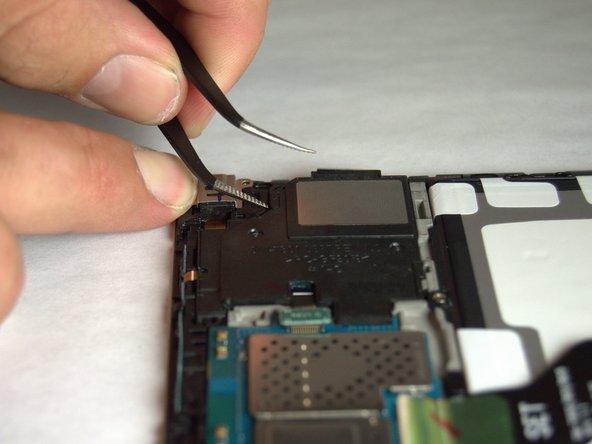
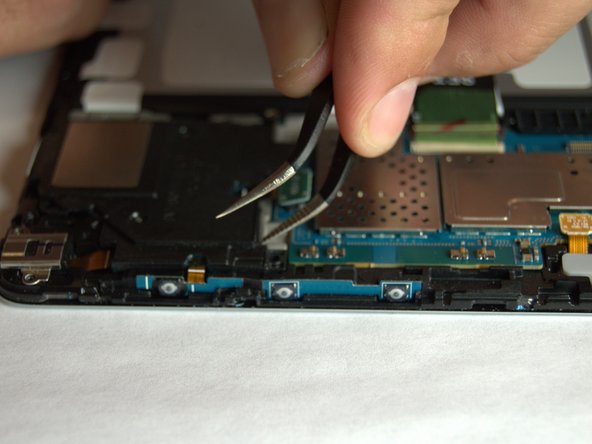
Utilisez le spudger pour commencer à sortir le haut-parleur.
-
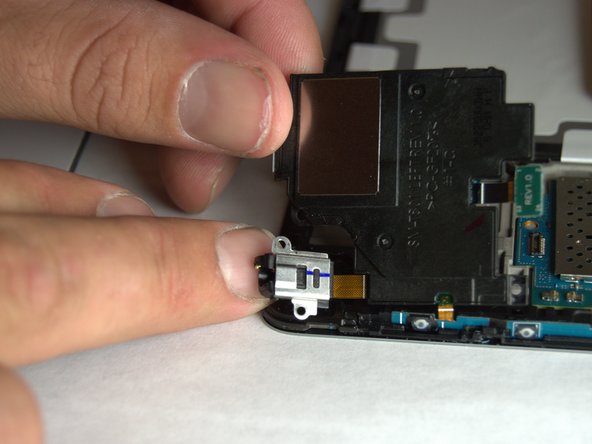
Coincer le spudger sous l'amplificateur pour le retirer de l'adhésif en le maintenant enfoncé.
-


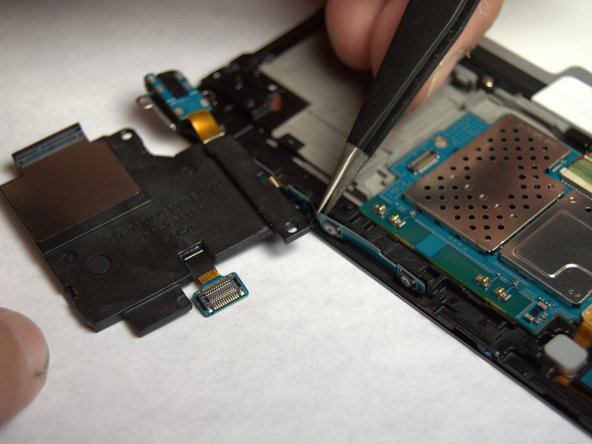
Pour réassembler votre appareil, suivez ces instructions dans l'ordre inverse.
Pour réassembler votre appareil, suivez ces instructions dans l'ordre inverse.
Annulation : je n'ai pas terminé ce tutoriel.
4 autres ont terminé cette réparation.
Merci à ces traducteurs :
100%
[deleted] nous aide à réparer le monde ! Vous voulez contribuer ?
Commencez à traduire ›
Équipe

USF Tampa, Team 3-2, Eyestone Fall 2015 Membre de l'équipe USF Tampa, Team 3-2, Eyestone Fall 2015
USFT-EYESTONE-F15S3G2
3 membres
20 tutoriels rédigés
3 commentaires
Absolutely right. See my comment above. Carefully prising with the right tools between the display and the frame - the bezel - and working around the outside of the display will eventually cause the bezel to come away from the display with the back cover attached. You can then access the parts you need to get to.
Suggestion….add the necessary step of removing the frame that covers the left speaker. If you follow the instructions in this guide, you will not be able to access and remove the left speaker, which is critical considering the on off and volume switches are integral to the speaker.