Il est possible que cette traduction ne reflète pas les dernières mises à jour du tutoriel source. Aidez à mettre à jour la traduction ou bien consultez le tutoriel source.
Introduction
Ce guide vous aidera à retirer la carte Bluetooth de la manette de jeu Nintendo Wii U.
Ce dont vous avez besoin
-
-
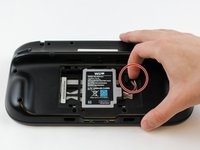
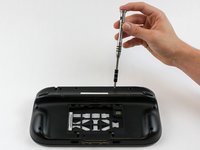
Placez la manette de jeu face vers le bas et retirez les deux vis de 4,7 mm à l'aide d'un tournevis cruciforme n° 00.
-
-
-
-
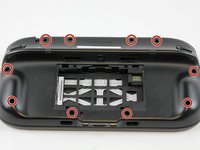
Retirez 10 vis de 9 mm avec un tournevis Tri-Wing de taille Y1 autour du boîtier extérieur.
-
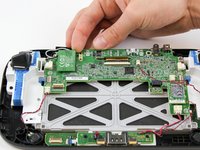
Soulevez le dos du boîtier.
-
-
-
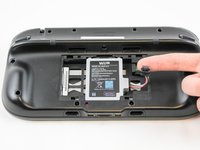
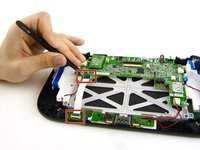
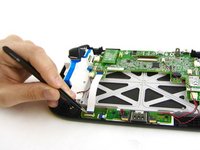
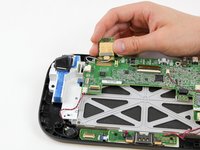
Ouvrez le fermoir supérieur et inférieur qui relie le câble flexible blanc à la carte mère avec la pince à épiler.
-
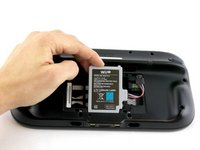
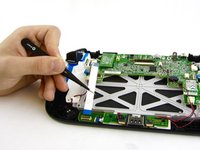
Retirez le câble flexible blanc avec la pince à épiler.
-


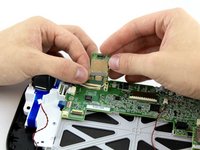

Pour remonter votre appareil, suivez ces instructions dans l'ordre inverse.
Pour remonter votre appareil, suivez ces instructions dans l'ordre inverse.
Annulation : je n'ai pas terminé ce tutoriel.
21 autres ont terminé cette réparation.
Merci à ces traducteurs :
12%
[deleted] nous aide à réparer le monde ! Vous voulez contribuer ?
Commencez à traduire ›
Équipe

USF Tampa, Team 1-6, Sullivan Spring 2016 Membre de l'équipe USF Tampa, Team 1-6, Sullivan Spring 2016
USFT-SULLIVAN-S16S1G6
4 membres
40 tutoriels rédigés
13 commentaires
I just completed this repair on our Game Pad, and it worked perfectly!
There were two things that I noted that may be of use to anyone else completing this repair. First, the 9mm screws on the back may be located under small stickers used to conceal the screw holes. If you take them up carefully with a knife or other flat blade, you can reuse them if desired. Second, I didn’t see the need to remove the white ribbon cable in step #6. I successfully completed the repair without that step.
I just completed this repair on our Game Pad, and the guide worked perfectly!
There were two things that I noticed that may be of help to someone else completing this repair. First, note that the 9mm screws holding the back on may be located under small black stickers used to hide the screw holes. If you take them up carefully with a knife or other flat blade, you should be able to reuse them if you desire. Second, I didn’t see a need to remove the white ribbon cable in Step #6. I successfully completed the repair without that step.
Cheers!
This fix worked perfectly - our Wii U was virtually unusable because of the severely limited range of the gamepad. My kids are thrilled that they can comfortably play again!
Worked perfectly, gamepad only worked within 2 ft of the console and now works 15ft away.
Instructions were concise, well illustrated and easy to complete.
Thanks a lot!
I went to do this - already have another chip - but I discovered there are no wires attached! The white and black wires shown are not in my gamepad at all. I’m amazed I can connect in the first place. Any idea how I can replace the wires that attach to the chip? Or work around it?