Introduction
Le câble du disque dur inclut le capteur IR/indicateur veille.
Ce dont vous avez besoin
-
-
Retirez les dix vis suivantes par lesquelles le boîtier inférieur est fixé au boîtier supérieur :
-
Sept vis Phillips 3 mm.
-
Trois vis Phillips 13,5 mm.
-
-
-
Retirez les deux vis Pentalobe P5 disposées le long du côté supérieur de la batterie.
Question: why do you remove the battery? According to Apple's official manual, this is not required (not for the mid-2009 and not for the mid-2010 15-inch MacBook Pro) - see pages 37 ff:
Citation de alexkli :
Question: why do you remove the battery? According to Apple's official manual, this is not required (not for the mid-2009 and not for the mid-2010 15-inch MacBook Pro) - see pages 37 ff:
I'm interested by your experience.
Did you have removed the optical drive without removing the battery ?
I'm just in this step now and if it is possible I would proceed like you because removing the battery void the warranty (and there is a sticker).
Thanks in advance.
Looks like my note to step 3 appears on all repair guides that have the same step. I meant that in the context of the hard drive replacement only.
Did you have removed the optical drive without removing the battery ?
I haven't yet done anything, waiting for my MacBook Pro 15 inch mid-2010 to arrive.
I missed the notes and went ahead and purchased the 5 point driver for the battery before I realized it was not necessary.
I've edited the repair guide to remove the section on the battery, but I don't have the points to approve the changes.
Please note - the step about removing the battery is part of a pre-requisite guide, that is used for many of the guides, most that do require removal of the battery. Also, working inside a disassembled laptop with the battery still connected risks damaging/shorting out very expensive parts.
Absolutely. To be clear -- ALL of the above discussion is ONLY in reference to replacing the hard drive.
I replaced a hard drive in a MacBook Pro of an earlier model than this without removing the battery. The hard drive wasn't right. It only worked at about half speed, and I had to replace it once more. The second time I removed the battery and all went well. The recommendation by the iFixit staff to remove the battery before working on electronic equipment is a good one.
What is the size of those screws... I have rounded off the socket on mine and would like to replace them.
I measured the screw size, using a micrometer, its about 1.523mm in diameter and 3.186mm in length. Not sure what screw size that is. They are not easily available I guess, unless someone is selling used ones on ebay
-
-
-
Soulevez la batterie en tirant sur la languette d'extraction et dégagez-la du boîtier supérieur.
My T6 (appears to be same screw driver you have - $6 on amazon for 20piece set) did NOT fit int he battery screws...not sure if I had the wrong screws or what, but I went ahead w/o battery steps and it was pretty easy.
I also noticed that the new SDD (from crucial) didn't have the 4 screws, so I had to move those off the old HD and onto the new one.
Just had the same issue: T6 does not fit the battery screws ;-( ... but with a little bit more preassure it was possible to remove the screws.
-
-
-
-
Inclinez la batterie vers l'arrière suffisamment pour accéder au connecteur du câble de la batterie.
-
Débranchez le câble de la batterie de sa prise sur la carte mère et retirez la batterie du boîtier supérieur.
-
-
-
Retirez les deux vis Phillips par lesquelles le support du disque dur est fixé au boîtier supérieur.
-
Soulevez le support de fixation hors du boîtier supérieur.
-
-
-
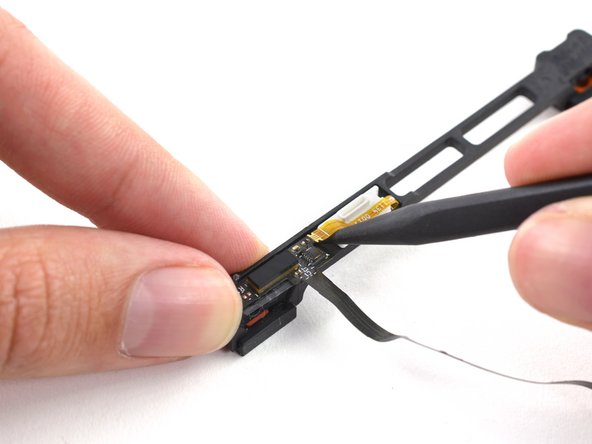
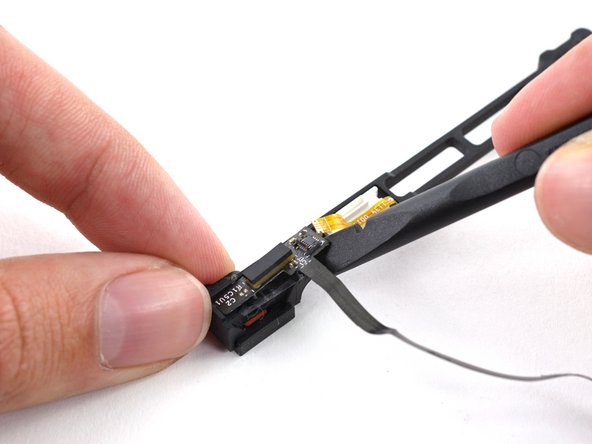
Dévissez les quatre vis suivantes, qui fixent le câble du disque dur et du capteur IR au boîtier supérieur :
-
Deux vis cruciformes de 1,5 mm.
-
Deux vis cruciformes de 4 mm.
-


Pour remonter votre ordinateur, suivez ces instructions en sens inverse.
Pour remonter votre ordinateur, suivez ces instructions en sens inverse.
Annulation : je n'ai pas terminé ce tutoriel.
48 autres ont terminé cette réparation.
Merci à ces traducteurs :
100%


Ces traducteurs nous aident réparer le monde ! Vous voulez contribuer ?
Commencez à traduire ›

3 commentaires
I found that the smaller cable branch to the IR sensor was glued down to the case. The new part (purchased from ifixit.com) didn't have a sticky backing so I carefully removed some of the sticky material from the original cable and stuck it to the new cable. This kept the cable in place when I replaced the hard drive. I could see how one might accidentally bend or fold the cable in a way that could damage it when placing the hard drive.
This guide made it really easy. It fixed my problem. Thanks!
I want to buy a hard drive cable but I live in Mozambique, how can I get it, because my country is not included?
May be helpful to have more distinct colors to identify the different screws.
Victor Caamano - Réponse