Introduction
Ce guide vous guidera à travers les étapes de retrait du joystick. Cela vous sera utile si vous avez un joystick escroc
Ce dont vous avez besoin
-
-
Placez le contrôleur (boutons) sur une surface solide.
-
Retirez les six vis TRI-Wing Y0 de 9,2 mm qui maintiennent le panneau arrière en place.
-
-
-
-
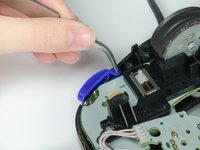
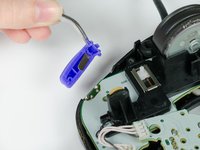
Saisissez le bouton Z par la cheville avec une pince à épiler et retirez-le du contrôleur.
-


Pour remonter votre appareil, suivez ces instructions dans l'ordre inverse.
Annulation : je n'ai pas terminé ce tutoriel.
31 autres ont terminé cette réparation.
Merci à ces traducteurs :
100%
[deleted] nous aide à réparer le monde ! Vous voulez contribuer ?
Commencez à traduire ›
Équipe

Cal Poly, Team 19-44, Regan Winter 2013 Membre de l'équipe Cal Poly, Team 19-44, Regan Winter 2013
CPSU-REGAN-W13S19G44
4 membres
32 tutoriels rédigés
13 commentaires de tutoriel
Great guide, but I'm looking to buy replacement joysticks and I can't find them anywhere. Where would I find those?
When I removed the joystick it would come off. The plastic was stuck too hard to the joystick so I accidentally broke it in half. Is there anyway to glue it back together?
@Tyler Lovejoy - That's already part of the controller.
@Joe Freedman - Try Amazon.com
@Mattias Wirsenius - At this point it would be best to buy a new controller.
This guide is quite unhelpful; it tells you how to remove the stick but not how to repair it. My controller's joystick has sunken into the controller and stays slightly tilted if i move it to the right. Yet when I go to the "rogue joystick" portion of the troubleshooting guide, it tells me to repair the joystick if it's not correctly attached to the motherboard. Seriously, there needs to be a more in-depth guide if such repairs are possible.
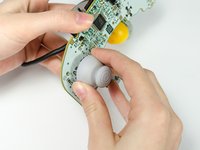
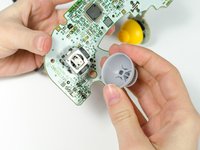
without taking the controller completely apart, pull the joystick straight up with your hand