Introduction
Le Mac Pro est refroidi par un seul ventilateur centrifuge. Utilisez ce tutoriel pour retirer le ventilateur afin de le nettoyer ou le remplacer.
Ce dont vous avez besoin
-
-
Basculez l'interrupteur de verrouillage vers la droite en position déverrouillé.
-
-
-
Enlevez cinq vis Torx T10 de 5,1 mm autour du périmètre extérieur de l'ensemble du ventilateur.
Fat Mango is correct. That said. If you do pull the fan assembly note that the screws are all held in with blue Permatex and breaking them free takes a fair amount of effort. Getting a good set of Torx screwdrivers is a must.
Hey guys, what would happen if you only replace one card.. I have a D300 but the plan is to upgrade to D500 or D600. So If I can afford and install one instead of the pair would it increase something? or will it cause any conflict? I guess I don’t understand if I the Mac Pro has 2 D300 graphic cards that means each has 1GB? Same as If I would Install 1 D600 that would increase 3GB only? Thanks.
D300 = 2GB each card. Very few apps uses two cards at the same time.
Gio Cas -
The (5) Screws are Apple part number 923-0713
-
-
-
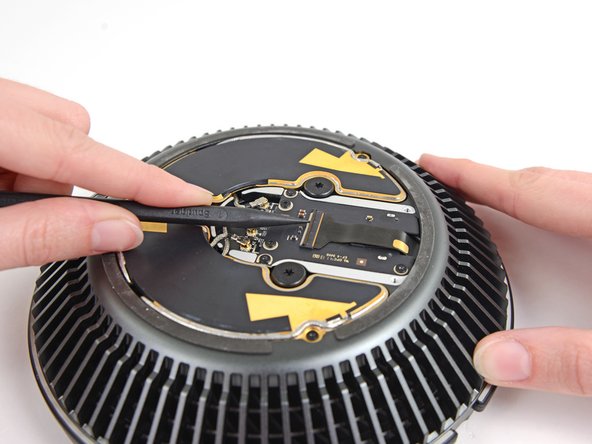
Tout en soutenant l'ensemble du ventilateur d'une main, desserrez les deux vis captives T8 dans le support de la nappe du ventilateur.
On my machine, a TR7 worked to remove them due to the weird angle.
-
-
-
-
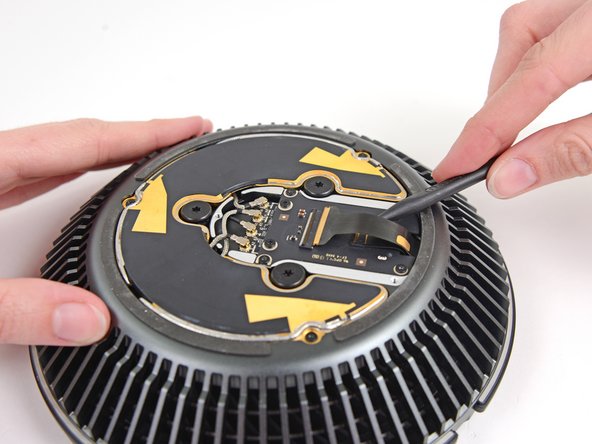
Utilisez l'extrémité plate d'une spatule (spudger) pour retirer le couvercle de l'ensemble du ventilateur hors de l'ensemble du ventilateur.
-
Retirez le couvercle de l'ensemble du ventilateur.
There is a thin circle of double sided adhesive that must be loosened in order to remove the plastic cover.
-
-
-
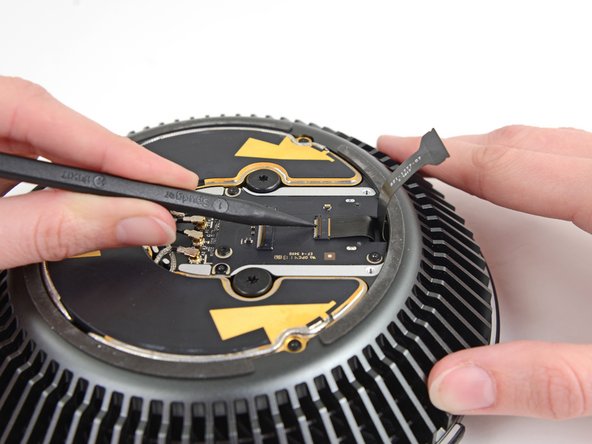
Retirez les trois vis T4 de 3,7 mm fixant le cache métallique à la baie de la carte AirPort.
I had better luck using a T5 driver.
Same here. Mine were T5, not T4.
t4 was good for me
-
-
-
Retirez les trois vis T4 de 3,7 mm fixant le joint du ventilateur à l'ensemble du ventilateur.
-
-
-
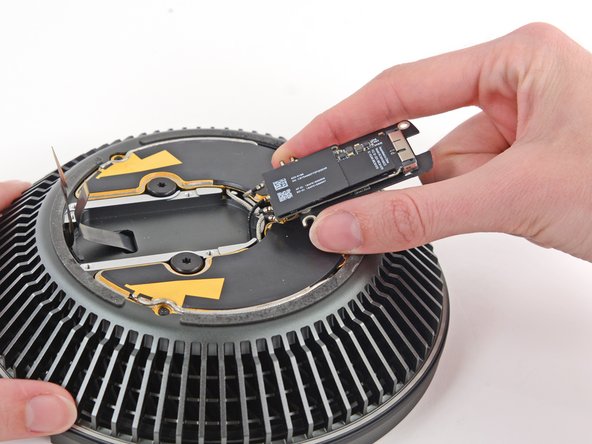
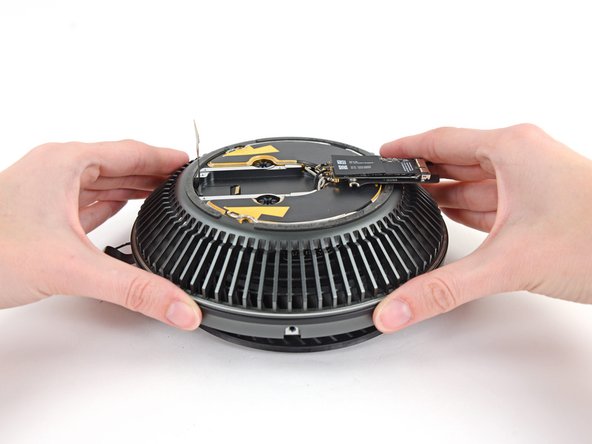
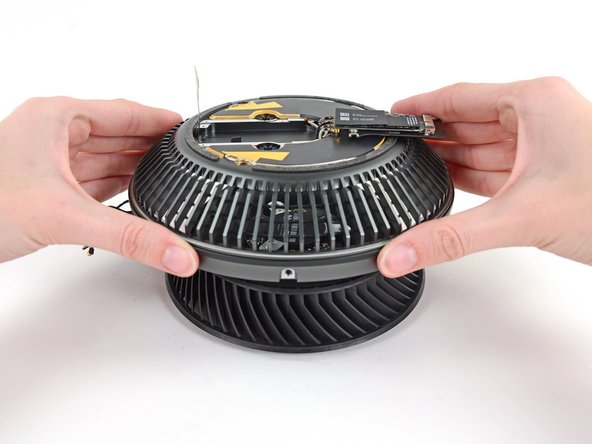
Soulevez l'ensemble du ventilateur du ventilateur.
No way to install that last ribbon of a new fan is actually put on the last ribbon is attached
I would be happy to pay 100 dollars to find the solution for the last ribbon coennection when a new fan is actually put on
THANK YOU, now I know how to connect the ribbon to the fan again.
-


Pour remonter votre appareil, suivez ces instructions dans l'ordre inverse.
Pour remonter votre appareil, suivez ces instructions dans l'ordre inverse.
Annulation : je n'ai pas terminé ce tutoriel.
14 autres ont terminé cette réparation.
Merci à ces traducteurs :
100%

Ces traducteurs nous aident réparer le monde ! Vous voulez contribuer ?
Commencez à traduire ›

5 commentaires
using my iFixit bit set, I'd have to say that the tiny screws for Airport card & cover, as well as fan bezel, are actually T5, not T4 - came very close to stripping the heads on two of the Airport card screws with the recommended T4 bit, but firm pressure and a steady hand with T5 bit got them out. Thanks for the guide - many careful steps to get a scrap of scotch tape out of the fan where its gentle ticks-ticka was driving us crazy thinking something far worse was going wrong.....
Ha! I wondered what would happen if some tiny flotsam was dropped in through the top - terrible! Thanks for the tip!
Likewise, I've had a random noise in the fan at startup, and finally took the fan assembly apart to grab it. It was some even tinier screw from somewhere that had lodged in part of the fan housing. All is very, very well now!!!!
Hey Colin, I have same fan startup nois in my MP. Can you help me and tell how to fix in few steps?
Deny -
Using Macs Fan Control, I noticed the baseline fan speed of my “trashcan” slowly creeping up from 790 RPM (the usual) to 8 or 900 RPM. Using this guide I took the fan assembly off, and vacuumed and dusted everything with a vacuum, soft brush and canned air. It wasn’t necessary to disassemble the fan unit itself. That did the trick - fan speed is back down to 790 RPM after putting it back together.
PS - in Step 5, a Torx T8 screwdriver seemed to fit just fine for the fan cable bracket screws.