Introduction
Les machines à laver Elite HE3 arrêtent de tourner et affichent un code d'erreur quand elles détectent un problème. Deux codes sont particulièrement fréquents : FDL et F11. FDL indiquent une panne du mécanisme de fermeture de la porte. F11 indique une erreur de communication entre la carte électronique et le panneau frontal. Effacer l'erreur et relancer le cycle peut résoudre temporairement le problème, mais la solution n'est pas permanente.
Le problème est souvent causé par un relais du loquet de porte recouvert de suie en raison de formation excessive d'arcs électriques. Ce tutoriel vous explique comment accéder aux relais pour les nettoyer ou les remplacer.
Ce dont vous avez besoin
-
-
L'erreur code F-DL indique qu'il est impossible d'ouvrir la porte, donc de sortir votre linge mouillé. Cette première étape facultative explique comment ouvrir manuellement le hublot.
-
Servez-vous d'un tournevis Torx T20 ou d'une clé à douilles 9/32" pour dévisser les trois vis en bas du panneau frontal de la machine à laver, puis retirez celui-ci.
-
Tâtez à l'intérieur, à droite derrière le loquet de porte jusqu'à ce que vous trouviez un anneau de 2,5 cm de diamètre. Saisissez-le et tirez vers le bas. Cela ouvrira le loquet de porte.
-
-
-
Ces précautions et risques ne sont pas des plaisanteries. Je ne suis pas responsable de ce que vous entreprenez. Vous assumez les conséquences de la consultation de ce tutoriel. Adressez-vous à un réparateur professionnel si vous ne vous sentez pas à l'aise avec la procédure à suivre.
-
-
-
-
Pour enlever le panneau, dévissez les trois vis avec un tournevis Torx T20 ou une clé à douilles 9/32".
-
Faites glisser le panneau vers l'arrière de la machine d'environ 3,75 mm et soulevez celui-ci vers le haut.
-
-
-
Marquer les fils et notez comment les câbles sont branchés pour les remettre correctement lors du remontage.
-
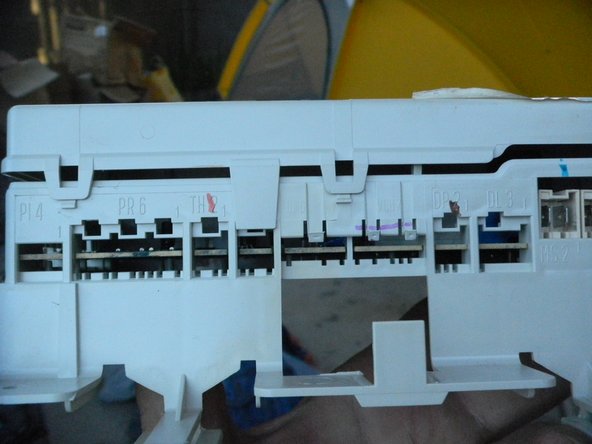
Servez-vous d'étiquettes ou d'un feutre indélébile à pointe fine pour indiquer sur chaque connecteur les deux lettres de la prise correspondante. Elles sont écrites sur le compartiment en plastique du module de commande. Une lampe de poche peut s'avérer utile pour lire les lettres à gauche du panneau.
-
-
-
Pour ôter le module de commande, soulevez avec beaucoup de précaution les deux languettes à l'extérieur à l'aide d'un tournevis à lame plate tout en faisant glisser le panneau vers l'avant de la machine à laver.
-
Ouvrez le compartiment gris du module de commande en appuyant délicatement sur les languettes latérales.
-
Ôtez le circuit électronique de la même façon, en soulevant les languettes qui le maintiennent en place.
-
-
-
Il y a trois ou cinq relais sur le circuit. K6 est un OMRON G2RL-1A-E, 12VDC, réglé sur 16A et 250 VAC. K1 et K4 sont tous deux OMRON G5LE-1-VD, 12 VDC, réglés sur 10A et 250 VAC.
-
K1 contrôle la fermeture de porte. Les contacts étaient noircis à cause des arcs électriques. Je ne sais pas quelle est la fonction des deux autres relais, mais je les ai tous nettoyés. D'autres réparateurs disent inspecter seulement K1 et K4. K1 était très noir, K4 semblait comme neuf à ses côtés. Le traitement de K1 a résolu tous mes problèmes !
-
Dessoudez un relais à la fois du circuit, nettoyez-le ou remplacez-le, puis ressoudez-le à sa place.
-
Pour dessouder un relais, commencez par chauffer la soudure d'une extrémité, puis poussez délicatement la gaine en plastique du plastique d'un doigt de la main qui tient le circuit. Épongez l'excès en soudure avec une mèche à dessouder. Ensuite, recommencez la procédure pour les contacts de l'autre côté du relais.
-
Pour nettoyer un relais, ouvrez sa gaine en plastique. Soufflez pour enlever les particules de poussière. Frottez les contacts de relais avec un petit morceau de papier de verre grain 200-400 imbibé d'un nettoyant pour contacts. Reposez la gaine en plastique sur le relais.
-
Soudez le relais sur le circuit imprimé et répétez l'opération avec les autres relais jusqu'à ce qu'ils soient tous nettoyés et/ou remplacés.
How do you remove the circuit board from the housing to access the other side? Mine seems to be pretty firmly held in place
I ended up using a screw driver to get enough leverage to disengage the clips
where can I buy the whole circuit board … I would rather replace the whole thing.
I just replaced K1, which had blackened contacts, and everything now working perfectly! Thanks for the instructions!
Thank you!!! On mine the door wasn't locking , just kept clicking I cleaned both white relays contacts and it worked. Looked like K4 need it most. So I recommend cleaning both as well.
-


Pour remonter votre appareil, suivez ces instructions en sens inverse.
Pour remonter votre appareil, suivez ces instructions en sens inverse.
Annulation : je n'ai pas terminé ce tutoriel.
20 autres ont terminé cette réparation.
Merci à ces traducteurs :
100%

Claire Miesch nous aide à réparer le monde ! Vous voulez contribuer ?
Commencez à traduire ›
16 commentaires
"Open the gray housing of the control unit by gently prying the side tabs open." Gently is the operative word here, I broke both tabs, could use a new cover. Found K1 clean as a whistle, no suspect solder joints. Just cleaned the board edge contacts and up and running. We will see how long it lasts.
well its good but i think i am not facing problems regarding control board i think its main machine....
Hey guys! Just wanted to tell anyone who's mentally (and miserably) preparing themselves to have to fix their washer.
I had same problem: an f11 error that I could not clear....2 weeks of trying. I unplugged it, plugged it back in....i did this repeatedly....and nothing. Still had that error.
Anyway, when I finally got 'ready' to do this repair I took the stacked-on-top dryer off of it and in a last ditch effort, decided to plug it in.... you know, just one last time .... and I'll be a son of a b*tch! The %#*@ thing works. No code. No problems at all.
I've no clue as to whether the dryer being on top of it had anything to do with it, but one must admit, it sure is odd.....
Anyway..... you might just try leaving it unplugged for a few hours and always make that 1 last attempt! Ya never know.
Whew. I dodged that bullet. (for now)
Thanks for the precise instructions. My wife and I have had a Kenmore Elite HE4t Washer since the early 2000's and got tired of paying a couple hundred bucks for periodic repair to address the relay issues. I found the HE3 repair instructions that seemed very similar to the HE4t circuit board. I cleaned the contacts on the K1 and K4 relays; the others were sealed. I ordered the 5 relays K1, 3, 4, 6, and 7. Cleaning sort of worked for about a month, then back to beating the top of the machine with a plastic hammer to get the relays to switch so I replaced all 5 relays. The machine has been working wonderfully for a week. The five relays were less than $20 with shipping, so if the fix lasts awhile I intend to order several replacements while I can still get them. Of the five relays, I found the K3 and K4 relay contacts were the most severely burned. Thanks again.
My HE3t quit working today, washed fine 3 days ago. I pushed the power button, fine, then the start. The light came on but the door did not lock nor did it start. Tried it several times. Turned the breaker on and off, unplugged, plugged it back in, tried a different plug. Now the lights don't come on at all, just a little dinging sound when I hit power? Anyone have this problem?
It worked! Thanks. We have an HE4T, bought around 12 years ago. Used twice a day. For the last couple of years it would throw an occasional DL code, and we had the ritual of opening the top and jiggling the pink heavy duty wires at the control board and that seemed to work. Went on like this for a long time. We had a matching set of W/D and pedestals so I didn't want to give up on them. I do have some electronics background, so I was keen to fix it. I thought maybe the one of the plugs was bad, or even the board. I removed the board and re-soldered key areas I thought may be the problem, even soldered wires direct from the 4-lead DL pink plug to no avail. It turned out it was the K4 RELAY, not the K1 for us. The K1 looked perfect, but the K4 had arc dust on the closing set (normally open) contact. I filed the contacts with fine grit paper. But I swapped the two relays upon reinstallation (let the other cleaner really have a go at the next 12 years). So far all good. Will buy new relays though.
As an extra note, our symptoms were also hearing clicking from the control board as it would try to 'lock' the front door. It would click a few times, then give up and throw the DL code. If opened the lid in time, while clicking, we could jiggle the pink wires and the door would normally now lock - which made me think it was a connection problem with plug to the board or the board itself had a bad trace line. In the end though, it was the K4 relay.
Worked like a charm. My washer (H3t) was most often throwing the DL code. I pulled K1 and K4, K4 was blackened, K1 was fine. I replaced both with the 16A version, and reflowed all components that were bigger than a transistor. Some of the plastic locking tabs for the wire connectors broke when I touched then, so I used a dab of hotglue to hold them in place. Thanks for all the information, everyone.
Chasing the FH error. Replaced inlet valves and flowmeter. Still get error code. Plenty of water coming in, draining fine. Thoughts?
Ever figure out anything? I’m having the same issue.
Neither my K1 or K4 were blackened. Reflowing doesn’t seem to have helped with the F11
Have a nod code what does it mean
I love my 14 yr old he elite 3. Ran so quiet. Always had it stacked until I moved. ThenF11 became a normal par t of washing. Thought the wood floor/ leveling was culprit. For years, I’d hit the part to the right of other board, water level detector? with end of big screwdriver and it’d work... code always come up at same times during wash cycle,( first 10/20 min and 4,3,2 and 1 min from finish).
Turned out to be a combination of things… like a loose contact from the part that detects water level and mostly due to slope and build up where the 1.5” drain line connected to main drain. Leveled machine to “exact“ rather than “almost”. Changed drain line size to 2”, improved slope, cleaned contacts and replaced pink wire “ thingy” that runs from mother board to the part I’d been beating on….And tada