Ce tutoriel a des changements plus récents. Passer à la dernière version non vérifiée.
Introduction
After a thunderstorm the TV did not turn back on. It displayed a continuous blinking green light. No other function would work, the reset did not accomplish anything. I did some research and learned that this is a common failure on this TV. this particular TV is 10 years old, but had never given any trouble. So I felt it was a worthwhile project.
Ce dont vous avez besoin
-
-
Unplug the set. disconnect the coax cable and any other device plugged into the TV.
-
Remove the back panel
-
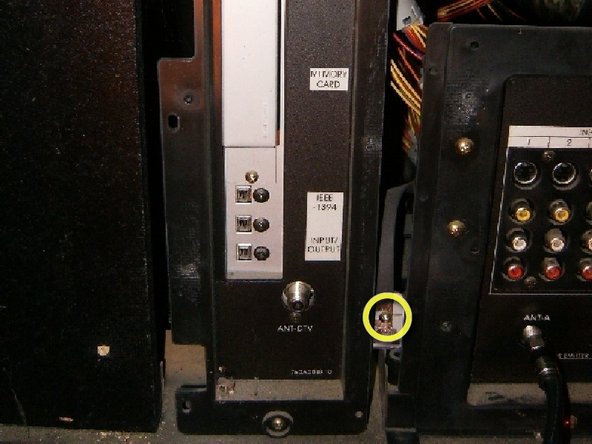
The antenna coax cable as well as other device connect directly to the DM module which is enclosed in a metal case.
-
-
-
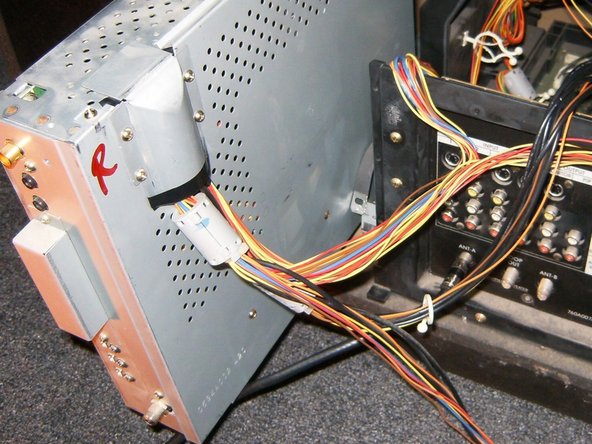
Disconnect the wiring coming off the DM board to the main chassis. On this TV there were four separate wiring harnesses: DA,VA,DB and PF. These markings are not of importance to this repair. But they all are clearly marked on the connectors as well as the logic board they connect to. This will help to identify their proper position for the re-assembly.
-
Undo the two screws that hold the plastic cover to the DM board.
-
-
-
To the bottom right is a screw that connects a ground strap and holds the board to the chassis, undo that.
-
With all the connector disconnected, the ground strap removed, pull the DM board carefully from the chassis. Some models have a small tab stop that you must push down to release the board.
-
-
-
-
Remove the wiring attached to it (PD,PE,PF). These are simple connector and can just pulled of. These markings are not of importance to this repair. But they all are clearly marked on the connectors as well as the logic board they connect to. This will help to identify their proper position for the re-assembly.
-
Remove the four screws holding the board on.
-
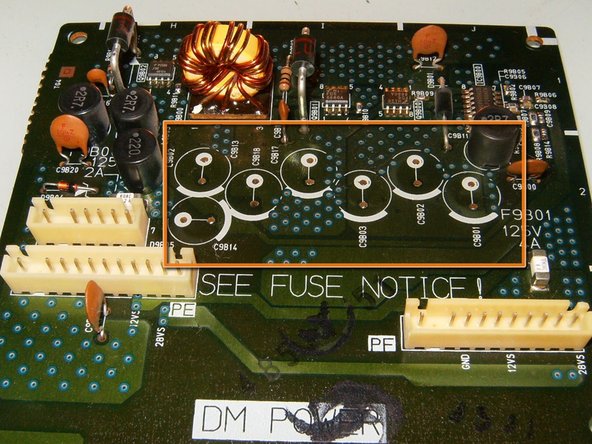
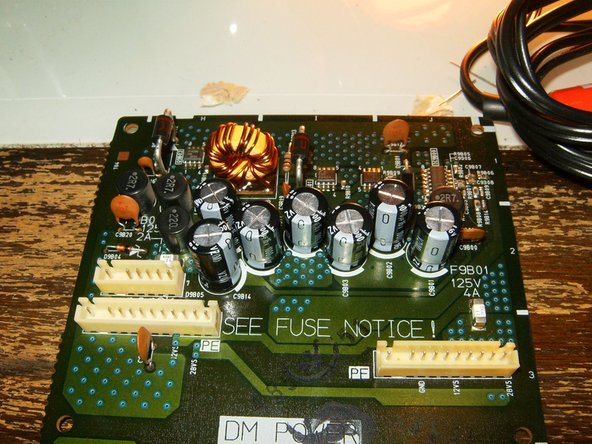
This board has 7 1000uf 16Volt capacitors. These are the ones that have a tendency of failing. Inspect those for bulging tops as well as leakage. In this case, one capacitors was sligthly bulged.
-
-
-
Unsolder all the capacitors and remove them. In this repair a 30watt soldering iron and solder sucker was used. The solder sucker can be substituted with soldering wick.
-
Solder all the capacitors in their respective places. On the logic board, where the capacitors are located, is an outline of a circle with one part of the circle being heavier. It corresponds with the negative lead of the condenser.
-
Once all the capacitors are replaced, double check the board to make sure everything is properly mounted.
-
-
-
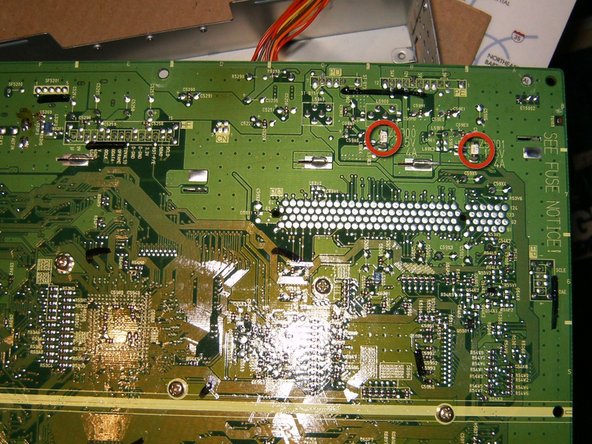
While the board and the DM power module are accessible check the SMD fuses for continuity. There are two on the daughter board. In this case, the fuses had continuity and were functioning.
-
The main PCB has two fuses on the underside. In order to get to it, one will have to disassemble the module further. This was skipped in this repair.
-
-
-
With the repair completed, everything should be double checked for proper soldering and proper polarity. The unit was re-assembled in reverse order. Reconnect all the wiring connectors. Double check for proper positioning and that all the connectors are properly seated.
-
The TV was plugged in and after a minute of the green light flashing,.....IT WORKED. Total cost of repair was $13 dollars for the UVK1C102MPD capacitors, which includes $7 for shipping.
-


To reassemble your device, follow these instructions in reverse order.
To reassemble your device, follow these instructions in reverse order.
Annulation : je n'ai pas terminé ce tutoriel.
19 autres ont terminé cette réparation.

Équipe

23 commentaires
I want to thank oldturkey 03! My ws-65511 had a blinking green light after a lightening storm, & wouldn't come on. We looked up this guide that you put online. We followed it exactly. I ordered the exact parts you listed, for $14 from Mouser Electronics. I got the capacitors in a couple of days. My wonderful Dad came over and completed the repair according to your instructions. We plugged it in, and it works like new. Even better than before, because while we had the back off, I cleaned the lenses, which made a huge improvement. I can't thank you enough for unselfishly spending your time to put this online, to help other people. Your expertise saved me over $1000, by not having to buy a new TV. That is worth a huge and heartfelt THANK YOU! THANK YOU to my Dad too, since he actually did the repair. :) I will make this note for anyone else that wants to try it. Our capacitors did not look bubbled, or blown, and weren't leaking. We replaced them anyway, and it worked beautifully. HAPPY DAY!!