Aller au contenu principal

Replacement of the W670SZQ1 BIOS Battery

Tutoriel Archivé
Ce tutoriel est conservé uniquement à des fins de suivis historiques. Utilisez la version actuelle du tutoriel pour effectuer votre réparation.

Ce dont vous avez besoin

  1. Replacement of the W670SZQ1 BIOS Battery, accumulator: étape 1, image 1 de 3 Replacement of the W670SZQ1 BIOS Battery, accumulator: étape 1, image 2 de 3 Replacement of the W670SZQ1 BIOS Battery, accumulator: étape 1, image 3 de 3
    • Open the latch of the accumulator on the left side.

    • Open the battery latch on the right side.

    • Remove the accumulator by simultaneously holding the right-hand latch open.

  2. Replacement of the W670SZQ1 BIOS Battery, Access to the most important components: étape 2, image 1 de 3 Replacement of the W670SZQ1 BIOS Battery, Access to the most important components: étape 2, image 2 de 3 Replacement of the W670SZQ1 BIOS Battery, Access to the most important components: étape 2, image 3 de 3
    • Use the Philips screwdriver to remove the two screws at the bottom of the cover.

    • Lift the cover at the bottom right with the iFixit Opening Tool

    • Lift the cover at the bottom left with the iFixit Opening Tool

    • Finally, remove the cover to gain access to the most important components.

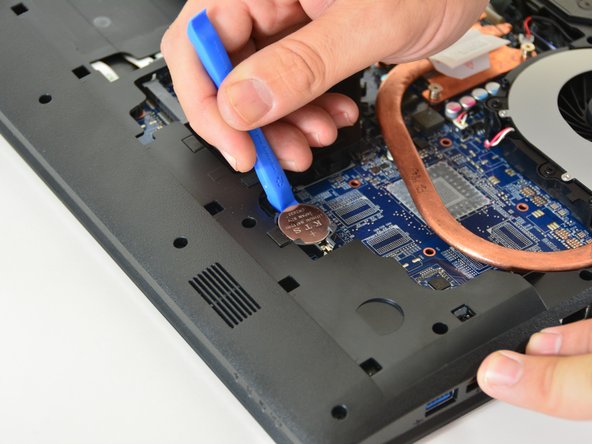
  3. Replacement of the W670SZQ1 BIOS Battery, BIOS battery: étape 3, image 1 de 1
    • Be careful removing the BIOS battery from its holder.

    • Please do not throw the battery in the garbage. In Switzerland, the electrical shops are obliged to accept all batteries and accumulators for disposal.

Conclusion

Replacing the W670SZQ1 BIOS Battery

Merci à ces traducteurs :

de en

100%

Corey Meyer nous aide à réparer le monde ! Vous voulez contribuer ?
Commencez à traduire ›

Felice Suglia

Membre depuis le 06/15/13

30 908 Réputation

264 tutoriels rédigés

0 commentaires

Ajouter un commentaire

Nombre de vues :

Dernières 24 heures : 0

7 derniers jours : 0

30 derniers jours : 0

Total : 68