Aller au contenu principal

Replacing Snapfon ez One Motherboard Assembly

Ce dont vous avez besoin

  1. Replacing Snapfon ez One Motherboard Assembly, Remove the battery cover: étape 1, image 1 de 1
    • Turn off the phone to prevent data loss.

    • Press and slide the battery out to remove it.

    • Picture rights belong to Snapfon®. Picture is used for educational purposes only. No copyright infringement intended.

  2. Replacing Snapfon ez One Motherboard Assembly, Remove the battery: étape 2, image 1 de 1
    • Pry the battery out with your thumb or the iFixit opening tool.

    • Make sure to properly dispose of the old battery at a recycling center.

    • Picture rights belong to Snapfon®. Picture is used for educational purposes only. No copyright infringement intended.

  3. Replacing Snapfon ez One Motherboard Assembly, Removing the plastic inserts: étape 3, image 1 de 2 Replacing Snapfon ez One Motherboard Assembly, Removing the plastic inserts: étape 3, image 2 de 2
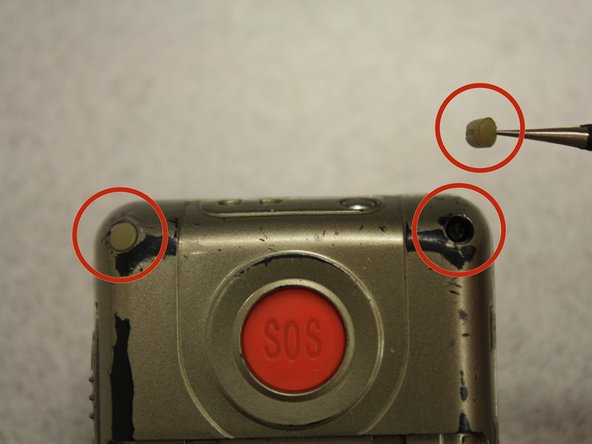
    • Remove the rubber inserts from the screw holes using the black metal tweezers. This is done by inserting the tip of the metal tweezers down around the plastic insert.

  4. Replacing Snapfon ez One Motherboard Assembly, Remove the shield screws: étape 4, image 1 de 3 Replacing Snapfon ez One Motherboard Assembly, Remove the shield screws: étape 4, image 2 de 3 Replacing Snapfon ez One Motherboard Assembly, Remove the shield screws: étape 4, image 3 de 3
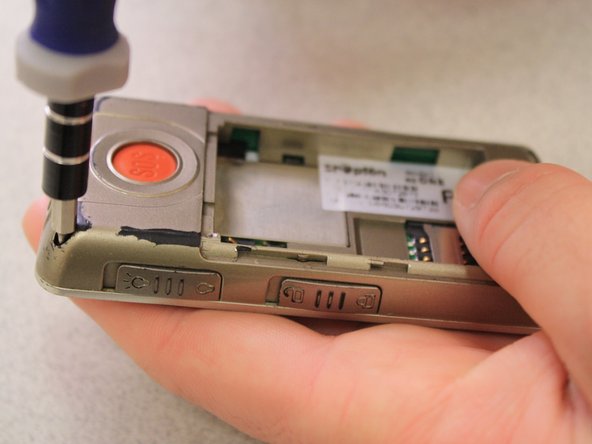
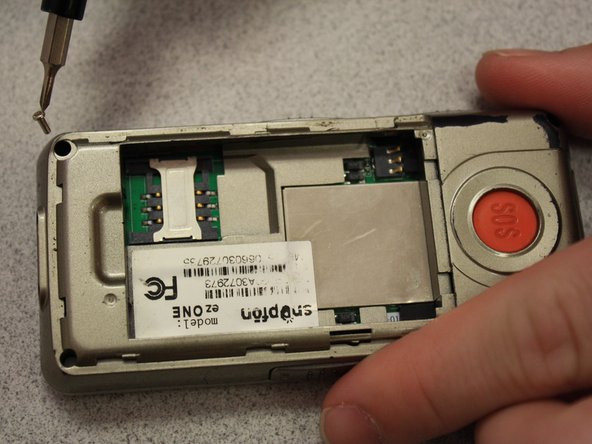
    • Remove the four 3.1mm Phillips #00 screws from the corners.

    • This is done by turning the screwdriver counter clockwise using little torque.

  5. Replacing Snapfon ez One Motherboard Assembly, Separate the case: étape 5, image 1 de 3 Replacing Snapfon ez One Motherboard Assembly, Separate the case: étape 5, image 2 de 3 Replacing Snapfon ez One Motherboard Assembly, Separate the case: étape 5, image 3 de 3
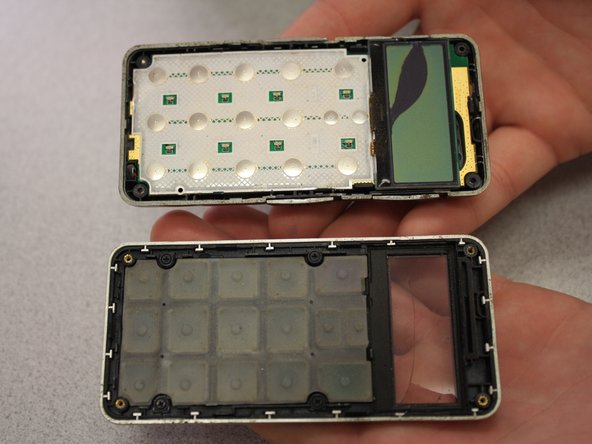
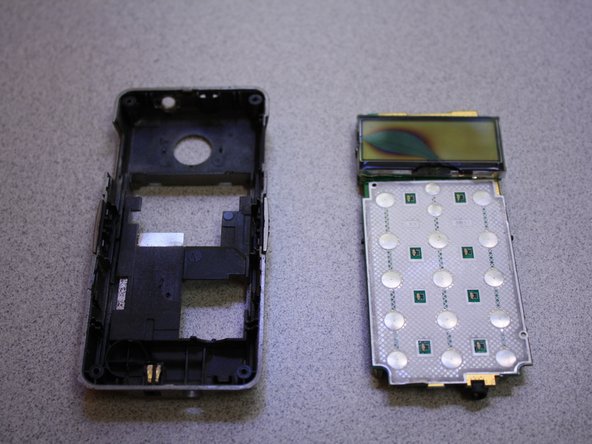
    • Separate the phone's front case from the back case.

    • There is an intermediate decorative outlay around the front cases perimeter. This should be removed as well.

  6. Replacing Snapfon ez One Motherboard Assembly, Remove the volume slider: étape 6, image 1 de 1
    • Remove the volume slider button by using the tweezers to pry it out.

    • The volume slider button may fall out during the seperation of the front and back cases, this is ok.

  7. Replacing Snapfon ez One Motherboard Assembly, Remove the motherboard: étape 7, image 1 de 3 Replacing Snapfon ez One Motherboard Assembly, Remove the motherboard: étape 7, image 2 de 3 Replacing Snapfon ez One Motherboard Assembly, Remove the motherboard: étape 7, image 3 de 3
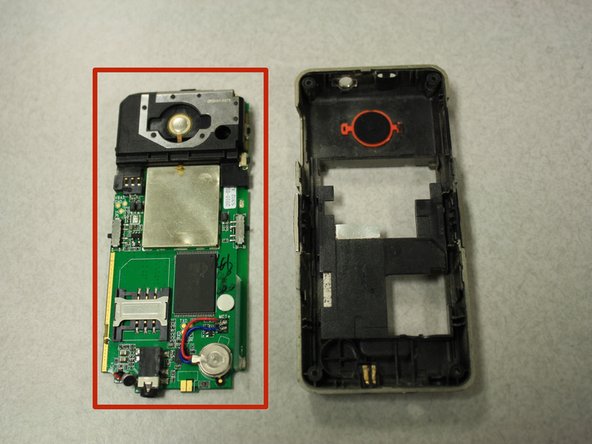
    • Using the opening tools, separate the circuit board from the inside of the back case by prying between the circuit board and the case as shown.

    • The last picture is a view of the back of the circuit board.

Conclusion

To reassemble your device, follow these instructions in reverse order.

John Bender

Membre depuis le 03/26/14

818 Réputation

8 tutoriels rédigés

Équipe

Clemson, Team 6-5, Benson Spring 2014 Membre de l'équipe Clemson, Team 6-5, Benson Spring 2014

CLEM-BENSON-S14S6G5

3 membres

16 tutoriels rédigés

0 commentaires

Ajouter un commentaire

Nombre de vues :

Dernières 24 heures : 0

7 derniers jours : 1

30 derniers jours : 1

Total : 205