Il est possible que cette traduction ne reflète pas les dernières mises à jour du tutoriel source. Aidez à mettre à jour la traduction ou bien consultez le tutoriel source.
Introduction
Ce tutoriel vous montrera comment retirer et remplacer le disque dur d’un IBM ThinkPad 560z.
Ce dont vous avez besoin
-
-
Retirez la vis cruciforme n° 0 de 7mm.
-
Retirez la vis cruciforme n° 0 de 10mm.
-
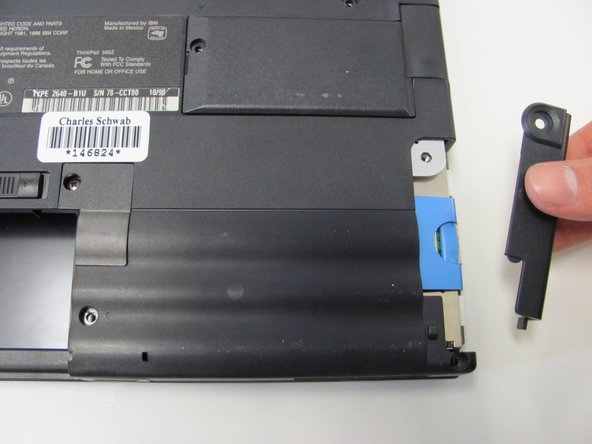
Retirez la vis cruciforme n° 0 de 14mm.
-
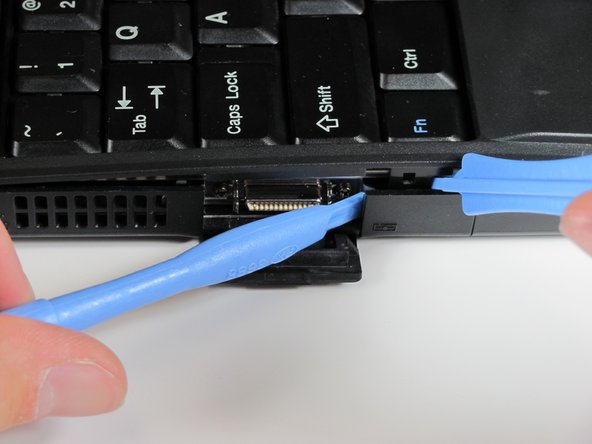
-
-
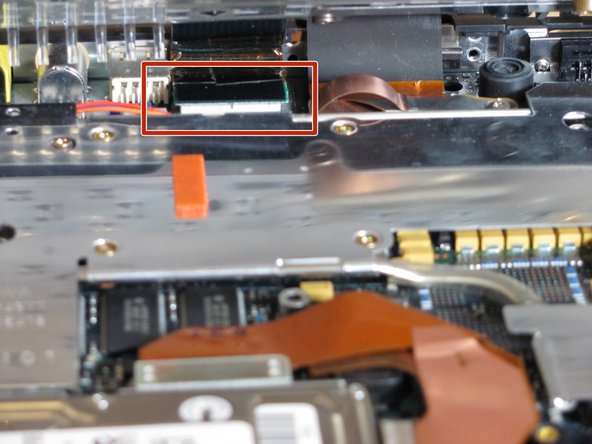
À l'arrière de l'ordinateur, utilisez un tournevis à tête plate pour retirer cette vis.
-


Pour remonter votre appareil, suivez ces instructions dans l'ordre inverse.
Pour remonter votre appareil, suivez ces instructions dans l'ordre inverse.
Annulation : je n'ai pas terminé ce tutoriel.
2 autres ont terminé cette réparation.
Merci à ces traducteurs :
88%


Ces traducteurs nous aident réparer le monde ! Vous voulez contribuer ?
Commencez à traduire ›
Équipe

Cal Poly, Team 26-27, Regan Spring 2010 Membre de l'équipe Cal Poly, Team 26-27, Regan Spring 2010
CPSU-REGAN-S10S26G27
3 membres
18 tutoriels rédigés
Un commentaire
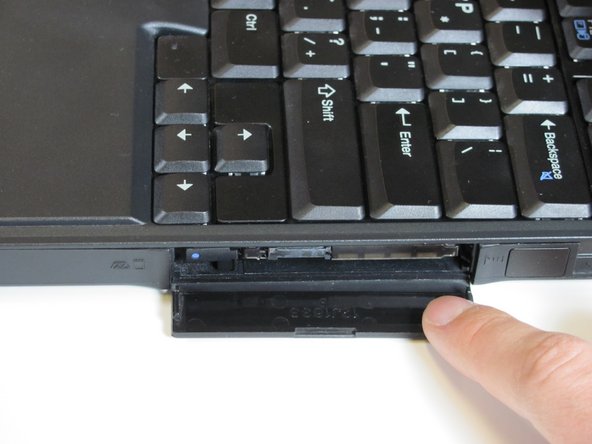
You don't have to go to this length to remove the hard drive on a 560Z. Only do steps 0 (remove battery), 9 (remove screw) and 10 (remove cover). Then simply grab the blue tab of the hard drive caddy and pull the drive out of the bay. Complete directions on maintenance of the IBM Thinkpad 560Z can be found here:
http://www.thinkpads.com/support/hmm/hmm...
The Hardware Maintenance Manual has all of the information you need to take a 560Z apart and put it back together.
The procedure outlined here is similar to what the 560, 560E and 560X systems required; the 560Z is totally different when removing the hard drive.