Aller au contenu principal

ResMed AirSense 10 Motherboard Replacement

Matériel médical
Ni iFixit ni ce tutoriel de réparation ne sont approuvés par ou affiliés au fabricant de ce dispositif médical.

Ce dont vous avez besoin

  1. ResMed AirSense 10 Motherboard Replacement, Top Cover: étape 1, image 1 de 2 ResMed AirSense 10 Motherboard Replacement, Top Cover: étape 1, image 2 de 2
    • Remove the water tub by gently pulling it out.

  2. ResMed AirSense 10 Motherboard Replacement: étape 2, image 1 de 3 ResMed AirSense 10 Motherboard Replacement: étape 2, image 2 de 3 ResMed AirSense 10 Motherboard Replacement: étape 2, image 3 de 3
    • Pry off the face plate by using your finger or an opening tool.

    • Use a moderate amount of force when prying open.

    • Remove the face plate from the top cover.

    • There will be a clicking sound on either side of the divot when assembling and disassembling.

  3. ResMed AirSense 10 Motherboard Replacement: étape 3, image 1 de 2 ResMed AirSense 10 Motherboard Replacement: étape 3, image 2 de 2
    • Unscrew and remove the two 11.8 mm TR10 Torx screws that were revealed from the face plate being removed.

  4. ResMed AirSense 10 Motherboard Replacement: étape 4, image 1 de 2 ResMed AirSense 10 Motherboard Replacement: étape 4, image 2 de 2
    • Unscrew and remove the two 11.8 mm TR10 Torx screws from the bottom of the device.

  5. ResMed AirSense 10 Motherboard Replacement: étape 5, image 1 de 3 ResMed AirSense 10 Motherboard Replacement: étape 5, image 2 de 3 ResMed AirSense 10 Motherboard Replacement: étape 5, image 3 de 3
    • Remove the top cover from the rest of the device.

  6. ResMed AirSense 10 Motherboard Replacement, Motherboard: étape 6, image 1 de 2 ResMed AirSense 10 Motherboard Replacement, Motherboard: étape 6, image 2 de 2
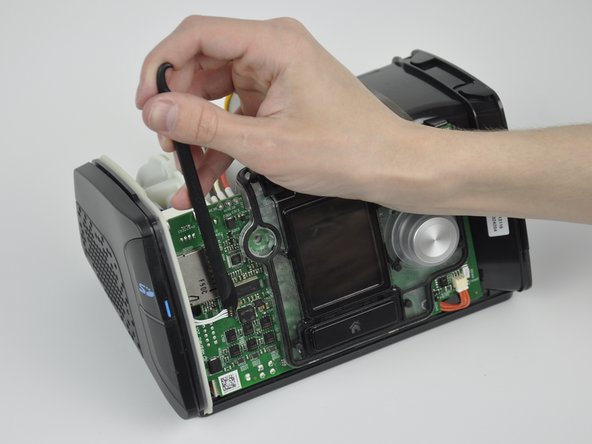
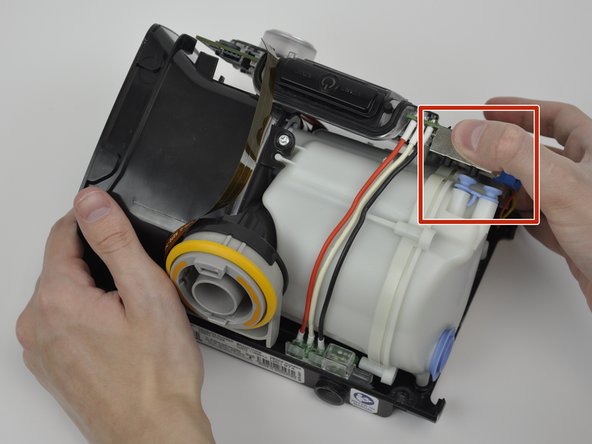
    • Insert a halberd spudger behind the black connector on the white wires from the wireless communication board.

    • Apply gentle pressure away from the motherboard to the black connector.

  7. ResMed AirSense 10 Motherboard Replacement: étape 7, image 1 de 3 ResMed AirSense 10 Motherboard Replacement: étape 7, image 2 de 3 ResMed AirSense 10 Motherboard Replacement: étape 7, image 3 de 3
    • Remove the two 11.8 mm TR10 Torx screws from the air filter side underneath the device.

    • Use an opening tool to pry the air filter side cover away from the chassis of the device.

    • Pull the air filter side cover directly away from the chassis of the device.

  8. ResMed AirSense 10 Motherboard Replacement: étape 8, image 1 de 3 ResMed AirSense 10 Motherboard Replacement: étape 8, image 2 de 3 ResMed AirSense 10 Motherboard Replacement: étape 8, image 3 de 3
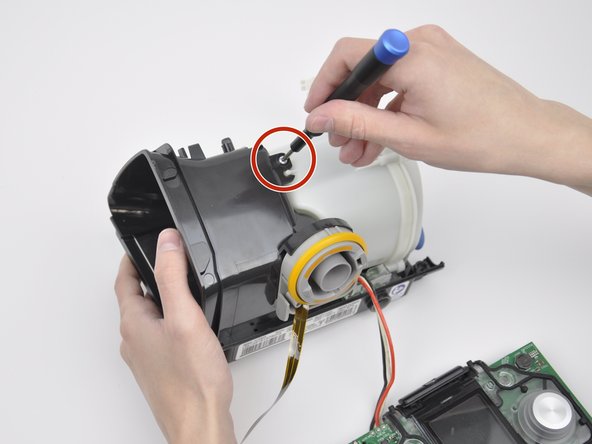
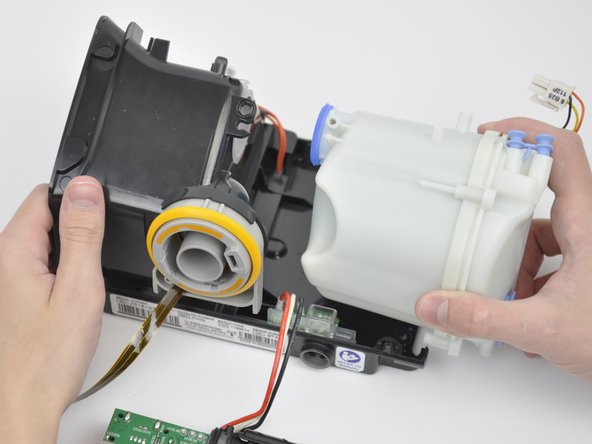
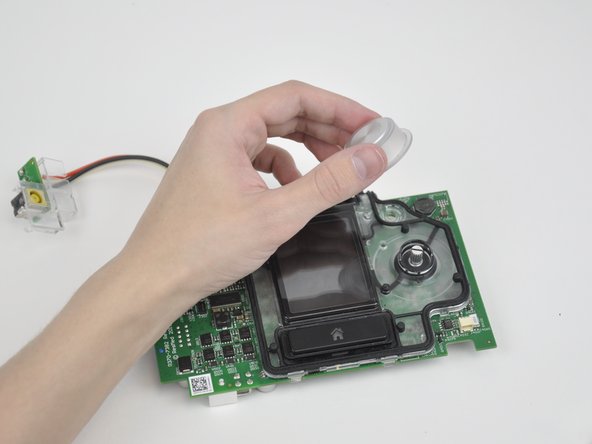
    • Rotate the outer ring of the air outlet port counterclockwise to provide slack in the ribbon cable.

    • As the ribbon cable becomes slack, you can put a finger under it to support it and gently pull the cable upwards from the frame.

    • Do not pull the ribbon cable more than an inch and a half from the top of the black plastic housing. Pulling the ribbon cable too far could damage it.

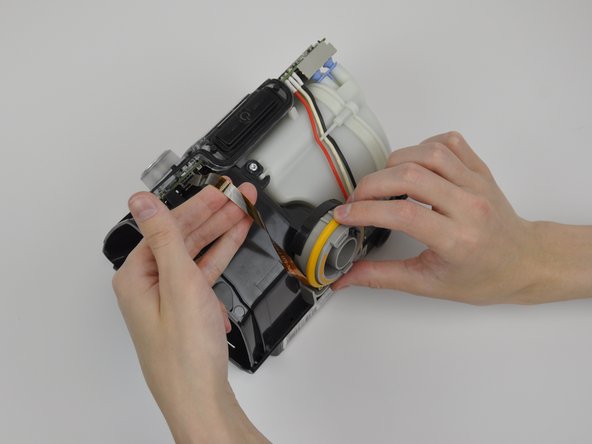
    • Grip the thin sides of the hard plastic tab on the end of the ribbon cable which connects to the motherboard.

    • Gently pull the hard plastic end of the ribbon cable upwards from the top of the motherboard, and wiggle it slightly from side to side to disconnect it.

  9. ResMed AirSense 10 Motherboard Replacement: étape 9, image 1 de 2 ResMed AirSense 10 Motherboard Replacement: étape 9, image 2 de 2
    • Slide the red, white, and black wires out from under the plastic tab on the top of the pump housing.

    • Gently pull the silver case away from the pump housing to disconnect the two small pipes.

    • When reassembling the device, make sure that the blue rubber adapter is in place.

  10. ResMed AirSense 10 Motherboard Replacement: étape 10, image 1 de 3 ResMed AirSense 10 Motherboard Replacement: étape 10, image 2 de 3 ResMed AirSense 10 Motherboard Replacement: étape 10, image 3 de 3
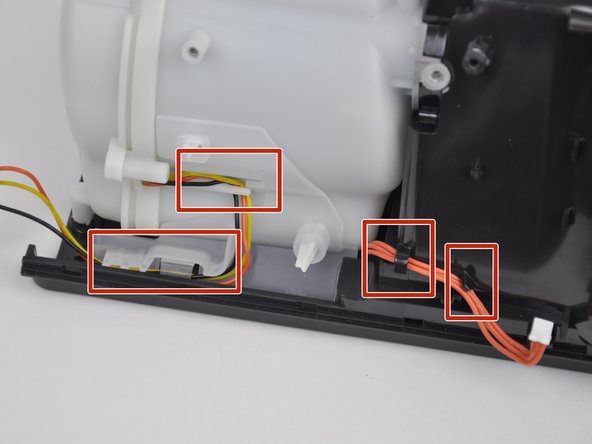
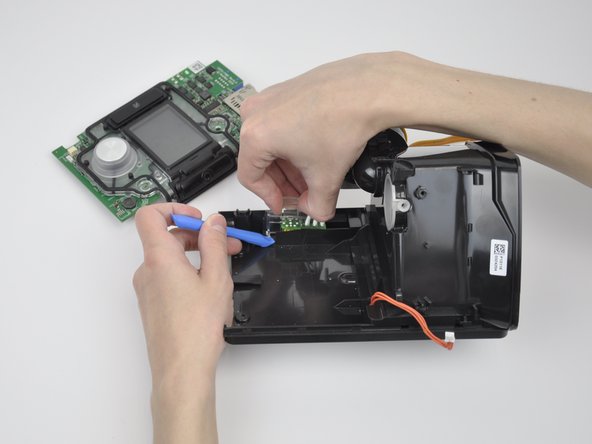
    • Use an opening tool, a spudger, or your finger nails to apply pressure to the connector on the orange wires. Pull the connector downwards in the direction of the bottom of the motherboard.

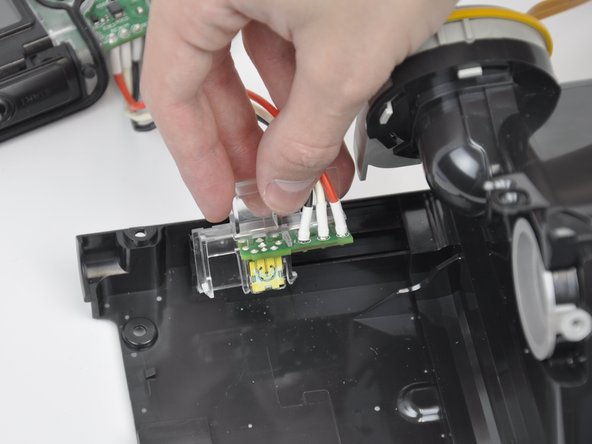
    • Depress the lever of the plastic catch on the pump motor wiring connector.

    • Gently pull the connector away from the side of the motherboard. Wiggling it slightly may make removing the connector easier.

    • Pull on the white plastic connectors, not the wires themselves. Pulling on the wires can damage the small contacts in the connectors.

    • Make sure that the wires are held in the clips (shown in the red rectangles) on the pump housing and chassis when reassembling the device. This will keep the wires from interfering with the position of the motherboard.

  11. ResMed AirSense 10 Motherboard Replacement: étape 11, image 1 de 3 ResMed AirSense 10 Motherboard Replacement: étape 11, image 2 de 3 ResMed AirSense 10 Motherboard Replacement: étape 11, image 3 de 3
    • Remove the 14 mm TR10 Torx screw (located above the air outlet port) from the water tank housing.

    • Hold the black plastic body of the device and slide the pump housing away from the body.

    • The underside of the pump housing and the device chassis have corresponding rails (marked with the orange rectangles) that must be aligned when removing or replacing the pump housing.

  12. ResMed AirSense 10 Motherboard Replacement: étape 12, image 1 de 3 ResMed AirSense 10 Motherboard Replacement: étape 12, image 2 de 3 ResMed AirSense 10 Motherboard Replacement: étape 12, image 3 de 3
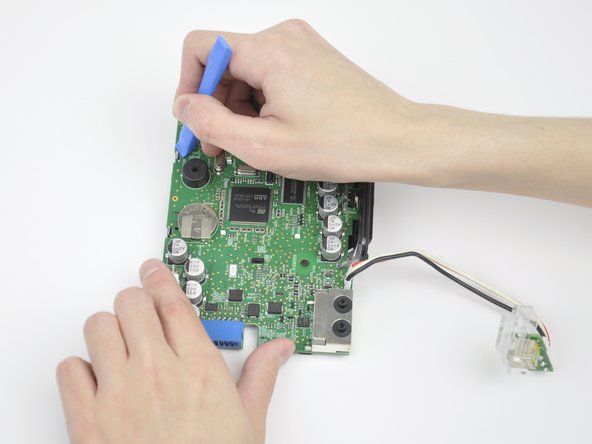
    • Place the device with the air outlet port facing away from you.

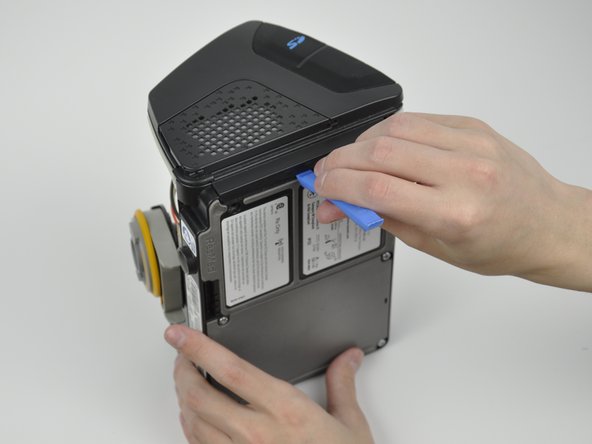
    • Press the clear plastic clip (on the left-hand side) towards the air outlet port using one of the opening tools.

    • Apply pressure upwards on the clip with the opening tool to disengage the clear plastic clip from the corresponding clip on the black plastic body of the device.

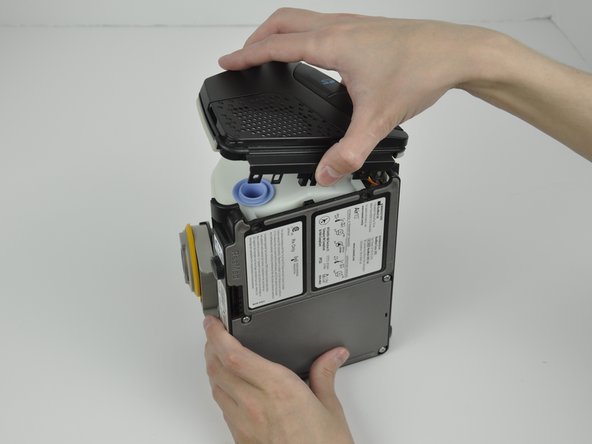
    • Apply moderate force to the square clear plastic tab towards the air outlet port while also pulling the square tab upwards.

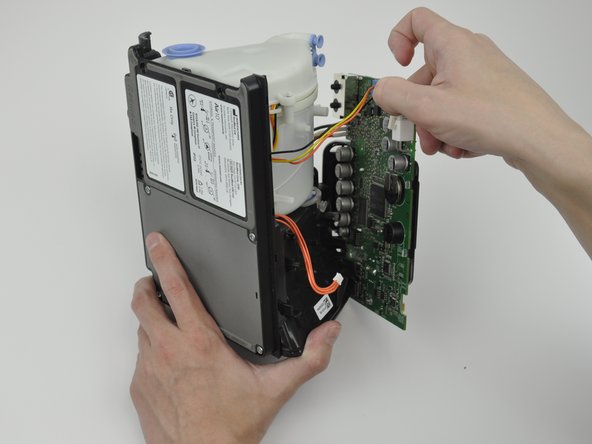
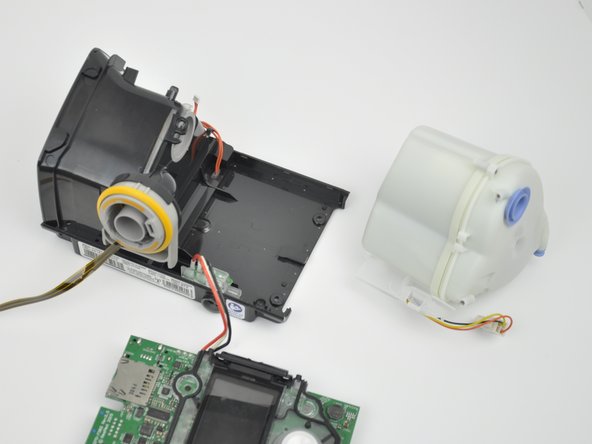
    • Remove the motherboard from the chassis of the device.

  13. ResMed AirSense 10 Motherboard Replacement: étape 13, image 1 de 2 ResMed AirSense 10 Motherboard Replacement: étape 13, image 2 de 2
    • Pry the knob away from the screen cover plate using a spudger or opening tool, while supporting the opposite side of the knob and pulling it upwards and away from the cover plate.

  14. ResMed AirSense 10 Motherboard Replacement: étape 14, image 1 de 3 ResMed AirSense 10 Motherboard Replacement: étape 14, image 2 de 3 ResMed AirSense 10 Motherboard Replacement: étape 14, image 3 de 3
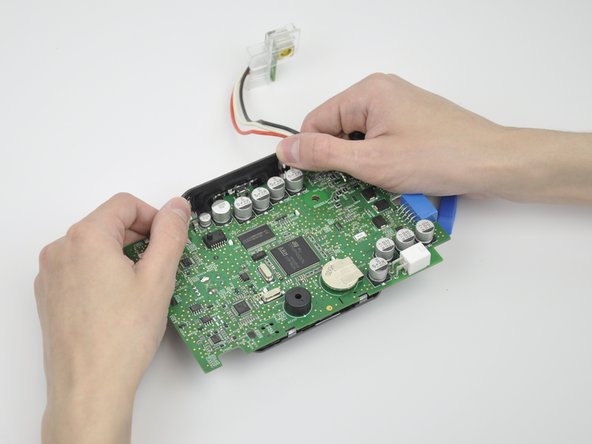
    • Apply pressure to the two protruding clear plastic tabs on the long edge of the motherboard using an opening tool, to unclip them from the motherboard. Gently press downwards on the top of the tabs and lift upwards on the motherboard until the tabs sit slightly below the level of the circuit board and no longer clip the board in.

    • Repeat the procedure to unclip the tab on the shorter edge of the motherboard.

    • Repeat the procedure to unclip the tab in the center of the motherboard.

    • Be careful that the opening tool does not slip along the motherboard. This could damage components on the board.

    • Push the screen cover plate away from you using your thumbs until it clears the top of the motherboard.

Conclusion

To reassemble your device, follow these instructions in reverse order.

2 autres ont terminé cette réparation.

5 commentaires

Well, yeah, great article, BUT where do you get the friggin' motherboard. It's not mentioned in your article and a google/edge search only turns up sites that will sell you masks, pillows, and hoses. Help me out here, bro.

David M - Réponse

Get a cheap used device from ebay and only use the motherboard. You can disinfect it with Isopropyl Alcohol (IPA).

Jon Jon -

Does anyone know if an Airsense 10, curve (motherboard) be used on a Airsense 10 for her to replace?

Newbie 20 - Réponse

Only in CPAP mode.

That board doesn't support autoset mode (autocpap) nor Autoset For Her mode.

Mário Cardoso -

"Get a cheap used device from ebay and only use the motherboard." - none available!

Joe - Réponse

Ajouter un commentaire

Nombre de vues :

Dernières 24 heures : 2

7 derniers jours : 28

30 derniers jours : 177

Total : 3,673