Aller au contenu principal

Ridgid R175RNE Cylinder O-Rings Replacement

Ce dont vous avez besoin

  1. Ridgid R175RNE Cylinder O-Rings Replacement, Top Cap: étape 1, image 1 de 3 Ridgid R175RNE Cylinder O-Rings Replacement, Top Cap: étape 1, image 2 de 3 Ridgid R175RNE Cylinder O-Rings Replacement, Top Cap: étape 1, image 3 de 3
    • Disconnect the nailer from the air compressor before beginning.

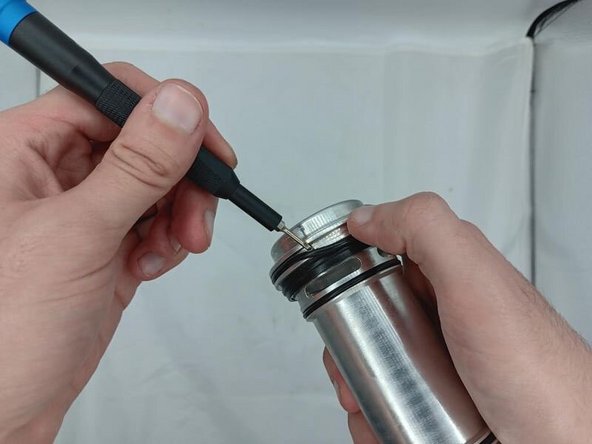
    • Use a 5/32" Allen wrench to remove the four 25 mm screws that secure the top cap.

    • Remove the top cap.

  2. Ridgid R175RNE Cylinder O-Rings Replacement, Driver Cylinder O-Rings: étape 2, image 1 de 3 Ridgid R175RNE Cylinder O-Rings Replacement, Driver Cylinder O-Rings: étape 2, image 2 de 3 Ridgid R175RNE Cylinder O-Rings Replacement, Driver Cylinder O-Rings: étape 2, image 3 de 3
    • Disconnect the nailer from the air compressor before beginning.

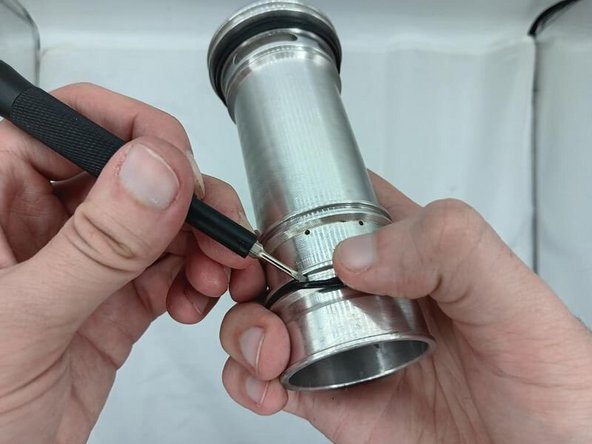
    • Remove the driver cylinder and place the nailer body to the side.

    • Take note of the orientation the plastic ring is on the cylinder.

  3. Ridgid R175RNE Cylinder O-Rings Replacement: étape 3, image 1 de 3 Ridgid R175RNE Cylinder O-Rings Replacement: étape 3, image 2 de 3 Ridgid R175RNE Cylinder O-Rings Replacement: étape 3, image 3 de 3
    • Take your o-ring pick or flathead and gently slide the tip under the O-ring.

    • Stretch it only as far as to remove it from its indentation.

    • Repeat with other four O-rings starting, from top to bottom.

    • There should be 5 O-rings in total.

Conclusion

To reassemble your device, follow these instructions in reverse order.

Aijaz Popatia

Membre depuis le 02/07/24

197 Réputation

1 tutoriel rédigé

Équipe

0 commentaires

Ajouter un commentaire

Nombre de vues :

Dernières 24 heures : 0

7 derniers jours : 0

30 derniers jours : 18

Total : 48