Aller au contenu principal

Ring Stick Up Cam Battery Camera Replacement

Ce dont vous avez besoin

  1. Ring Stick Up Cam Battery Camera Replacement, Battery: étape 1, image 1 de 1
    • Turn the camera so the lens is facing away from you, and the back is facing towards you.

    • Place one hand securely on the base and the other on the stand.

    • Carefully twist your bottom hand counterclockwise until the indicator line reaches the unlock icon.

  2. Ring Stick Up Cam Battery Camera Replacement: étape 2, image 1 de 1
    • Gently pull down to separate the stand from the camera body.

  3. Ring Stick Up Cam Battery Camera Replacement: étape 3, image 1 de 2 Ring Stick Up Cam Battery Camera Replacement: étape 3, image 2 de 2
    • Hold the camera so the opening containing the battery is toward the ceiling.

    • Squeeze the silver lever labeled "push" and extract the battery from its slot.

  4. Ring Stick Up Cam Battery Camera Replacement, Motherboard: étape 4, image 1 de 1
    Outil utilisé dans cette étape :
    Halberd Spudger
    $2.99
    J'achète
    • Remove the upper and lower silicon covers on the rear panel with your fingers or the hook-end of the halberd spudger.

  5. Ring Stick Up Cam Battery Camera Replacement: étape 5, image 1 de 1
    • Remove the 6 mm white screw from the rear panel with the a T3 Torx screwdriver.

  6. Ring Stick Up Cam Battery Camera Replacement: étape 6, image 1 de 1
    • Rotate the device so the base is facing upward.

    • Remove the two 6 mm screws from the base (on either side of the QR code) using a Phillips #00 screwdriver.

    • Remove the two 4 mm screws that connect the silver latch on the outside rim using a Phillips #00 screwdriver.

  7. Ring Stick Up Cam Battery Camera Replacement: étape 7, image 1 de 1
    • Remove the silver latch from the base.

    • Remove the front cover.

    • Remove the eight 6 mm screws from the inside panel with a Philips #00 screwdriver.

    • Remove the two 4 mm screws from the inside panel with a Phillips #00 screwdriver.

  8. Ring Stick Up Cam Battery Camera Replacement: étape 8, image 1 de 1
    • Pry the inside panel open using your hands or a spudger if necessary.

  9. Ring Stick Up Cam Battery Camera Replacement: étape 9, image 1 de 1
    • Remove the seven 4 mm screws connecting the motherboard to the camera body with a Phillips #00 screwdriver.

  10. Ring Stick Up Cam Battery Camera Replacement: étape 10, image 1 de 2 Ring Stick Up Cam Battery Camera Replacement: étape 10, image 2 de 2
    • Lift the motherboard from the camera body with the halberd spudger.

  11. Ring Stick Up Cam Battery Camera Replacement: étape 11, image 1 de 2 Ring Stick Up Cam Battery Camera Replacement: étape 11, image 2 de 2
    • Rotate the device to its side.

    • With your fingers, carefully remove the white part of the cord clip from the beige base.

    • Repeat this for the remaining three cords connecting the motherboard to the camera body.

  12. Ring Stick Up Cam Battery Camera Replacement: étape 12, image 1 de 1
    • Fold the motherboard downward from the camera body, revealing a white connecting strip.

    • Using the flat end of a spudger, flick the black hinge upward.

    • Pull the white strip out of the slot.

  13. Ring Stick Up Cam Battery Camera Replacement: étape 13, image 1 de 2 Ring Stick Up Cam Battery Camera Replacement: étape 13, image 2 de 2
    • Carefully insert the spudger underneath gold adhesive at the lower left-hand corner of the motherboard.

    • Gently remove the adhesive cover from the motherboard.

  14. Ring Stick Up Cam Battery Camera Replacement, Camera: étape 14, image 1 de 1
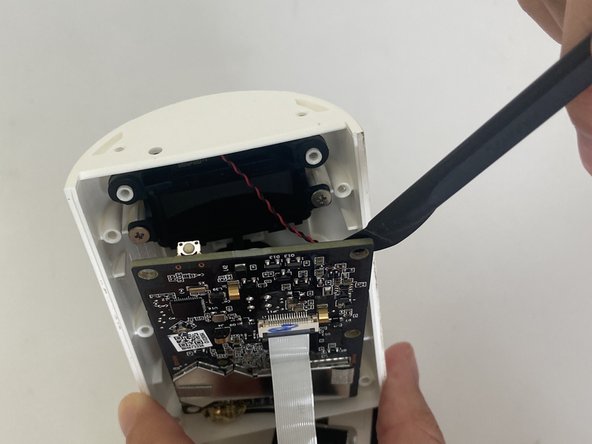
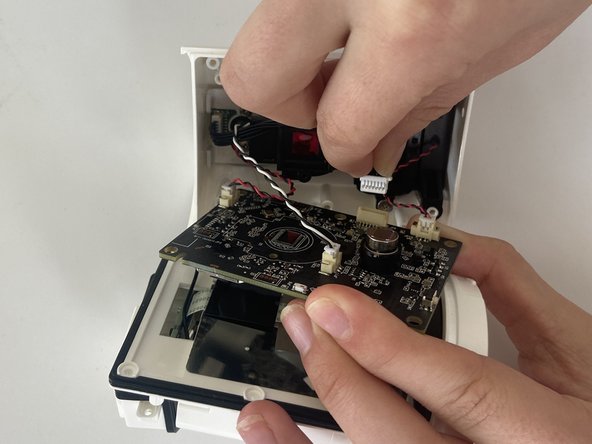
    • Orient your device so that the interior of the camera body is facing the ceiling.

  15. Ring Stick Up Cam Battery Camera Replacement: étape 15, image 1 de 1
    • Remove the two 6 mm screws that connect the camera to the camera body using a Phillips #00 screwdriver.

  16. Ring Stick Up Cam Battery Camera Replacement: étape 16, image 1 de 1
    • Grab and twist the camera counterclockwise with your thumb and index finger.

  17. Ring Stick Up Cam Battery Camera Replacement: étape 17, image 1 de 2 Ring Stick Up Cam Battery Camera Replacement: étape 17, image 2 de 2
    • Using your fingers, lift out the camera component including the camera lens and the attached wire.

Conclusion

To reassemble your device, follow these instructions in reverse order.

Une autre personne a terminé cette réparation.

Nick Tomkins

Membre depuis le 02/24/23

124 Réputation

1 tutoriel rédigé

Équipe

Marist, Team 1-1, Chaterdon Spring 2023 Membre de l'équipe Marist, Team 1-1, Chaterdon Spring 2023

MARS-CHATERDON-S23S1G1

3 membres

5 tutoriels rédigés

0 commentaires

Ajouter un commentaire

Nombre de vues :

Dernières 24 heures : 10

7 derniers jours : 42

30 derniers jours : 286

Total : 2,797