Cette version peut contenir des modifications incorrectes. Passez au dernier aperçu vérifié.
Ce dont vous avez besoin
-
Cette étape n’est pas traduite. Aidez à la traduire
-
Turn the toaster over and remove the rubber bumper feet.
-
-
Cette étape n’est pas traduite. Aidez à la traduire
-
Use a Phillips #2 screwdriver to remove four 12 mm screws at the base of the toaster shell.
-
-
-
Cette étape n’est pas traduite. Aidez à la traduire
-
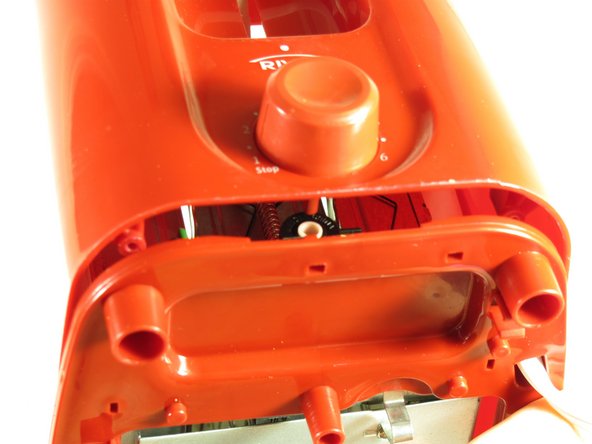
With the dial facing you, push the toaster base up and away until the base is just over the lip of the shell. This will disconnect the browning dial from the rest of the toaster.
-
-
Cette étape n’est pas traduite. Aidez à la traduire
-
Reach into the shell and grab the back white part of the lever.
-
Hold the grey lever with both your index finger and middle finger. Next, pull it.
-
Remove the shell.
-
-
Cette étape n’est pas traduite. Aidez à la traduire
-
After disassembling the toaster, turn the back side of the toaster towards you.
-
On the back of the toaster the metal tabs attached to the bread shelf should be visible.
-
These tabs will sometimes get caught in the shaft which disables your toaster from returning the bread.
-
-
Cette étape n’est pas traduite. Aidez à la traduire
-
Twist the metal tabs to vertical position to allow them to glide along the slot.
-
Push down on the white lever on the opposite side repeatedly to ensure that the metal tabs will no longer stick.
-


Annulation : je n'ai pas terminé ce tutoriel.
2 autres ont terminé cette réparation.
Équipe

Cal Poly, Team 2-8, Propen Fall 2012 Membre de l'équipe Cal Poly, Team 2-8, Propen Fall 2012
CPSU-PROPEN-F12S2G8
5 membres
6 tutoriels rédigés