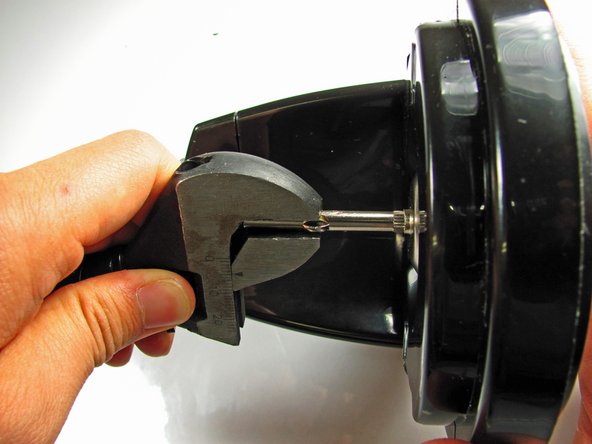
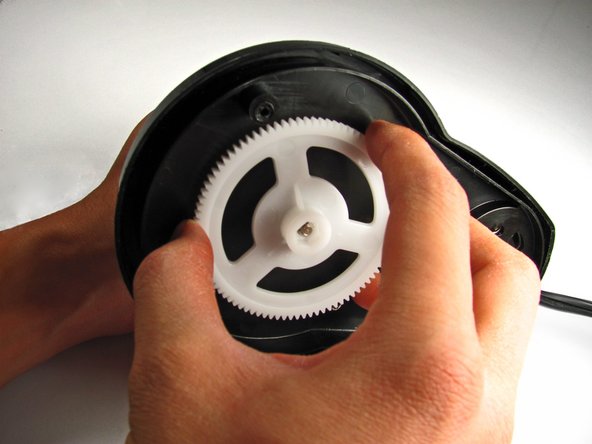
Aller au contenu principal

Rival Mini Chopper MC-67BL Turning Gears Replacement

Ce dont vous avez besoin

  1. Rival Mini Chopper MC-67BL Turning Gears Replacement, Turning Gears: étape 1, image 1 de 2 Rival Mini Chopper MC-67BL Turning Gears Replacement, Turning Gears: étape 1, image 2 de 2
    • Twist the plastic lid counterclockwise to unlock it.

    • Lift the lid to remove it from the container.

  2. Rival Mini Chopper MC-67BL Turning Gears Replacement: étape 2, image 1 de 1
    • Carefully remove the blade from the container.

    • For reassembly, the teeth on the metal shaft line up with slots on the inside of the plastic hole.

  3. Rival Mini Chopper MC-67BL Turning Gears Replacement: étape 3, image 1 de 1
    • With your hand, twist the container counter-clockwise until it unlocks from the base. Remove the container by lifting it straight up.

  4. Rival Mini Chopper MC-67BL Turning Gears Replacement: étape 4, image 1 de 1
    • Use your fingers to pry out the two rubber feet from the bottom cover of the base.

    • The two feet furthest from the button tower contain screws. The other two feet do not.

  5. Rival Mini Chopper MC-67BL Turning Gears Replacement: étape 5, image 1 de 2 Rival Mini Chopper MC-67BL Turning Gears Replacement: étape 5, image 2 de 2
    • Use the Phillips #2 screwdriver to unscrew the two 12.7-mm screws underneath the rubber feet.

    • Use the same screwdriver to unscrew the 15.88-mm screw from the back of the chopper.

  6. Rival Mini Chopper MC-67BL Turning Gears Replacement: étape 6, image 1 de 1
    • Firmly lift the bottom cover off of the base.

  7. Rival Mini Chopper MC-67BL Turning Gears Replacement: étape 7, image 1 de 1
    • Remove the smaller white gear by lifting it up with your hand.

  8. Rival Mini Chopper MC-67BL Turning Gears Replacement: étape 8, image 1 de 3 Rival Mini Chopper MC-67BL Turning Gears Replacement: étape 8, image 2 de 3 Rival Mini Chopper MC-67BL Turning Gears Replacement: étape 8, image 3 de 3
    • Use a pair of pliers or any other clamping tool to securely hold the blade-shaft that sits above the base.

    • Grab the gear with your other hand and turn CLOCKWISE. Unlike most screws, the gear is reverse-threaded to allow the blade to spin.

    • Continue turning the gear until completely removed from the blade-shaft.

Conclusion

To reassemble your device, follow these instructions in reverse order.

Une autre personne a terminé cette réparation.

Roxanne

Membre depuis le 10/17/13

522 Réputation

4 tutoriels rédigés

Équipe

Cal Poly, Team 4-29, Amido Fall 2013 Membre de l'équipe Cal Poly, Team 4-29, Amido Fall 2013

CPSU-AMIDO-F13S4G29

4 membres

5 tutoriels rédigés

0 commentaires

Ajouter un commentaire

Nombre de vues :

Dernières 24 heures : 0

7 derniers jours : 2

30 derniers jours : 3

Total : 805