Aller au contenu principal

Roku 3 A/C Power Port Replacement

Ce dont vous avez besoin

  1. Roku 3 A/C Power Port Replacement, Motherboard: étape 1, image 1 de 1
    • Place the Roku 3 on the table face down and orient it so you can correctly read the writing.

  2. Roku 3 A/C Power Port Replacement: étape 2, image 1 de 3 Roku 3 A/C Power Port Replacement: étape 2, image 2 de 3 Roku 3 A/C Power Port Replacement: étape 2, image 3 de 3
    • Pull back the rubber protection in the top right corner to locate the screw.

    • Repeat with the bottom right corner and bottom left corner.

  3. Roku 3 A/C Power Port Replacement: étape 3, image 1 de 1
    • Remove the 9 mm screws from the three corners with a Hex 1.3 Screwdriver.

  4. Roku 3 A/C Power Port Replacement: étape 4, image 1 de 2 Roku 3 A/C Power Port Replacement: étape 4, image 2 de 2
    • Open the device by gently lifting the bottom half away from the top half of the device.

  5. Roku 3 A/C Power Port Replacement: étape 5, image 1 de 1
    • Use your fingers to carefully lift the motherboard from the top half of the device.

  6. Roku 3 A/C Power Port Replacement: étape 6, image 1 de 2 Roku 3 A/C Power Port Replacement: étape 6, image 2 de 2
    • Pull away the IO shield from the motherboard using your hands.

  7. Roku 3 A/C Power Port Replacement, A/C Power Port: étape 7, image 1 de 2 Roku 3 A/C Power Port Replacement, A/C Power Port: étape 7, image 2 de 2
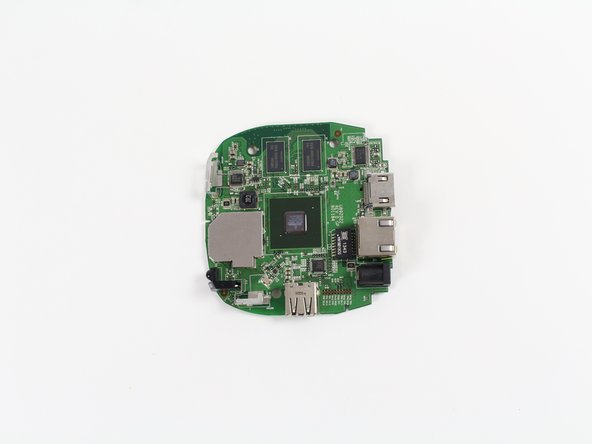
    • Turn over the motherboard so the back is face up and almost all large silver components are resting facedown on the table.

    • Orient it such that the backside of the HDMI port is in your upper right corner.

  8. Roku 3 A/C Power Port Replacement: étape 8, image 1 de 1
    • Desolder the connections of the A/C Power Port on the motherboard.

    • Remove the port.

    • For more information on soldering, check out iFixit's Soldering Guide.

Conclusion

To reassemble your device, follow these instructions in reverse order.

Une autre personne a terminé cette réparation.

Andy Hak

Membre depuis le 10/07/16

250 Réputation

2 tutoriels rédigés

Équipe

Cal Poly, Team 15-2, Livingston Fall 2016 Membre de l'équipe Cal Poly, Team 15-2, Livingston Fall 2016

CPSU-LIVINGSTON-F16S15G2

3 membres

6 tutoriels rédigés

Un commentaire

What’s the size and name of the actual jack? Where do I get a replacement one?

Bo Northwest Designs of SE - Réponse

Ajouter un commentaire

Nombre de vues :

Dernières 24 heures : 1

7 derniers jours : 7

30 derniers jours : 17

Total : 2,457