Introduction
After several years of use, the display of your Saeco Intelia machine might not display properly statuses colors (green/yellow/red). In this tutorial, we will see how to replace the LCD display of the machine.
These instructions may also help with other Saeco models and with coffee makers from Philips and Gaggia—they are all made by the same manufacturer and have a very similar design.
Ce dont vous avez besoin
-
-
Remove the screw in the middle of the bean container protection and remove the bean container protection.
-
Remove the three screws of the been container and remove the been container.
-
You can now remove the upper casing cover by pulling it up gently (picture 2).
-
-
-
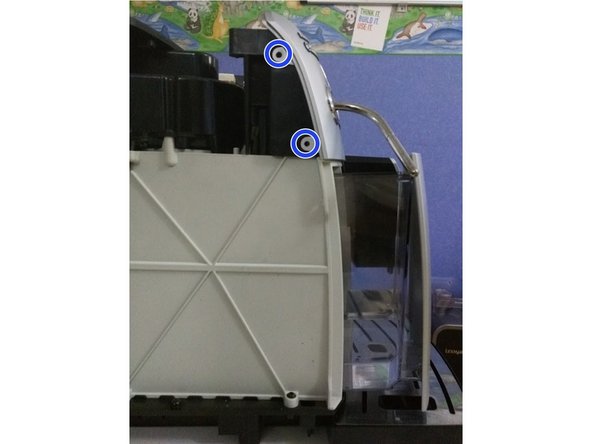
Remove the two screws on the top of the left panel.
-
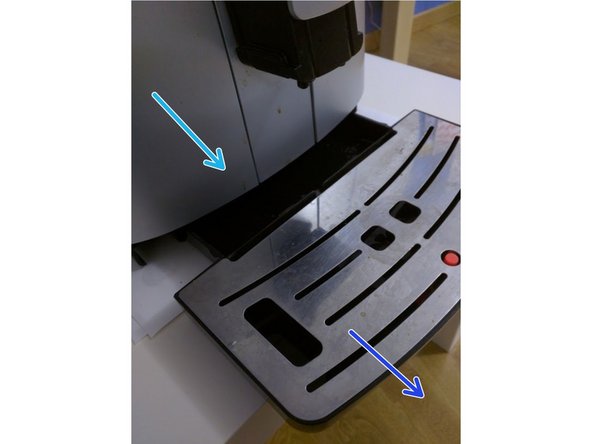
Remove the drip tray.
-
Remove the water tank.
-
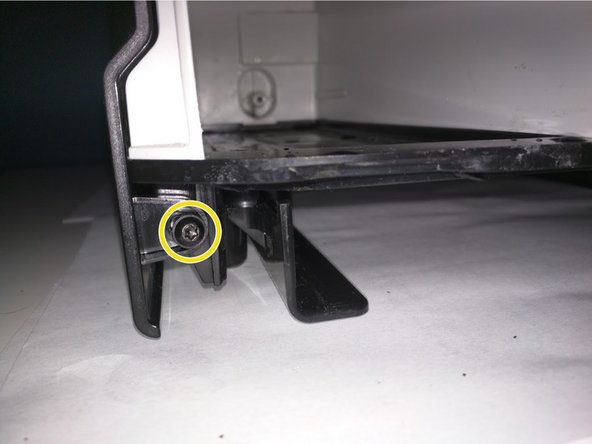
Below the water tank location, remove the bottom screw of the left side casing.
-
Remove the left side casing by pulling it gently. Take care of the nick, at the middle of the panel (above the yellow marked screw).
-
-
-
-
If Pannarello is present, remove it first from hot water dispenser by pulling it firmly to the bottom. Next, open up service gate on the right of the appliance.
-
Remove the two right screws of the silver front panel.
-
Remove the two left screws of the silver front panel.
-
Separate the silver front panel from the main unit by pulling it gently.
-
Loosen or remove the two screws of the hot water dispenser.
-
Remove the silver front panel. Take care of hot water dispenser and left and right nicks of the panel.
-
-
-
Remove the LCD black plastic frame. It is simply placed into two necks.
-
-
-
Remove the two screws on each side of the LCD screen.
-
Disconnect the first connector.
-
Disconnect the other cable.
-
To disconnect the second cable, you need to lifts the flap of the connector.
-
-
-
Disassemble the old LCD screen from support frame.
-
Clip the new LCD screen to the LCD support frame.
-
Reconnect the two cables.
-
-
-
Reconnect power cable and switch on the appliance. Colors (yellow, green) from the screen should be back :)
-


To reassemble your appliance, follow the instructions in reverse order.
To reassemble your appliance, follow the instructions in reverse order.
Annulation : je n'ai pas terminé ce tutoriel.
18 autres ont terminé cette réparation.

37 commentaires
Great ! :) Thank you.
You're welcome :)
Jean T -
Jean, can you please look at my inline comments and include them in your main instructions? They are hidden to the user and they wont see these precautions until it too late. Again, thank you for this excellent super helpful guide with great pictures. I took a few of my repair Id be happy to send to you. I would have posted them but this site doesn't allow commentators to post pictures.
Hi Paul,
Thanks for your comments :) I have included some of them into the guide.
Jean T -
Very good Description! Trank you!!!