Ce dont vous avez besoin
-
-
Remove all attachments such as drawers, water tank, brewing unit.
-
Carefully pull the steam button out. If it is too tight, first loosen the cover (steps 2 to 4), lift slightly and then push the ratchet nose with a small screwdriver.
-
-
-
Remove the single T10 Torx screw on the rear edge of the top cover under the water reservoir.
-
Remove the single Phillipps screw on the rear edge of the top cover under the container of the coffee beans.
-
There are two Phillipps screws on the frontal unterside edge of the top cover. Turn them out.
-
-
-
-
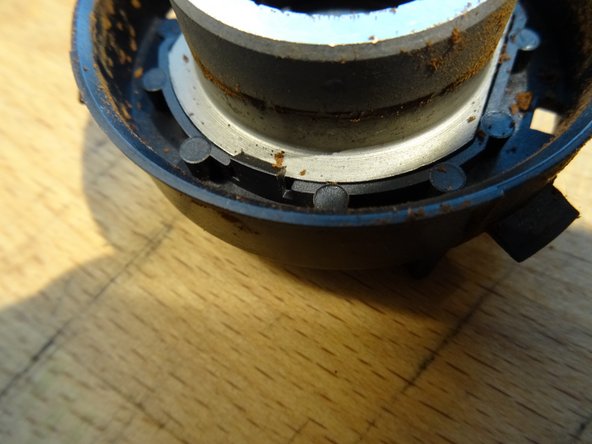
Note the blue markings. Turn the outer ring anti clockwise until the blue marks line up to each other.
-
Then the ring can be lifted off. Siphon off all ground coffee immediately.
-
-
-
After loosening the screw you can first lift the auger, then carefully the grinding cone. You can see the three balls of the slip clutch. Carefully lift out and keep safely.
-
-
-
The driver can be pulled up. Pay attention to the three springs on which the balls of the slip clutch lie, these also safe to store.
-
All parts are thoroughly cleaned and degreased.
-
-
-
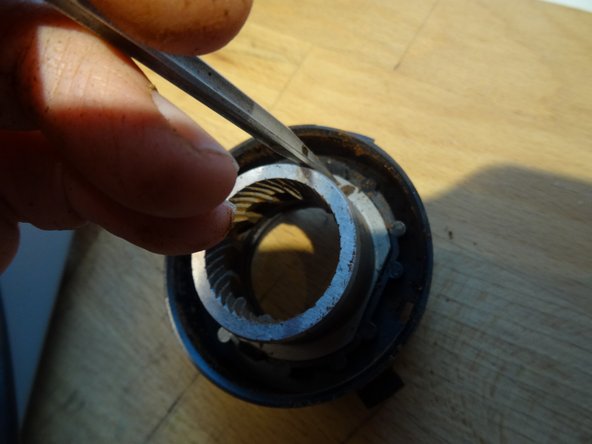
The cap of the grinding ring can be removed by pushing the small notches alternately left and right with a screwdriver.
-
The grinding ring is fastened with clamps. Press with the screwdriver to the side, then the Mahlring can be solved.
-
Again, everything is cleaned well, then pressed the new ring and the lid put on.
-
-
-
Here are all parts.
-
The driver is reinstated. Then the three feathers and beads inserted. When adjusting the new grinding cone, make sure that the balls are in the recesses on the bottom.
-
Then insert the auger so that it engages correctly in the grooves.
-
Finally, insert the central bolt, push the cone down slightly and tighten the bolt. Reminder: left-hand thread, that is "falschrum".
-
-
-
The mounted grinding ring is inserted. At first, the markers face each other. The outer ring is turned on until a resistance can be felt. So the millstones sit on each other.
-
Then he is turned back about 15 stops. This is about the middle setting of the degree of grinding, but can also be fine-tuned later.
-


Repeat the steps in the reverse order to re-mount the unit.
Repeat the steps in the reverse order to re-mount the unit.
Annulation : je n'ai pas terminé ce tutoriel.
3 autres ont terminé cette réparation.
Merci à ces traducteurs :
100%
VauWeh nous aide à réparer le monde ! Vous voulez contribuer ?
Commencez à traduire ›
Équipe

Repair is War on Entropy Membre de l'équipe Repair is War on Entropy
Community
24 membres
1 097 tutoriels rédigés
3 commentaires
I cleaned everything, but still not grinding. The grinding button (middle) just blinking.
I cleaned everything but still not grinding. The drinding button (middle) just keep blinking
Proof all functions using the “test mode" (Google “Saeco Vienna Test Mode").