Aller au contenu principal

Samsung ATIV Book 9 NP900X3K-S01US Battery Replacement

Ce dont vous avez besoin

  1. Samsung ATIV Book 9 NP900X3K-S01US Battery Replacement, Bottom Case: étape 1, image 1 de 3 Samsung ATIV Book 9 NP900X3K-S01US Battery Replacement, Bottom Case: étape 1, image 2 de 3 Samsung ATIV Book 9 NP900X3K-S01US Battery Replacement, Bottom Case: étape 1, image 3 de 3
    • Make sure that the Samsung ATIV Book 9 is powered off and not connected to any power outlets.

    • Close the device and rest it on a flat surface.

    • Flip the device over to access the ten 4.3 mm screws located on the bottom case.

    • Remove all ten screws using the Phillips #00 screwdriver.

  2. Samsung ATIV Book 9 NP900X3K-S01US Battery Replacement: étape 2, image 1 de 2 Samsung ATIV Book 9 NP900X3K-S01US Battery Replacement: étape 2, image 2 de 2
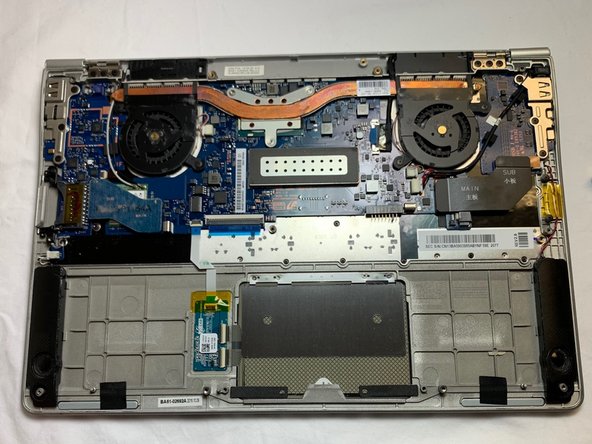
    • Gently lift and remove the bottom case.

  3. Samsung ATIV Book 9 NP900X3K-S01US Battery Replacement, Battery: étape 3, image 1 de 3 Samsung ATIV Book 9 NP900X3K-S01US Battery Replacement, Battery: étape 3, image 2 de 3 Samsung ATIV Book 9 NP900X3K-S01US Battery Replacement, Battery: étape 3, image 3 de 3
    • Using a Phillips #00 screwdriver, remove the six 4.3 mm screws securing the battery to the device.

  4. Samsung ATIV Book 9 NP900X3K-S01US Battery Replacement: étape 4, image 1 de 2 Samsung ATIV Book 9 NP900X3K-S01US Battery Replacement: étape 4, image 2 de 2
    • Carefully lift the battery out.

Conclusion

To reassemble your device, follow these instructions in reverse order.

Arthur Guz

Membre depuis le 02/05/19

85 Réputation

1 tutoriel rédigé

Équipe

UC Davis, Team S18-G1, Lore Winter 2019 Membre de l'équipe UC Davis, Team S18-G1, Lore Winter 2019

UCD-LORE-W19S18G1

3 membres

3 tutoriels rédigés

0 commentaires

Ajouter un commentaire

Nombre de vues :

Dernières 24 heures : 1

7 derniers jours : 6

30 derniers jours : 16

Total : 779