Aller au contenu principal

Samsung DVD-HD850 Player Disk Tray Replacement

Ce dont vous avez besoin

  1. Samsung DVD-HD850 Player Disk Tray Replacement, Locate and Remove The Disk Tray: étape 1, image 1 de 1
    • *NOTE* remember to never connect to power when working on electrical components

    • Find and locate the disk tray it is located top right hand side of the component when the back of the device ( dvd player ) is facing you.

  2. Samsung DVD-HD850 Player Disk Tray Replacement, Removing The Data Strips: étape 2, image 1 de 1
    • Locate and gently remove the data strips on the tray. There are three in total, two on the left hand side and one on the right.

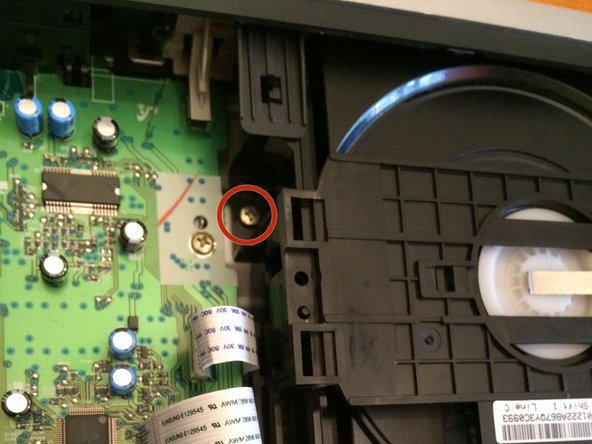
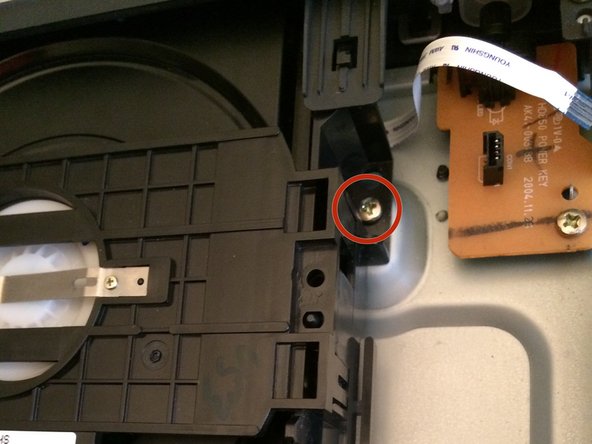
  3. Samsung DVD-HD850 Player Disk Tray Replacement, Removing The Screws: étape 3, image 1 de 3 Samsung DVD-HD850 Player Disk Tray Replacement, Removing The Screws: étape 3, image 2 de 3 Samsung DVD-HD850 Player Disk Tray Replacement, Removing The Screws: étape 3, image 3 de 3
    • As noted by the red circles, locate and remove the screws one at a time

  4. Samsung DVD-HD850 Player Disk Tray Replacement, Disk Tray Removal: étape 4, image 1 de 1
    • After removing the clips slowly incline the disk drive towards you and unclip it from the two (2) brackets located on the top

    • Be careful not to push too much pressure on the brackets since they tend to break easily

  5. Samsung DVD-HD850 Player Disk Tray Replacement, Success!: étape 5, image 1 de 1
    • Congrats! You have sucessfully have taken out the disk drive

Conclusion

To reassemble your device, follow these instructions in reverse order.

Une autre personne a terminé cette réparation.

Carlos

Membre depuis le 10/16/14

354 Réputation

3 tutoriels rédigés

Équipe

UMass Dartmouth, Team 1-6, Duarte Fall 2014 Membre de l'équipe UMass Dartmouth, Team 1-6, Duarte Fall 2014

UMASSD-DUARTE-F14S1G6

3 membres

7 tutoriels rédigés

0 commentaires

Ajouter un commentaire

Nombre de vues :

Dernières 24 heures : 1

7 derniers jours : 1

30 derniers jours : 8

Total : 546