Aller au contenu principal

Samsung Galaxy A50 Display Assembly with Frame Replacement

Ce dont vous avez besoin

Vidéo d'introduction

  1. Samsung Galaxy A50 Display Assembly with Frame Replacement, LCD Display Assembly replacement: étape 1, image 1 de 3 Samsung Galaxy A50 Display Assembly with Frame Replacement, LCD Display Assembly replacement: étape 1, image 2 de 3 Samsung Galaxy A50 Display Assembly with Frame Replacement, LCD Display Assembly replacement: étape 1, image 3 de 3
    • Display Touch Screen Digitizer Assembly with Frame for Samsung Galaxy A50

  2. Samsung Galaxy A50 Display Assembly with Frame Replacement, Battery cover removal: étape 2, image 1 de 3 Samsung Galaxy A50 Display Assembly with Frame Replacement, Battery cover removal: étape 2, image 2 de 3 Samsung Galaxy A50 Display Assembly with Frame Replacement, Battery cover removal: étape 2, image 3 de 3
    • Heat up the back cover to loosen the adhesive.

    • To separate the back cover use a Suction Cup and plastic tools.

  3. Samsung Galaxy A50 Display Assembly with Frame Replacement, Middle frame removal: étape 3, image 1 de 3 Samsung Galaxy A50 Display Assembly with Frame Replacement, Middle frame removal: étape 3, image 2 de 3 Samsung Galaxy A50 Display Assembly with Frame Replacement, Middle frame removal: étape 3, image 3 de 3
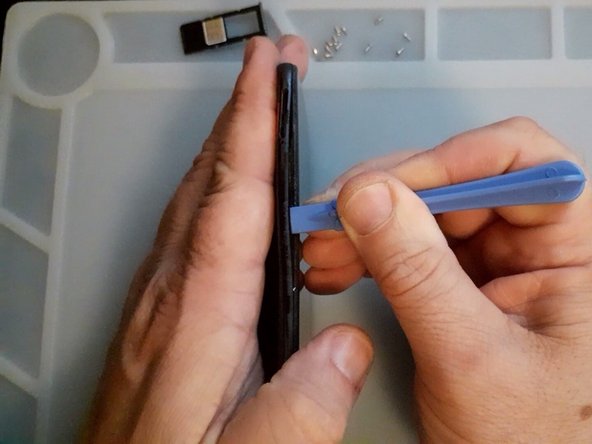
    • Remove the SIM tray.

    • Remove the Philips Screws.

    • Again use plastic tools to separate the middle frame.

  4. Samsung Galaxy A50 Display Assembly with Frame Replacement, Test the new spare part: étape 4, image 1 de 3 Samsung Galaxy A50 Display Assembly with Frame Replacement, Test the new spare part: étape 4, image 2 de 3 Samsung Galaxy A50 Display Assembly with Frame Replacement, Test the new spare part: étape 4, image 3 de 3
    • First disconnect the Battery.

    • Test the new spare part before the installation.

  5. Samsung Galaxy A50 Display Assembly with Frame Replacement, Logic board removal: étape 5, image 1 de 3 Samsung Galaxy A50 Display Assembly with Frame Replacement, Logic board removal: étape 5, image 2 de 3 Samsung Galaxy A50 Display Assembly with Frame Replacement, Logic board removal: étape 5, image 3 de 3
    • Disconnect and remove the Main Flex Cable.

    • Remove the black Philips screw, it's shorter then the middle frame screws.

    • Disconnect the coaxial antenna cable.

    • Now you can remove the logic board.

  6. Samsung Galaxy A50 Display Assembly with Frame Replacement, Sub board removal: étape 6, image 1 de 3 Samsung Galaxy A50 Display Assembly with Frame Replacement, Sub board removal: étape 6, image 2 de 3 Samsung Galaxy A50 Display Assembly with Frame Replacement, Sub board removal: étape 6, image 3 de 3
    • First remove the Fingerprint sensor.

    • The screws for the Fingerprint are shorter.

    • It's better to use hot air before to disassemble the sub-board.

    • Reminder - only plastic tools :)

  7. Samsung Galaxy A50 Display Assembly with Frame Replacement, Battery removal: étape 7, image 1 de 3 Samsung Galaxy A50 Display Assembly with Frame Replacement, Battery removal: étape 7, image 2 de 3 Samsung Galaxy A50 Display Assembly with Frame Replacement, Battery removal: étape 7, image 3 de 3
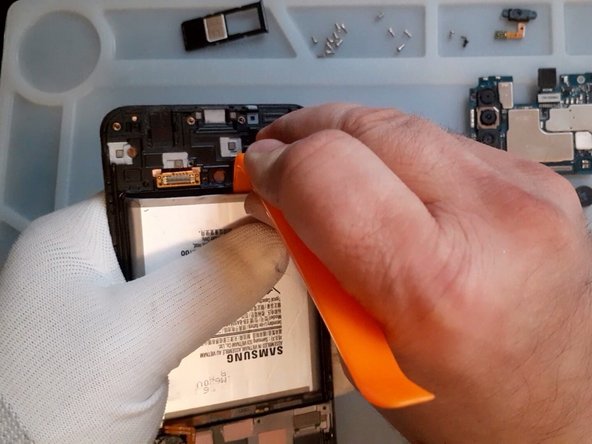
    • Again, hot air, plastic tools and very slowly remove the battery.

  8. Samsung Galaxy A50 Display Assembly with Frame Replacement: étape 8, image 1 de 1
    • All's Well That Ends Well

Conclusion

To reassemble your device, follow these instructions in reverse order.

4 autres ont terminé cette réparation.

ZFix

Membre depuis le 12/09/13

191 308 Réputation

330 tutoriels rédigés

Équipe

Master Techs Membre de l'équipe Master Techs

Community

322 membres

2 535 tutoriels rédigés

Un commentaire

The frame I bought doesn't have the place for earspeaker surrounded by little "walls", so it's very loose and doesn't have contact with the board. Anyone experienced this?

knezi - Réponse

Ajouter un commentaire

Nombre de vues :

Dernières 24 heures : 9

7 derniers jours : 63

30 derniers jours : 304

Total : 13,443