Aller au contenu principal

Samsung Galaxy Note 8.0 Headphone Jack Replacement

Ce dont vous avez besoin

  1. Samsung Galaxy Note 8.0 Headphone Jack Replacement, Back Cover: étape 1, image 1 de 1
    • Remove the Samsung S-Pen stylus.

    • Remove the micro SD storage card.

  2. Samsung Galaxy Note 8.0 Headphone Jack Replacement: étape 2, image 1 de 1
    • Using the plastic opening tool, start where the S-pen was located and carefully pry up the corner.

  3. Samsung Galaxy Note 8.0 Headphone Jack Replacement: étape 3, image 1 de 1
    • Work your way around the entire device by carefully prying and sliding the plastic opening tool.

    • There are clips approximately 2cm apart. As you are removing the back cover you should hear the clips being dislocated from the tablet.

  4. Samsung Galaxy Note 8.0 Headphone Jack Replacement, Battery: étape 4, image 1 de 2 Samsung Galaxy Note 8.0 Headphone Jack Replacement, Battery: étape 4, image 2 de 2
    • Remove the 8 Phillips#00 3-mm screws holding the battery in place.

  5. Samsung Galaxy Note 8.0 Headphone Jack Replacement: étape 5, image 1 de 1
    • Lift the top left corner of the battery up by the black tab.

  6. Samsung Galaxy Note 8.0 Headphone Jack Replacement: étape 6, image 1 de 1
    • Gently grasp and lift up the white connector located at the bottom right corner of the battery. It is connected to the battery by two blue and two red wires.

    • Do not yank the connector by the wires. If it does not disconnect easily, slide a plastic opening tool between the white connector and the board to lift the connector away from the board.

  7. Samsung Galaxy Note 8.0 Headphone Jack Replacement, Headphone Jack: étape 7, image 1 de 2 Samsung Galaxy Note 8.0 Headphone Jack Replacement, Headphone Jack: étape 7, image 2 de 2
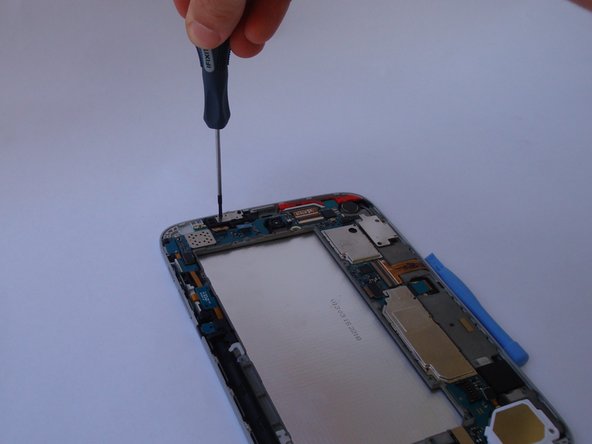
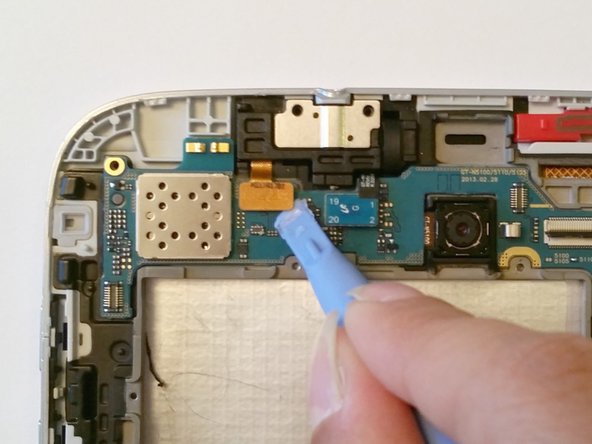
    • Remove the two 4.5-mm black phillips head screws using a #00Phillips screwdriver.

  8. Samsung Galaxy Note 8.0 Headphone Jack Replacement: étape 8, image 1 de 2 Samsung Galaxy Note 8.0 Headphone Jack Replacement: étape 8, image 2 de 2
    • Gently pry up the teal connector.

    • Do not yank the connector. If it does not disconnect easily use a plastic opening tool between the connector and the board to lift the connector away from the board.

  9. Samsung Galaxy Note 8.0 Headphone Jack Replacement: étape 9, image 1 de 2 Samsung Galaxy Note 8.0 Headphone Jack Replacement: étape 9, image 2 de 2
    • Gently pry up the gold connector.

    • Do not yank the connector. If it does not disconnect easily use a plastic opening tool between the connector and the board to lift the connector away from the board.

  10. Samsung Galaxy Note 8.0 Headphone Jack Replacement: étape 10, image 1 de 1
    • Remove the headphone jack from it's housing.

    • If difficult, use a plastic opening tool to pry up.

Conclusion

To reassemble your device, follow these instructions in reverse order.

6 autres ont terminé cette réparation.

Joel

Membre depuis le 09/23/14

1 862 Réputation

6 tutoriels rédigés

Équipe

USF Tampa, Team 12-2, Blackwell Fall 2014 Membre de l'équipe USF Tampa, Team 12-2, Blackwell Fall 2014

USFT-BLACKWELL-F14S12G2

4 membres

16 tutoriels rédigés

3 commentaires

Lightning struck while my son was on his tablet... no more headset audio? Replaced recommend parts still no audio. Plays fine without earbuds??? Insurance claim? What else could be the issue? Motherboard?

Shasta - Réponse

what are these connectors on the left side of headphone jack which are connected to the backside plate?

sanco - Réponse

this did not help getting the broken headphone jack out of my Samsung note 8

joshua- collins - Réponse

Ajouter un commentaire

Nombre de vues :

Dernières 24 heures : 0

7 derniers jours : 2

30 derniers jours : 7

Total : 6,793