Aller au contenu principal
Pour réparer ensemble - Je crée un compte

Samsung Galaxy Note USB Board Replacement

Ce dont vous avez besoin

  1. Samsung Galaxy Note USB Board Replacement, Stylus: étape 1, image 1 de 2 Samsung Galaxy Note USB Board Replacement, Stylus: étape 1, image 2 de 2
    • Grasp the cap of the stylus and remove it from its slot in the midframe.

    Demander à FixBot

    Ajouter un commentaire

  2. Samsung Galaxy Note USB Board Replacement, Rear Case: étape 2, image 1 de 2 Samsung Galaxy Note USB Board Replacement, Rear Case: étape 2, image 2 de 2
    • Pry with a plastic opening tool, or your fingernail, in the divot to the right of the rear-facing camera, near the volume rocker.

    Demander à FixBot

    Ajouter un commentaire

  3. Samsung Galaxy Note USB Board Replacement: étape 3, image 1 de 2 Samsung Galaxy Note USB Board Replacement: étape 3, image 2 de 2
    • Lift and remove the rear case from the phone.

    Demander à FixBot

    Ajouter un commentaire

  4. Samsung Galaxy Note USB Board Replacement, Battery: étape 4, image 1 de 2 Samsung Galaxy Note USB Board Replacement, Battery: étape 4, image 2 de 2
    • Insert your finger in the notch of the battery compartment.

    • Press the battery toward the rear facing camera while pulling outward.

    Demander à FixBot

    Ajouter un commentaire

  5. Samsung Galaxy Note USB Board Replacement, MicroSD Card: étape 5, image 1 de 3 Samsung Galaxy Note USB Board Replacement, MicroSD Card: étape 5, image 2 de 3 Samsung Galaxy Note USB Board Replacement, MicroSD Card: étape 5, image 3 de 3
    • Use the flat end of a spudger, or your fingernail, to press the microSD card slightly deeper into its slot until you hear a click.

    • After the click, release the card and it will pop out of its slot.

    • For reassembly, push the microSD card into the slot until it clicks in place.

    Demander à FixBot

    Ajouter un commentaire

  6. Samsung Galaxy Note USB Board Replacement: étape 6, image 1 de 1
    • Remove the microSD card from its slot in the midframe.

    Demander à FixBot

    Ajouter un commentaire

  7. Samsung Galaxy Note USB Board Replacement, SIM Card: étape 7, image 1 de 2 Samsung Galaxy Note USB Board Replacement, SIM Card: étape 7, image 2 de 2
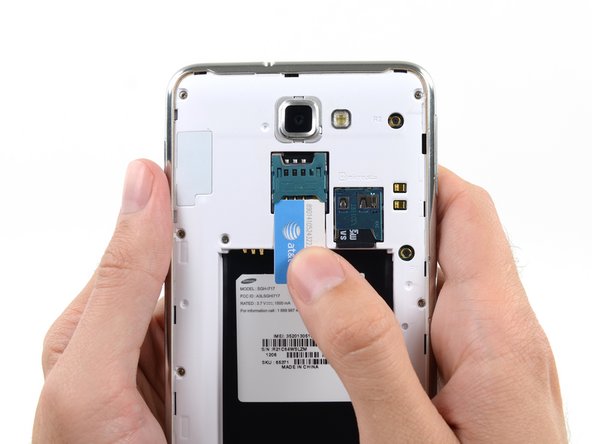
    • Use a plastic opening tool, or your fingernail, to push the SIM card out of its compartment.

    Demander à FixBot

    Ajouter un commentaire

  8. Samsung Galaxy Note USB Board Replacement: étape 8, image 1 de 2 Samsung Galaxy Note USB Board Replacement: étape 8, image 2 de 2
    • Slide the SIM card out the rest of the way with your thumb and remove it from the device.

    Demander à FixBot

    Ajouter un commentaire

  9. Samsung Galaxy Note USB Board Replacement, Midframe: étape 9, image 1 de 1
    • Remove the nine 3.4 mm Phillips #00 screws securing the midframe to the display assembly.

    Demander à FixBot

    Ajouter un commentaire

  10. Samsung Galaxy Note USB Board Replacement: étape 10, image 1 de 2 Samsung Galaxy Note USB Board Replacement: étape 10, image 2 de 2
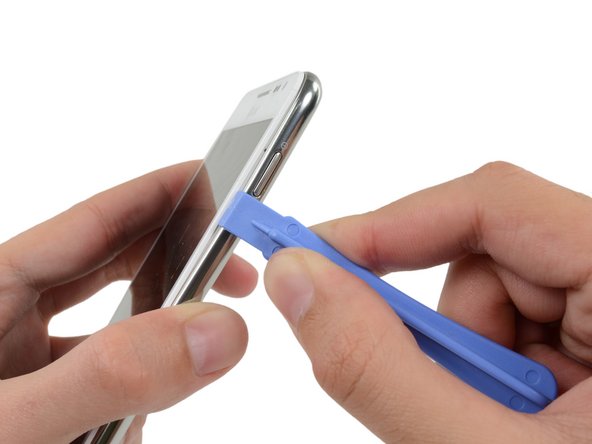
    • Insert your plastic opening tool to the left of the power button between the midframe and the front panel assembly and pry.

    Demander à FixBot

    Ajouter un commentaire

  11. Samsung Galaxy Note USB Board Replacement: étape 11, image 1 de 3 Samsung Galaxy Note USB Board Replacement: étape 11, image 2 de 3 Samsung Galaxy Note USB Board Replacement: étape 11, image 3 de 3
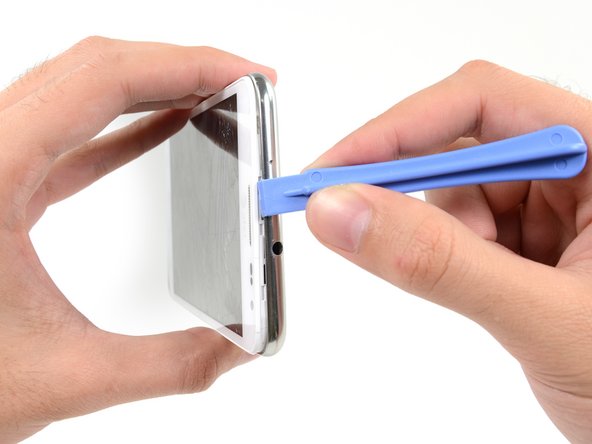
    • Slide the plastic opening tool down the seam.

    Demander à FixBot

    Ajouter un commentaire

  12. Samsung Galaxy Note USB Board Replacement: étape 12, image 1 de 3 Samsung Galaxy Note USB Board Replacement: étape 12, image 2 de 3 Samsung Galaxy Note USB Board Replacement: étape 12, image 3 de 3
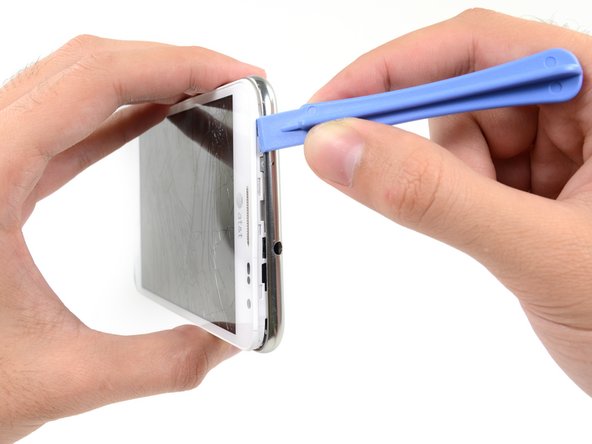
    • Insert your plastic opening tool to the left of the headphone jack between the midframe and the display assembly.

    • Slide the opening tool along the top edge of the phone.

    • Continue to run the plastic opening tool around the perimeter of the phone until the midframe is separated.

    Demander à FixBot

    Ajouter un commentaire

  13. Samsung Galaxy Note USB Board Replacement: étape 13, image 1 de 2 Samsung Galaxy Note USB Board Replacement: étape 13, image 2 de 2
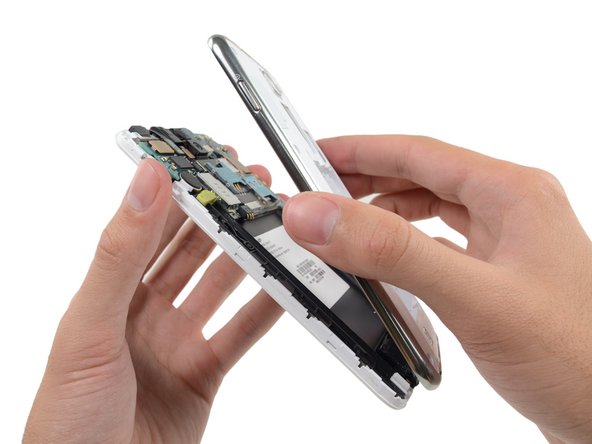
    • Remove the midframe from the display assembly.

    Demander à FixBot

    Ajouter un commentaire

  14. Samsung Galaxy Note USB Board Replacement, Motherboard Assembly: étape 14, image 1 de 2 Samsung Galaxy Note USB Board Replacement, Motherboard Assembly: étape 14, image 2 de 2
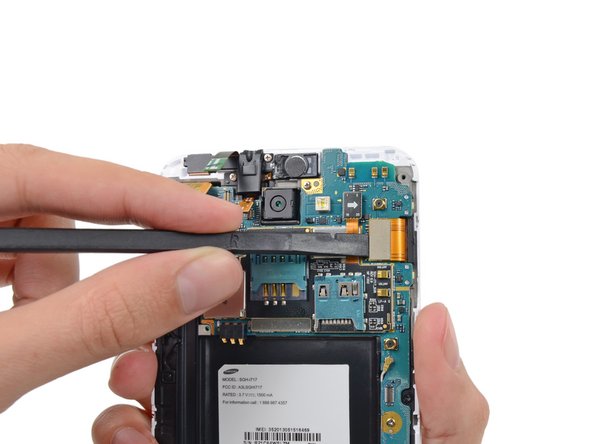
    • Use the flat end of a spudger to carefully disconnect the display cable connector.

    Demander à FixBot

    Ajouter un commentaire

  15. Samsung Galaxy Note USB Board Replacement: étape 15, image 1 de 3 Samsung Galaxy Note USB Board Replacement: étape 15, image 2 de 3 Samsung Galaxy Note USB Board Replacement: étape 15, image 3 de 3
    • Use a spudger to disconnect the front-facing camera assembly cable connector.

    • Disconnect the headphone jack/earpiece speaker assembly cable connector.

    • Disconnect the digitizer cable connector.

    Demander à FixBot

    Ajouter un commentaire

  16. Samsung Galaxy Note USB Board Replacement: étape 16, image 1 de 3 Samsung Galaxy Note USB Board Replacement: étape 16, image 2 de 3 Samsung Galaxy Note USB Board Replacement: étape 16, image 3 de 3
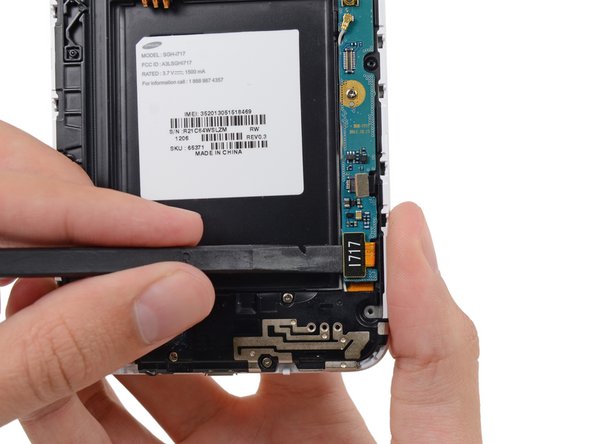
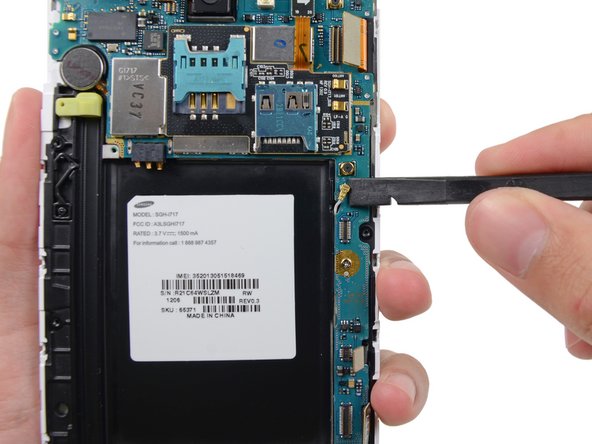
    • Disconnect the soft button cable connector with the flat end of a spudger.

    • Use a spudger to disconnect the USB board cable connector.

    • Disconnect the antenna cable connector.

    Demander à FixBot

    Ajouter un commentaire

  17. Samsung Galaxy Note USB Board Replacement: étape 17, image 1 de 1
    • Remove the two 3.4 mm Phillips #00 screws securing the motherboard to the display assembly.

    Demander à FixBot

    Ajouter un commentaire

  18. Samsung Galaxy Note USB Board Replacement: étape 18, image 1 de 2 Samsung Galaxy Note USB Board Replacement: étape 18, image 2 de 2
    • Remove the motherboard assembly from the display assembly.

    Demander à FixBot

    Ajouter un commentaire

  19. Samsung Galaxy Note USB Board Replacement, USB Board: étape 19, image 1 de 1
    • Remove the three 3 mm Phillips #00 screws securing the speaker enclosure to the front panel assembly.

    Demander à FixBot

    Ajouter un commentaire

  20. Samsung Galaxy Note USB Board Replacement: étape 20, image 1 de 1
    • Lift the speaker enclosure from the display assembly.

    Demander à FixBot

    Ajouter un commentaire

  21. Samsung Galaxy Note USB Board Replacement: étape 21, image 1 de 2 Samsung Galaxy Note USB Board Replacement: étape 21, image 2 de 2
    • Use the tip of a spudger to disconnect the antenna cable connector from the USB board.

    • Remove the antenna cable.

    Demander à FixBot

    Ajouter un commentaire

  22. Samsung Galaxy Note USB Board Replacement: étape 22, image 1 de 3 Samsung Galaxy Note USB Board Replacement: étape 22, image 2 de 3 Samsung Galaxy Note USB Board Replacement: étape 22, image 3 de 3
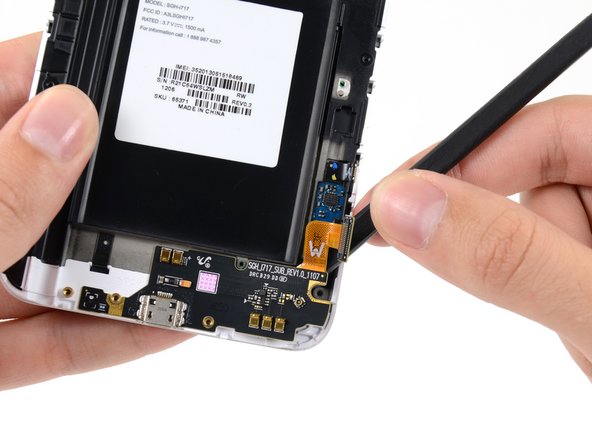
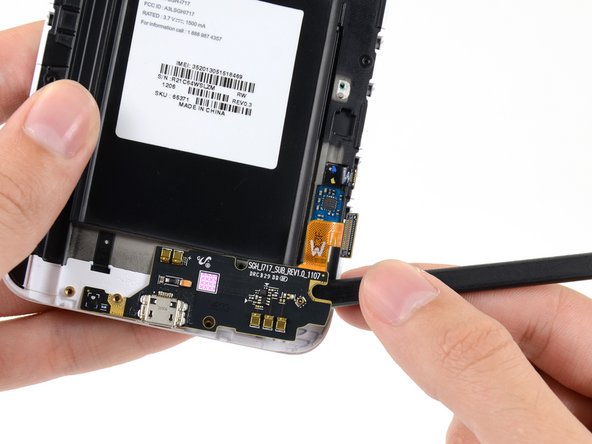
    • Push the flat end of a spudger under the USB board to separate it from the display assembly.

    • Insert the spudger at a shallow angle to avoid bending or damaging the USB board.

    Demander à FixBot

    Ajouter un commentaire

  23. Samsung Galaxy Note USB Board Replacement: étape 23, image 1 de 1
    • Remove the USB board.

    Demander à FixBot

    Ajouter un commentaire

Conclusion

To reassemble your device, follow these instructions in reverse order.

Annulation : je n'ai pas terminé ce tutoriel.

51 autres ont terminé cette réparation.

Sam Goldheart

Membre depuis le 10/18/12

477 673 Réputation

538 tutoriels rédigés

Équipe

iFixit Membre de l'équipe iFixit

Staff

123 membres

27 603 tutoriels rédigés

6 commentaires de tutoriel

Using the Guides on online and the PDF guides made this repair easy and quick!

Joe - Réponse Partager

It's not necessary to remove the motherboard (steps 17 and 18) to complete this repair. The flat flex running to the USB board can be easily slid out from under the motherboard with the motherboard still in position. Just omit steps 17 and 18 and the rest of the procedure works fine. I've done it twice.

Phil - Réponse Partager

Where in England could I buy the USB Board part?

Craig Pyle - Réponse Partager

USB board bought off ebay. Didnt need plastic opening tools, thumb nail worked easier than expected.

john dingley - Réponse Partager

It's not the Galaxy Note GT-N7000!

costantino - Réponse Partager

Ajouter un commentaire

Nombre de vues :

Dernières 24 heures : 0

7 derniers jours : 8

30 derniers jours : 35

Total : 25,108