Aller au contenu principal
Pour réparer ensemble - Je crée un compte

Samsung Galaxy Rush Display Replacement

Ce dont vous avez besoin

  1. Samsung Galaxy Rush Display Replacement, Rear Case: étape 1, image 1 de 2 Samsung Galaxy Rush Display Replacement, Rear Case: étape 1, image 2 de 2
    • Looking at the back of your phone, use your finger to remove back cover.

    Demander à FixBot

    Ajouter un commentaire

  2. Samsung Galaxy Rush Display Replacement: étape 2, image 1 de 2 Samsung Galaxy Rush Display Replacement: étape 2, image 2 de 2
    • Remove the battery.

    Demander à FixBot

    Ajouter un commentaire

  3. Samsung Galaxy Rush Display Replacement: étape 3, image 1 de 1
    • With a small phillips-head screw driver, remove the six screws holding the back panel in place.

    Demander à FixBot

    Ajouter un commentaire

  4. Samsung Galaxy Rush Display Replacement: étape 4, image 1 de 2 Samsung Galaxy Rush Display Replacement: étape 4, image 2 de 2
    • Use the pry tool to pry the back panel from the rest of the phone. Pry from the edge closest to the screen for simplicity.

    Demander à FixBot

    Ajouter un commentaire

  5. Samsung Galaxy Rush Display Replacement, Connectors: étape 5, image 1 de 2 Samsung Galaxy Rush Display Replacement, Connectors: étape 5, image 2 de 2
    Outil utilisé dans cette étape :
    Tweezers
    $4.99
    • Using tweezers, gently lift connectors from motherboard.

    • A connector will be on the upper left

    • The second connector is located towards the top of the phone. Above the camera. It comes off with ease.

    Demander à FixBot

    Ajouter un commentaire

  6. Samsung Galaxy Rush Display Replacement: étape 6, image 1 de 2 Samsung Galaxy Rush Display Replacement: étape 6, image 2 de 2
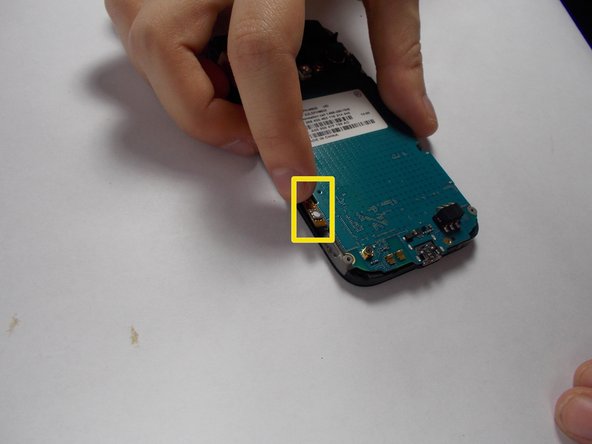
    • Use the tweezers to carefully remove the 2 adhesive orange ribbons.

    • These stay attached to the motherboard so be careful not to break them.

    • They are on the side of the phone.

    Demander à FixBot

    Ajouter un commentaire

  7. Samsung Galaxy Rush Display Replacement: étape 7, image 1 de 1
    • Use a philips-head screwdriver to remove the single screw on the bottom of the phone. Located to the right of the charging port.

    Demander à FixBot

    Ajouter un commentaire

  8. Samsung Galaxy Rush Display Replacement: étape 8, image 1 de 1
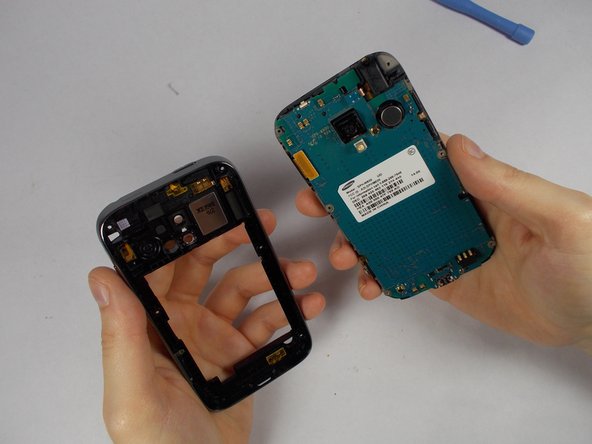
    • Lift the motherboard upwards separating it from your screen.

    Demander à FixBot

    Ajouter un commentaire

Conclusion

To reassemble your device, follow these instructions in reverse order.

Annulation : je n'ai pas terminé ce tutoriel.

Kenny Afiadata

Membre depuis le 10/20/14

34 Réputation

3 tutoriels rédigés

Équipe

UMass Dartmouth, Team 6-4, Vijaybhaskar Fall 2014 Membre de l'équipe UMass Dartmouth, Team 6-4, Vijaybhaskar Fall 2014

UMASSD-VIJAYBHASKAR-F14S6G4

3 membres

10 tutoriels rédigés

2 commentaires de tutoriel

where to get mother board

Braulio P - Réponse Partager

where to get mother board really cheap

Braulio P - Réponse Partager

Ajouter un commentaire

Nombre de vues :

Dernières 24 heures : 0

7 derniers jours : 7

30 derniers jours : 35

Total : 1,089