Aller au contenu principal
Pour réparer ensemble - Je crée un compte

Samsung Galaxy S II T989 Front Camera Replacement

Ce dont vous avez besoin

  1. Samsung Galaxy S II T989 Front Camera Replacement, Rear Cover: étape 1, image 1 de 3 Samsung Galaxy S II T989 Front Camera Replacement, Rear Cover: étape 1, image 2 de 3 Samsung Galaxy S II T989 Front Camera Replacement, Rear Cover: étape 1, image 3 de 3
    • To remove the rear cover, locate the tab indicated by the red outline.

    • Using your fingernail, gently pry the rear cover.

    Demander à FixBot

    Ajouter un commentaire

  2. Samsung Galaxy S II T989 Front Camera Replacement, Battery: étape 2, image 1 de 3 Samsung Galaxy S II T989 Front Camera Replacement, Battery: étape 2, image 2 de 3 Samsung Galaxy S II T989 Front Camera Replacement, Battery: étape 2, image 3 de 3
    • Turn off the phone before removing battery.

    • The battery can be removed from the phone by applying an upwards pressure to the bottom right edge of the battery, as indicated by the red rectangle.

    • After the battery starts to lift upwards, use your hand to hold and remove it.

    Demander à FixBot

    Ajouter un commentaire

  3. Samsung Galaxy S II T989 Front Camera Replacement, SIM Card: étape 3, image 1 de 3 Samsung Galaxy S II T989 Front Camera Replacement, SIM Card: étape 3, image 2 de 3 Samsung Galaxy S II T989 Front Camera Replacement, SIM Card: étape 3, image 3 de 3
    • The SIM card is the small white rectangle located in the red rectangle.

    • To remove the SIM card, press down on the card and slide it to the left, until it no longer is in contact with the metal.

    Demander à FixBot

    Ajouter un commentaire

  4. Samsung Galaxy S II T989 Front Camera Replacement, Media Card: étape 4, image 1 de 3 Samsung Galaxy S II T989 Front Camera Replacement, Media Card: étape 4, image 2 de 3 Samsung Galaxy S II T989 Front Camera Replacement, Media Card: étape 4, image 3 de 3
    • The media card is found inside the area indicated with the red rectangle. The card itself is small and black making it hard to easily see.

    • After locating the card, gently use your fingers to slide the card to the right, until the card is no longer in contact with the metal.

    Demander à FixBot

    Ajouter un commentaire

  5. Samsung Galaxy S II T989 Front Camera Replacement, Inner Plate: étape 5, image 1 de 3 Samsung Galaxy S II T989 Front Camera Replacement, Inner Plate: étape 5, image 2 de 3 Samsung Galaxy S II T989 Front Camera Replacement, Inner Plate: étape 5, image 3 de 3
    Outil utilisé dans cette étape :
    Magnetic Project Mat
    $19.95
    • The inner plate is held on by six screws that are 1/16 of an inch (1.6 mm).

    • Remove the screws with a Philips head precision screwdriver.

    • Place all screws someplace that they will not easily be lost, such as a magnetic mat or a plastic bag.

    Demander à FixBot

    Ajouter un commentaire

  6. Samsung Galaxy S II T989 Front Camera Replacement: étape 6, image 1 de 3 Samsung Galaxy S II T989 Front Camera Replacement: étape 6, image 2 de 3 Samsung Galaxy S II T989 Front Camera Replacement: étape 6, image 3 de 3
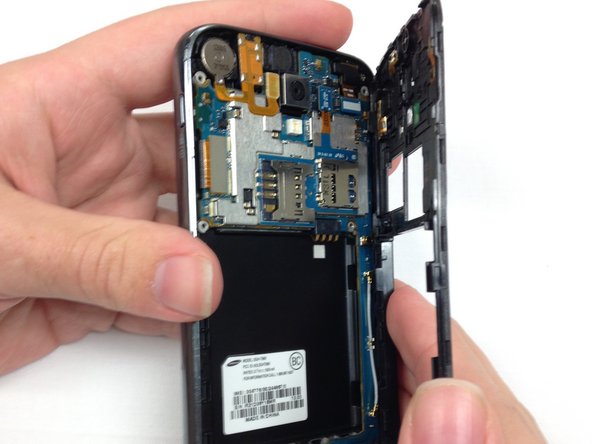
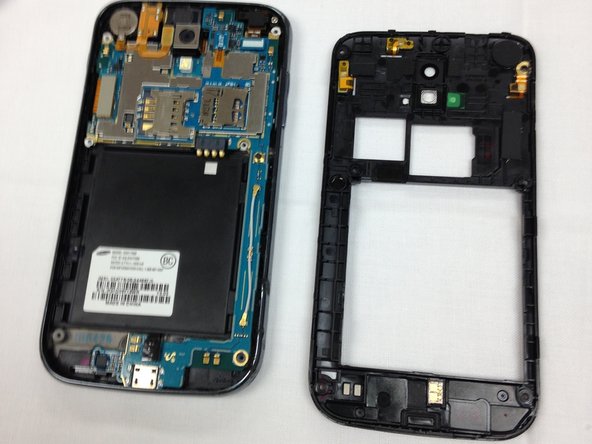
    • When removing the inner plate, place device on grounded surface or use anti static wrist band.

    • After the screws have been removed, the only thing holding the inner plate in is several plastic tabs built into the frame of the phone.

    • Firmly pinch the edge, as shown in the picture, and pull the plate away from the frame.

    • If you cannot get a grip on the inner plate, consider using the spudger to pry and lift the plate out.

    Demander à FixBot

    Ajouter un commentaire

  7. Samsung Galaxy S II T989 Front Camera Replacement, Motherboard: étape 7, image 1 de 3 Samsung Galaxy S II T989 Front Camera Replacement, Motherboard: étape 7, image 2 de 3 Samsung Galaxy S II T989 Front Camera Replacement, Motherboard: étape 7, image 3 de 3
    • The motherboard holds many delicate components, improper handling can result in the destruction of these components.

    • To remove the motherboard, first undo the three tabs, indicated by the red outlines, using either a small flat-head screwdriver or your thumbnail.

    • In addition to the three at the top of the motherboard, there is a fourth tab at the bottom of the phone that will need to be opened as well.

    Demander à FixBot

    Ajouter un commentaire

  8. Samsung Galaxy S II T989 Front Camera Replacement: étape 8, image 1 de 2 Samsung Galaxy S II T989 Front Camera Replacement: étape 8, image 2 de 2
    • After all the tabs are unplugged, carefully apply pressure to the edges of the motherboard and lift upwards.

    • If the motherboard does not lift up, you may need to wiggle it left and right to free the corners from the areas where the case screws were placed.

    Demander à FixBot

    Ajouter un commentaire

  9. Samsung Galaxy S II T989 Front Camera Replacement, Front Camera: étape 9, image 1 de 2 Samsung Galaxy S II T989 Front Camera Replacement, Front Camera: étape 9, image 2 de 2
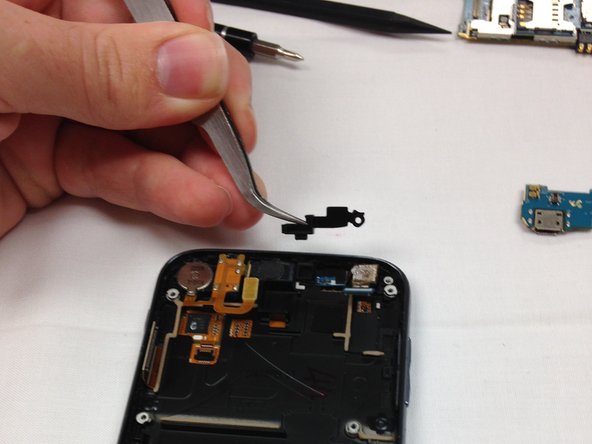
    • To remove the front camera we need to first remove the screw indicated by the red circle and the cover plate. The screw size is 1/16 of an inch (1.6 mm)

    • After the screw has been removed, the cover plate can be removed.

    Demander à FixBot

    Ajouter un commentaire

  10. Samsung Galaxy S II T989 Front Camera Replacement: étape 10, image 1 de 2 Samsung Galaxy S II T989 Front Camera Replacement: étape 10, image 2 de 2
    Outil utilisé dans cette étape :
    Tweezers
    $4.99
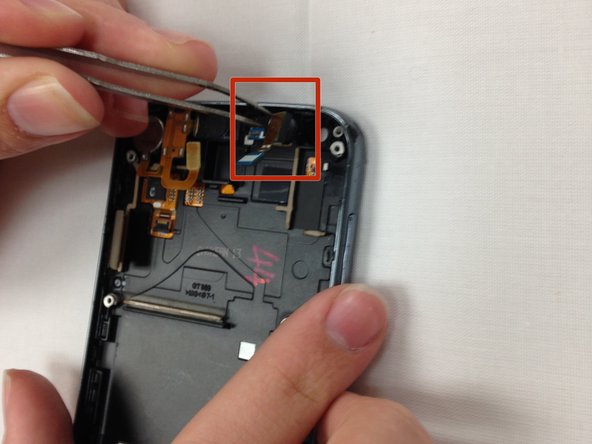
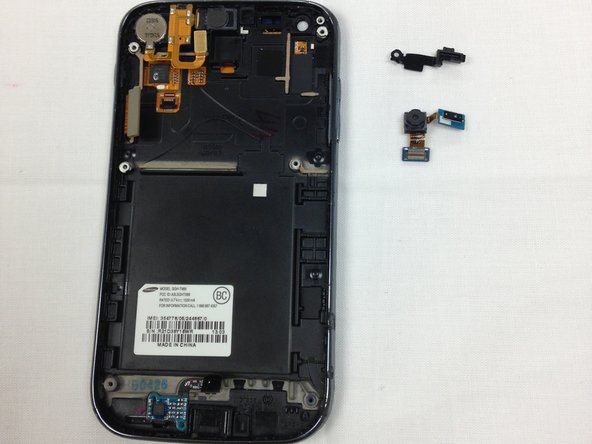
    • Use the tweezers to remove the plastic bar which holds the camera in place.

    Demander à FixBot

    Ajouter un commentaire

  11. Samsung Galaxy S II T989 Front Camera Replacement: étape 11, image 1 de 3 Samsung Galaxy S II T989 Front Camera Replacement: étape 11, image 2 de 3 Samsung Galaxy S II T989 Front Camera Replacement: étape 11, image 3 de 3
    • The camera is now exposed.

    • Carefully lift the camera out of the phone with the tweezers.

    Demander à FixBot

    Ajouter un commentaire

Conclusion

To reassemble your device, follow these instructions in reverse order.

Annulation : je n'ai pas terminé ce tutoriel.

3 autres ont terminé cette réparation.

Joshua King

Membre depuis le 03/26/14

1 378 Réputation

9 tutoriels rédigés

Équipe

Clemson, Team 1-5, Benson Spring 2014 Membre de l'équipe Clemson, Team 1-5, Benson Spring 2014

CLEM-BENSON-S14S1G5

4 membres

27 tutoriels rédigés

0 commentaires de tutoriel

Ajouter un commentaire

Nombre de vues :

Dernières 24 heures : 0

7 derniers jours : 11

30 derniers jours : 27

Total : 2,112