Aller au contenu principal

Samsung Galaxy S5 Fingerprint Reader Replacement

Tutoriel Archivé
Ce tutoriel est conservé uniquement à des fins de suivis historiques. Utilisez la version actuelle du tutoriel pour effectuer votre réparation.

Ce dont vous avez besoin

  1. Samsung Galaxy S5 Fingerprint Reader Replacement, Display Assembly: étape 1, image 1 de 3 Samsung Galaxy S5 Fingerprint Reader Replacement, Display Assembly: étape 1, image 2 de 3 Samsung Galaxy S5 Fingerprint Reader Replacement, Display Assembly: étape 1, image 3 de 3
    • Use a plastic opening tool to pry up the plastic midframe connector panel.

    • Remove the connector panel with a pair of tweezers.

    • There should be enough adhesive to readhere the panel upon reassembly, otherwise use a small amount of double-stick tape.

  2. Samsung Galaxy S5 Fingerprint Reader Replacement: étape 2, image 1 de 2 Samsung Galaxy S5 Fingerprint Reader Replacement: étape 2, image 2 de 2
    • Use the sharp tip of a spudger to pry the home button cable connector straight up off its socket.

  3. Samsung Galaxy S5 Fingerprint Reader Replacement: étape 3, image 1 de 2 Samsung Galaxy S5 Fingerprint Reader Replacement: étape 3, image 2 de 2
    • In the following steps you will be using an iOpener to warm the adhesive affixing the display assembly to the rest of the phone. This will allow for a safer, easier screen removal. For proper iOpener use, follow our iOpener heating guide, make sure to pay attention to all warnings.

    • Place a heated iOpener on the left side of the phone for at least 90 seconds.

    • Reheat the iOpener and place it on the right half of the phone.

  4. Samsung Galaxy S5 Fingerprint Reader Replacement: étape 4, image 1 de 2 Samsung Galaxy S5 Fingerprint Reader Replacement: étape 4, image 2 de 2
    • In the following steps you will be using an opening pick to separate the adhesive securing the front panel glass. Only pry where directed. If you experience resistance, stop sliding the opening pick and reapply heat.

    • Insert the edge of an opening pick underneath the bottom right side of the front glass.

  5. Samsung Galaxy S5 Fingerprint Reader Replacement: étape 5, image 1 de 3 Samsung Galaxy S5 Fingerprint Reader Replacement: étape 5, image 2 de 3 Samsung Galaxy S5 Fingerprint Reader Replacement: étape 5, image 3 de 3
    • Slide the opening pick up along the right side of the display.

  6. Samsung Galaxy S5 Fingerprint Reader Replacement: étape 6, image 1 de 3 Samsung Galaxy S5 Fingerprint Reader Replacement: étape 6, image 2 de 3 Samsung Galaxy S5 Fingerprint Reader Replacement: étape 6, image 3 de 3
    • Carefully slide the pick around the corner, stopping before the speaker grille at the top of the phone.

  7. Samsung Galaxy S5 Fingerprint Reader Replacement: étape 7, image 1 de 3 Samsung Galaxy S5 Fingerprint Reader Replacement: étape 7, image 2 de 3 Samsung Galaxy S5 Fingerprint Reader Replacement: étape 7, image 3 de 3
    • The adhesive securing the top of the phone is only a narrow strip above the earpiece speaker. Slide the pick along the top of the speaker to avoid damaging internal components.

    • Slide the opening pick across the top of the phone, being very careful not to insert the pick too deeply.

  8. Samsung Galaxy S5 Fingerprint Reader Replacement: étape 8, image 1 de 3 Samsung Galaxy S5 Fingerprint Reader Replacement: étape 8, image 2 de 3 Samsung Galaxy S5 Fingerprint Reader Replacement: étape 8, image 3 de 3
    • Carefully slide the pick around the upper left corner.

    • If you encounter any resistance from cooling adhesive, reapply a heated iOpener to the left side of the phone.

  9. Samsung Galaxy S5 Fingerprint Reader Replacement: étape 9, image 1 de 3 Samsung Galaxy S5 Fingerprint Reader Replacement: étape 9, image 2 de 3 Samsung Galaxy S5 Fingerprint Reader Replacement: étape 9, image 3 de 3
    • Slide the opening pick down along the left half of the phone stopping at the lower left corner.

  10. Samsung Galaxy S5 Fingerprint Reader Replacement: étape 10, image 1 de 2 Samsung Galaxy S5 Fingerprint Reader Replacement: étape 10, image 2 de 2
    • Slide the opening pick all the way to the bottom left corner of the phone, making sure it is securely placed.

    • In the following step you will be placing an iOpener over the home button end of the phone, you won't want your opening pick to slip out.

  11. Samsung Galaxy S5 Fingerprint Reader Replacement: étape 11, image 1 de 1
    • Place a reheated iOpener over the bottom portion of the display assembly.

    • There are delicate components in this portion of the phone, you want to ensure the adhesive is warm and easy to loosen to protect the phone.

  12. Samsung Galaxy S5 Fingerprint Reader Replacement: étape 12, image 1 de 3 Samsung Galaxy S5 Fingerprint Reader Replacement: étape 12, image 2 de 3 Samsung Galaxy S5 Fingerprint Reader Replacement: étape 12, image 3 de 3
    • The bottom end of the phone contains the soft button and home button ribbon cables. If you insert the opening pick too far into the phone you risk cutting these cables.

    • Slide the very end of the opening pick across the bottom edge of the display to separate the last of the remaining adhesive.

  13. Samsung Galaxy S5 Fingerprint Reader Replacement: étape 13, image 1 de 2 Samsung Galaxy S5 Fingerprint Reader Replacement: étape 13, image 2 de 2
    • Twist the opening pick to detach the glass from the phone.

    • If the front panel does not detach easily, it may require additional adhesive cutting.

  14. Samsung Galaxy S5 Fingerprint Reader Replacement: étape 14, image 1 de 2 Samsung Galaxy S5 Fingerprint Reader Replacement: étape 14, image 2 de 2
    • If the front panel is not easily freed, the adhesive on the soft button cable may need to be separated.

    • These cables are thin and easily damaged, therefore be certain you are only peeling them off the display assembly and not lacerating them.

    • Insert an opening pick under the soft button icons on the display and pry the button cables down off the inside of the front panel.

  15. Samsung Galaxy S5 Fingerprint Reader Replacement: étape 15, image 1 de 2 Samsung Galaxy S5 Fingerprint Reader Replacement: étape 15, image 2 de 2
    • Slightly lift, but do not remove, the home button end of display assembly.

    • Do not remove the front panel entirely. It is still attached by a connector.

    • If you are reusing the home button flex cable, be careful not to sever the cable from the home button. Adhesive can cause the cable to rip apart from the home button. While the home button will still work, the fingerprint scanner will not.

  16. Samsung Galaxy S5 Fingerprint Reader Replacement: étape 16, image 1 de 3 Samsung Galaxy S5 Fingerprint Reader Replacement: étape 16, image 2 de 3 Samsung Galaxy S5 Fingerprint Reader Replacement: étape 16, image 3 de 3
    • Use the sharp tip of a spudger to lift the front panel assembly cable connector straight up off its socket on the motherboard.

    • Safely remove the front panel assembly from phone.

    • If your replacement display did not come with a home button, follow our Home Button Assembly guide to transfer your old button over to the new display, or install a new button.

  17. Samsung Galaxy S5 Fingerprint Reader Replacement, Replacing a torn home button cable: étape 17, image 1 de 2 Samsung Galaxy S5 Fingerprint Reader Replacement, Replacing a torn home button cable: étape 17, image 2 de 2
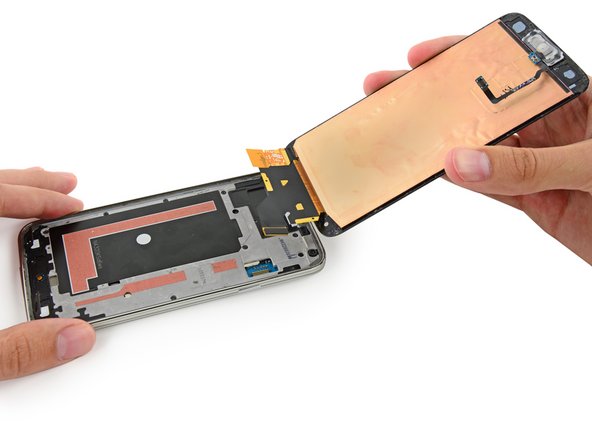
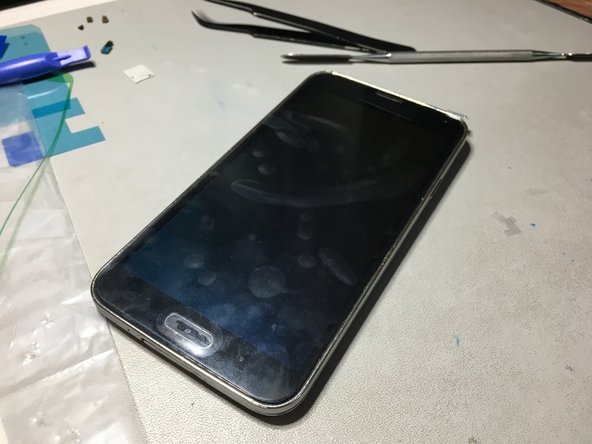
    • For this guide I am demonstrating on a Samsung Galaxy S5 which had the fingerprint reader cable for the home button torn.

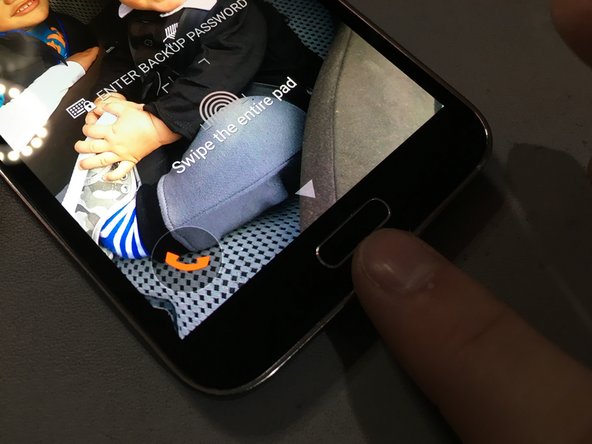
    • The home button 'press' is still functional with the underlying button (see second photo), but this guide restores your fingerprint scanner.

  18. Samsung Galaxy S5 Fingerprint Reader Replacement, Home button cable socket: étape 18, image 1 de 1
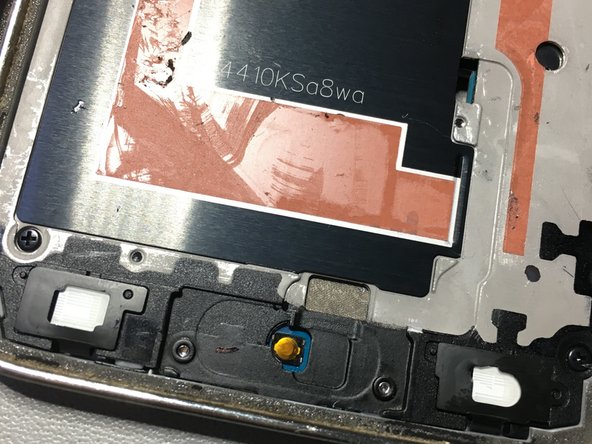
    • Make sure there isn't anything still connected in this socket.

  19. Samsung Galaxy S5 Fingerprint Reader Replacement, Remove remaining adhesive: étape 19, image 1 de 1
    • Scrape the remaining adhesive from the edges of the midframe using a plastic pry tool.

  20. Samsung Galaxy S5 Fingerprint Reader Replacement, Home button cable: étape 20, image 1 de 1
  21. Samsung Galaxy S5 Fingerprint Reader Replacement, Attaching the home button: étape 21, image 1 de 2 Samsung Galaxy S5 Fingerprint Reader Replacement, Attaching the home button: étape 21, image 2 de 2
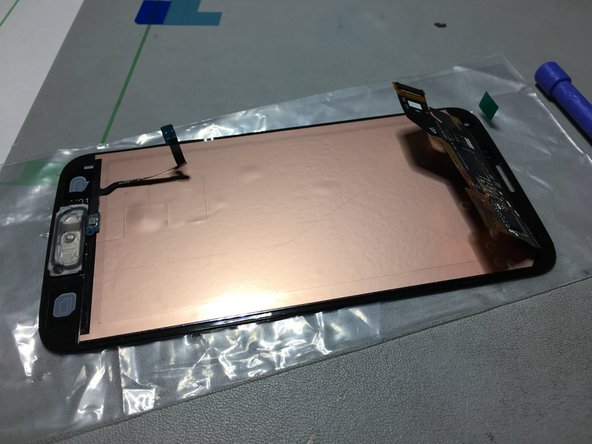
    • Attach the home button to the screen assembly. In this guide I am also installing a new screen assembly.

  22. Samsung Galaxy S5 Fingerprint Reader Replacement, Preparing the display: étape 22, image 1 de 2 Samsung Galaxy S5 Fingerprint Reader Replacement, Preparing the display: étape 22, image 2 de 2
    • Prepare your screen assembly by removing adhesive film. If you're not replacing the screen then you can skip this step.

  23. Samsung Galaxy S5 Fingerprint Reader Replacement, Display and home button cable: étape 23, image 1 de 2 Samsung Galaxy S5 Fingerprint Reader Replacement, Display and home button cable: étape 23, image 2 de 2
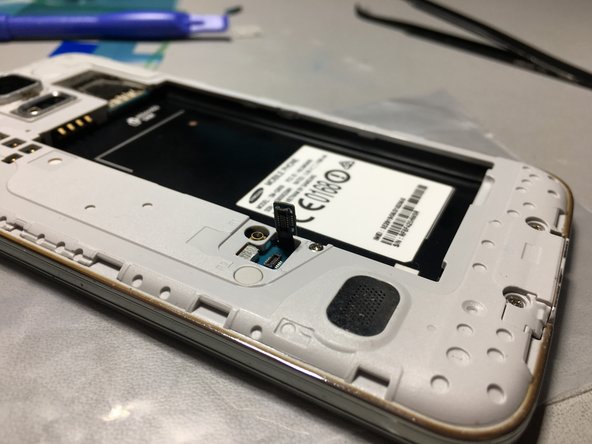
    • Connect the display cable.

    • Carefully line up the home button cable so that it comes through to the other side.

  24. Samsung Galaxy S5 Fingerprint Reader Replacement, Fitting the display: étape 24, image 1 de 3 Samsung Galaxy S5 Fingerprint Reader Replacement, Fitting the display: étape 24, image 2 de 3 Samsung Galaxy S5 Fingerprint Reader Replacement, Fitting the display: étape 24, image 3 de 3
    • Plug the home button cable into the socket.

    • Stick the screen assembly back down to the rest of the phone.

  25. Samsung Galaxy S5 Fingerprint Reader Replacement, Battery: étape 25, image 1 de 2 Samsung Galaxy S5 Fingerprint Reader Replacement, Battery: étape 25, image 2 de 2
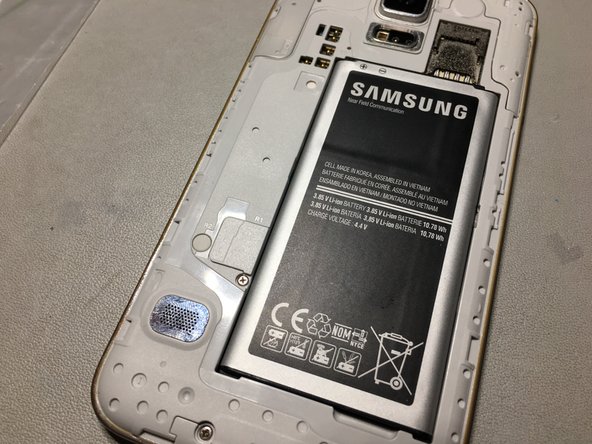
    • Reinstall the battery.

    • Remember to place the plastic panel back on the phone.

  26. Samsung Galaxy S5 Fingerprint Reader Replacement, Back cover: étape 26, image 1 de 1
    • Press the back cover back onto the phone.

  27. Samsung Galaxy S5 Fingerprint Reader Replacement, Power on and test: étape 27, image 1 de 2 Samsung Galaxy S5 Fingerprint Reader Replacement, Power on and test: étape 27, image 2 de 2
    • Power on the device and test the new fingerprint scanner.

Conclusion

If you have followed this guide correctly you should now have a functional fingerprint reader on your Samsung Galaxy S5.

18 autres ont terminé cette réparation.

Patrick Lee

Membre depuis le 03/10/13

6 968 Réputation

2 tutoriels rédigés

4 commentaires

Good guide, but how to apply new adhesive for the lcd display on the midframe ?

Arnoud - Réponse

It should already be attached to the LCD, if not then you can purchase the adhesive and attach it to the LCD yourself

Patrick Lee -

I would like to know whether there is a pin-compatible home button to replace the original Galaxy S5 home button to _physically_ get rid of the fingerprint reader unit and solely keep it as a simple and dumb home button.

Thanks in advance.

E.Remarque - Réponse

It should be noted that unlike replacing an iPhone Home Button, you can reprogram a replacement Galaxy Fingerprint scanner.

Andrew - Réponse

Ajouter un commentaire

Nombre de vues :

Dernières 24 heures : 0

7 derniers jours : 0

30 derniers jours : 0

Total : 8,981