Aller au contenu principal
Pour réparer ensemble - Je crée un compte

Samsung Galaxy S8 Active Battery Replacement

Ce dont vous avez besoin

  1. Samsung Galaxy S8 Active Battery Replacement, SIM Tray/Card: étape 1, image 1 de 2 Samsung Galaxy S8 Active Battery Replacement, SIM Tray/Card: étape 1, image 2 de 2
    • Insert and gently push the SIM card ejector tool (or an unfolded paperclip) into the small hole on the left side of the top edge of the phone.

    • Press gently to eject the SIM tray.

    • Remove the SIM card tray from the device.

    • To reinsert the SIM card tray, orient the SIM card with the gold contacts facing up and the notch to the bottom right. Reinsert the SIM card by pressing the card gently into the SIM tray slot.

    Demander à FixBot

    Ajouter un commentaire

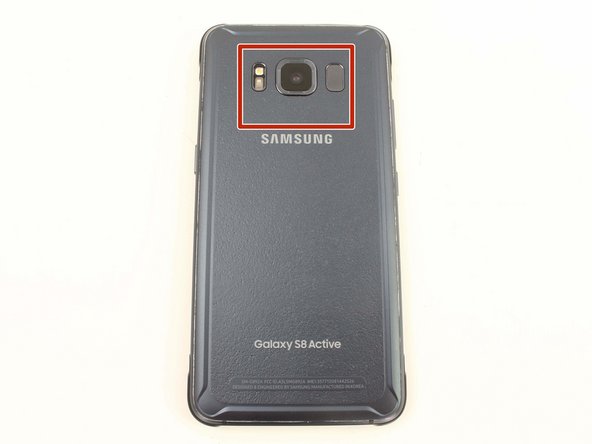
  2. Samsung Galaxy S8 Active Battery Replacement, NFC Antenna and Charging Coil Assembly: étape 2, image 1 de 3 Samsung Galaxy S8 Active Battery Replacement, NFC Antenna and Charging Coil Assembly: étape 2, image 2 de 3 Samsung Galaxy S8 Active Battery Replacement, NFC Antenna and Charging Coil Assembly: étape 2, image 3 de 3
    • Removing the back cover of the S8 Active will compromise its waterproof seals. Have replacement adhesive on hand before you proceed, or be sure to avoid exposure to liquid if you do not replace the adhesive when you reassemble the device.

    • Remove four black 3mm screws from the outside edges of the device that hold the rubber bumpers in place using the TR6 Torx Security Screwdriver.

    • Take off the rubber bumpers from the top and bottom edges of the device.

    Demander à FixBot

    Ajouter un commentaire

  3. Samsung Galaxy S8 Active Battery Replacement: étape 3, image 1 de 1
    • Use a heat gun to lightly heat the edges of the back to soften the adhesive that connects the back cover to the rest of the frame.

    • An iFixit iOpener, hair dryer, or hot plate can also be used to heat the edges.

    • Using a heat gun, hair dryer, or hot plate will make the metal frame rather hot to the touch, so handle it with care.

    • Be careful not to overheat the device –the OLED display, battery and other internal parts can be damaged by excessive heat. Approximately one minute should be enough to soften the adhesive.

    Demander à FixBot

    Ajouter un commentaire

  4. Samsung Galaxy S8 Active Battery Replacement: étape 4, image 1 de 3 Samsung Galaxy S8 Active Battery Replacement: étape 4, image 2 de 3 Samsung Galaxy S8 Active Battery Replacement: étape 4, image 3 de 3
    • Insert the Jimmy tool under the edge of the back cover.

    • Because of the texture of the back cover, a suction handle does not provide any grip to help lift the back cover.

    • Once the Jimmy tool is under the edge of the cover, insert an opening pick into the seam to prevent the seam from closing if the Jimmy tool slips or is accidentally removed.

    • Cut slowly around the top section of the device and be careful to avoid damaging the cables for the fingerprint sensor and camera. Avoid prying too far into the top of the device to protect the fingerprint sensor.

    • Slide the Jimmy tool down the sides of the device, separating the adhesive.

    Demander à FixBot

    Ajouter un commentaire

  5. Samsung Galaxy S8 Active Battery Replacement: étape 5, image 1 de 1
    • Use the opening pick to slice through any remaining adhesive.

    • If you have replacement adhesive strips, remove any remaining adhesive from the device frame using the Jimmy tool.

    • Open the back cover slightly to the point that you can see the fingerprint sensor flex cable connector.

    • The fingerprint sensor cable connects towards the top of the phone near the front-facing camera. To avoid tearing the cable, pull the back cover off gently.

    Demander à FixBot

    Ajouter un commentaire

  6. Samsung Galaxy S8 Active Battery Replacement: étape 6, image 1 de 2 Samsung Galaxy S8 Active Battery Replacement: étape 6, image 2 de 2
    • Slowly flip the cover over and set it down on top of the rest of the device.

    • Disconnect the fingerprint flex cable using the flat end of a spudger.

    • Remove the back cover.

    • To reconnect the fingerprint sensor cable during reassembly, angle the back cover until the flex cable lines up over its socket. Use the flat end of a spudger to snap the cable in place by gently pressing straight down.

    Demander à FixBot

    Ajouter un commentaire

  7. Samsung Galaxy S8 Active Battery Replacement: étape 7, image 1 de 3 Samsung Galaxy S8 Active Battery Replacement: étape 7, image 2 de 3 Samsung Galaxy S8 Active Battery Replacement: étape 7, image 3 de 3
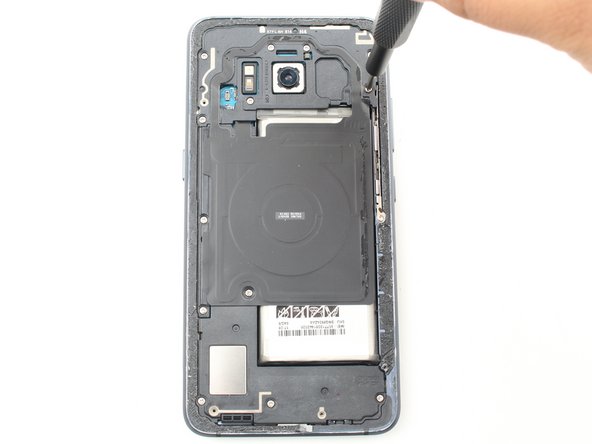
    • Remove eleven 3.5 mm screws using a Phillips #00 Screwdriver.

    • Remove two 2mm screws using a Phillips #00 Screwdriver.

    Demander à FixBot

    Ajouter un commentaire

  8. Samsung Galaxy S8 Active Battery Replacement: étape 8, image 1 de 2 Samsung Galaxy S8 Active Battery Replacement: étape 8, image 2 de 2
    • Remove the NFC antenna and charging coil assembly using the flat end of a spudger.

    Demander à FixBot

    Ajouter un commentaire

  9. Samsung Galaxy S8 Active Battery Replacement, Loudspeaker Assembly: étape 9, image 1 de 3 Samsung Galaxy S8 Active Battery Replacement, Loudspeaker Assembly: étape 9, image 2 de 3 Samsung Galaxy S8 Active Battery Replacement, Loudspeaker Assembly: étape 9, image 3 de 3
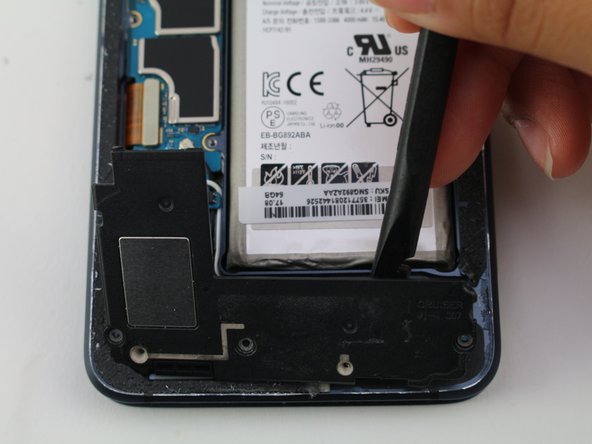
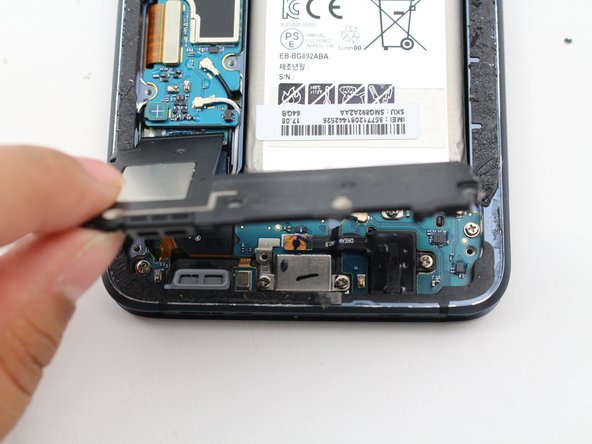
    • Remove the loudspeaker assembly using the flat end of a spudger.

    Demander à FixBot

    Ajouter un commentaire

  10. Samsung Galaxy S8 Active Battery Replacement, Battery: étape 10, image 1 de 2 Samsung Galaxy S8 Active Battery Replacement, Battery: étape 10, image 2 de 2
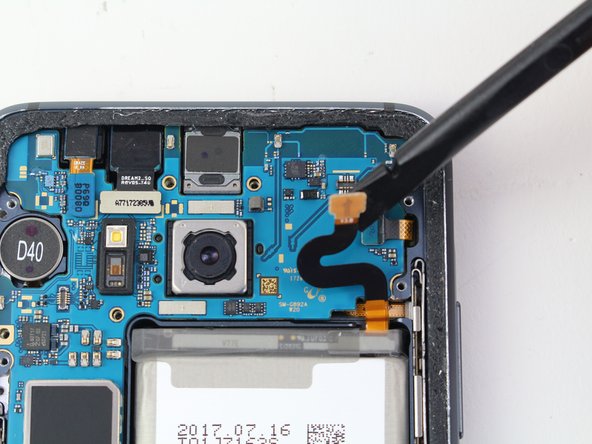
    • Use the flat end of a spudger to disconnect the battery flex cable.

    Demander à FixBot

    Ajouter un commentaire

  11. Samsung Galaxy S8 Active Battery Replacement: étape 11, image 1 de 1
    • Place the heated iOpener across the top of the battery for approximately three minutes to soften the adhesive holding the battery to the device.

    • If you have multiple iOpeners, it is recommended to also put one on the screen side of the battery.

    • Alternatively, apply 1-2 drops of high-concentration (>90%) isopropyl alcohol under each corner of the battery and allow it to penetrate for several minutes to help weaken the adhesive.

    • Using too much alcohol can damage the display.

    • A hair dryer or heat gun can also be used to soften the adhesive but be careful to not overheat the battery. Also, the hair dryer/heat gun will make the metal frame rather hot to the touch, so handle it with care.

    Demander à FixBot

    Ajouter un commentaire

  12. Samsung Galaxy S8 Active Battery Replacement: étape 12, image 1 de 2 Samsung Galaxy S8 Active Battery Replacement: étape 12, image 2 de 2
    • Use the flat end of a spudger to carefully pry up on the bottom of the battery with firm, steady pressure until the adhesive separates.

    • The adhesive that holds down the battery is industrial grade and is VERY difficult to separate.

    • If you used isopropyl alcohol, wait ten minutes before installing the new battery to allow the alcohol to completely evaporate.

    Demander à FixBot

    Ajouter un commentaire

Conclusion

To reassemble your device, follow these instructions in reverse order.

Annulation : je n'ai pas terminé ce tutoriel.

34 autres ont terminé cette réparation.

Erik Mauk

Membre depuis le 01/24/19

1 519 Réputation

6 tutoriels rédigés

Équipe

Cal Poly, Team S2-G1, White Winter 2019 Membre de l'équipe Cal Poly, Team S2-G1, White Winter 2019

CPSU-WHITE-W19S2G1

3 membres

22 tutoriels rédigés

9 commentaires de tutoriel

Can I buy all of the parts on ifixit?

mikeg216 - Réponse Partager

Where can I order the batter

walikossovi - Réponse Partager

I need to do this repair. Can’t seem to find the battery on here.

jeremy wren - Réponse Partager

Nice guide!

I still managed to rip the fingerprint cable tho ¯\_(ツ)_/¯

Somil Joshi - Réponse Partager

I completed this, the hardest parts were: 1. When prying up the battery, the back of the screen is directly under it! Any nicks or scratches will completely damage the screen! yikes. 2. when going back through and replacing the step 8 part, make sure the pieces are completely in line and the screws are not even a tiny bit crooked.

Thanks for the guide!

Bree - Réponse Partager

Ajouter un commentaire

Nombre de vues :

Dernières 24 heures : 2

7 derniers jours : 16

30 derniers jours : 98

Total : 25,846