Aller au contenu principal

Samsung Galaxy SIII Mini VE Rear Camera Replacement

Ce dont vous avez besoin

  1. Samsung Galaxy SIII Mini VE Rear Camera Replacement, Removing Rear Casing: étape 1, image 1 de 3 Samsung Galaxy SIII Mini VE Rear Camera Replacement, Removing Rear Casing: étape 1, image 2 de 3 Samsung Galaxy SIII Mini VE Rear Camera Replacement, Removing Rear Casing: étape 1, image 3 de 3
    • Flip your phone so you are facing the back.

    • Locate the notch at the top and gently use your finger or an opening tool to remove the rear casing.

  2. Samsung Galaxy SIII Mini VE Rear Camera Replacement, Removing Battery: étape 2, image 1 de 2 Samsung Galaxy SIII Mini VE Rear Camera Replacement, Removing Battery: étape 2, image 2 de 2
    • Use your finger or an opening tool to pry the battery out of the phone.

  3. Samsung Galaxy SIII Mini VE Rear Camera Replacement, Removing Screws: étape 3, image 1 de 1
    • Use the Phillips #000 Screwdriver to remove the 10, 4mm screws holding the plastic frame in place.

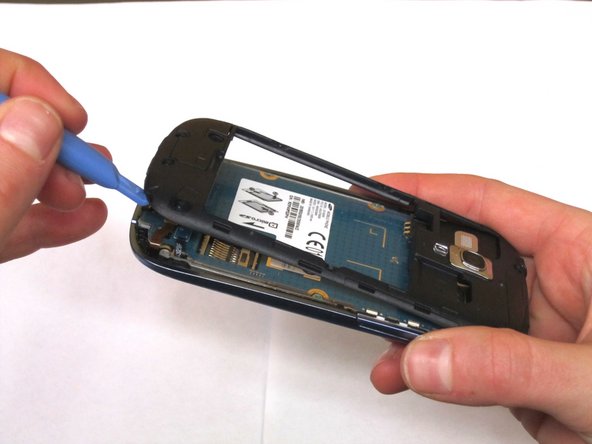
  4. Samsung Galaxy SIII Mini VE Rear Camera Replacement: étape 4, image 1 de 2 Samsung Galaxy SIII Mini VE Rear Camera Replacement: étape 4, image 2 de 2
    • Using an opening tool, gently separate the plastic framing from the phone.

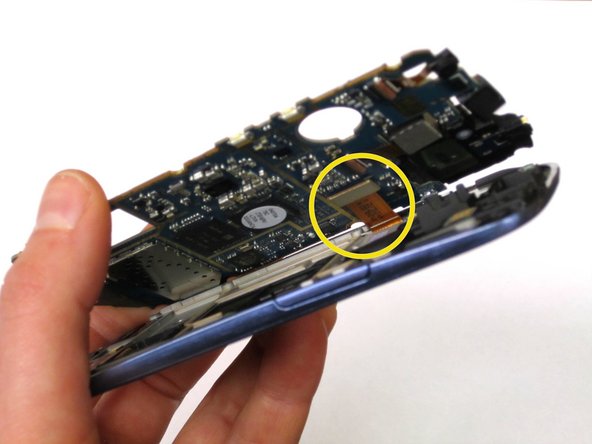
  5. Samsung Galaxy SIII Mini VE Rear Camera Replacement, Removing Circuit Board: étape 5, image 1 de 3 Samsung Galaxy SIII Mini VE Rear Camera Replacement, Removing Circuit Board: étape 5, image 2 de 3 Samsung Galaxy SIII Mini VE Rear Camera Replacement, Removing Circuit Board: étape 5, image 3 de 3
    • Unhook the two electrical connections at the bottom of the phone using your fingernail or a spudger.

    • Next, use the spudger and tweezers to remove the speaker at the top of the phone.

    • Once the 3 components have detached, the circuit board should release from the phone except for 1 connection on the underside.

    • Detach this connection using the spudger.

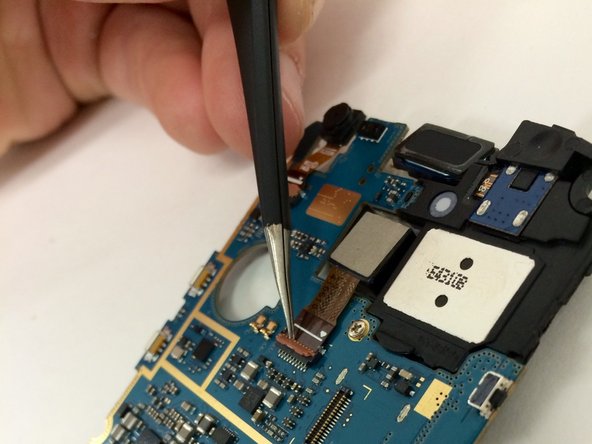
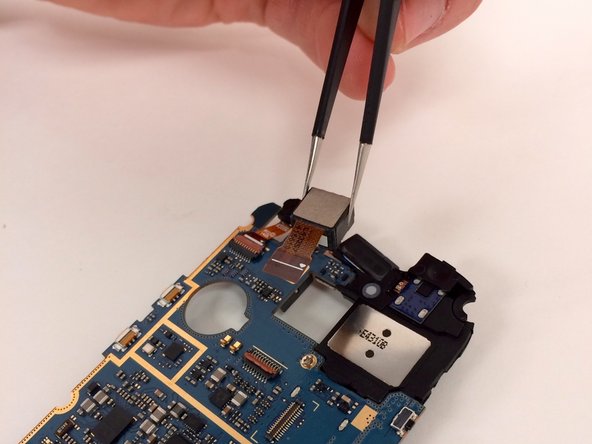
  6. Samsung Galaxy SIII Mini VE Rear Camera Replacement, Removing Camera: étape 6, image 1 de 3 Samsung Galaxy SIII Mini VE Rear Camera Replacement, Removing Camera: étape 6, image 2 de 3 Samsung Galaxy SIII Mini VE Rear Camera Replacement, Removing Camera: étape 6, image 3 de 3
    • Flip the holding tab to the open position.

    • Gently, separate the rear camera and the motherboard.

Conclusion

To reassemble your device, follow these instructions in reverse order.

Megan

Membre depuis le 10/23/14

1 186 Réputation

6 tutoriels rédigés

Équipe

Michigan Tech, Team 1-8, Lauer Fall 2014 Membre de l'équipe Michigan Tech, Team 1-8, Lauer Fall 2014

MTU-LAUER-F14S1G8

3 membres

6 tutoriels rédigés

0 commentaires

Ajouter un commentaire

Nombre de vues :

Dernières 24 heures : 0

7 derniers jours : 0

30 derniers jours : 0

Total : 1,117