Aller au contenu principal

Samsung Galaxy Tab 2 7.0 Camera Replacement

Ce dont vous avez besoin

  1. Samsung Galaxy Tab 2 7.0 Camera Replacement, Camera: étape 1, image 1 de 1
    • Using a nylon spudger or a flat plastic opening tool, pry open the back of the device.

    • It is easiest to begin this process by starting at the micro SD card insert, as shown in the pictures.

  2. Samsung Galaxy Tab 2 7.0 Camera Replacement: étape 2, image 1 de 1
    • Using a phillips head screwdriver, remove the 6 4mm screws holding the battery on the device.

    • Remove the battery, and set it aside.

  3. Samsung Galaxy Tab 2 7.0 Camera Replacement: étape 3, image 1 de 1
    • Using a phillips head screwdriver, remove the 6 4mm screws holding the motherboard in the device.

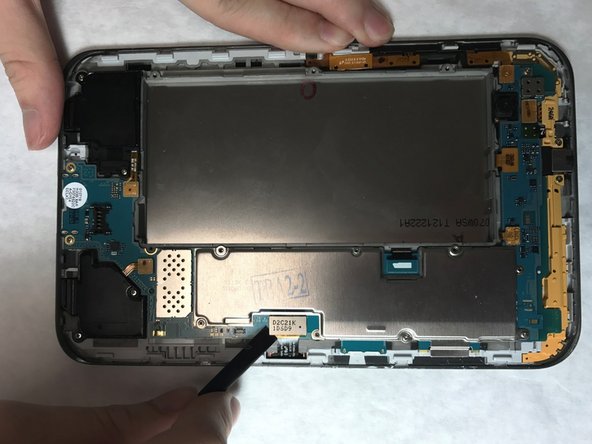
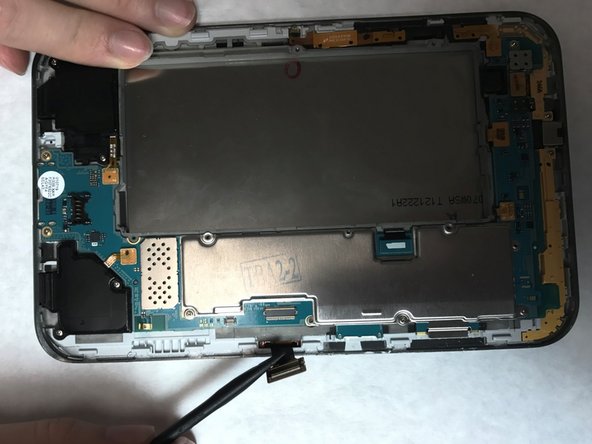
  4. Samsung Galaxy Tab 2 7.0 Camera Replacement: étape 4, image 1 de 3 Samsung Galaxy Tab 2 7.0 Camera Replacement: étape 4, image 2 de 3 Samsung Galaxy Tab 2 7.0 Camera Replacement: étape 4, image 3 de 3
    • Locate the 8 flex cables attached to the motherboard.

    • Using a nylon spudger, gently detach each flex cable from the motherboard.

    • Be careful when detaching flex cables. Excessive force and sharp objects have the potential to damage these components.

    • Lift the motherboard from the device and set it aside.

  5. Samsung Galaxy Tab 2 7.0 Camera Replacement: étape 5, image 1 de 1
    • Locate the camera towards the top of the device.

    • Use a nylon spudger to gently lift the camera and remove it from the device.

Conclusion

To reassemble your device, follow these instructions in reverse order.

2 autres ont terminé cette réparation.

Katija Tarailo

Membre depuis le 03/02/17

460 Réputation

3 tutoriels rédigés

Équipe

IUPUI, Team S3-G1, Harley Spring 2017 Membre de l'équipe IUPUI, Team S3-G1, Harley Spring 2017

IUPUI-HARLEY-S17S3G1

4 membres

3 tutoriels rédigés

0 commentaires

Ajouter un commentaire

Nombre de vues :

Dernières 24 heures : 2

7 derniers jours : 8

30 derniers jours : 13

Total : 659