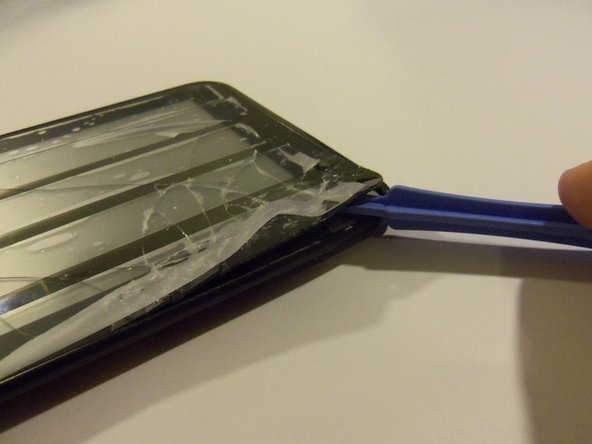
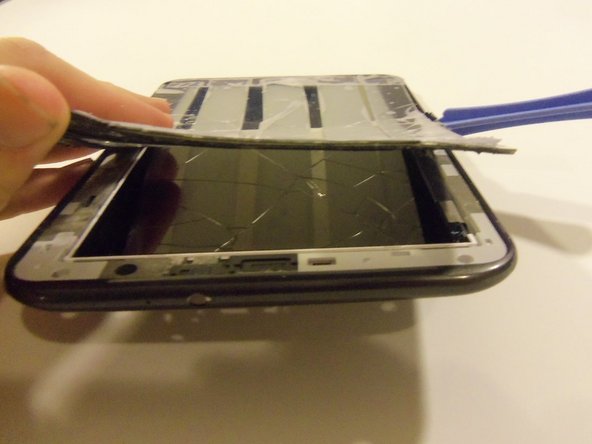
Aller au contenu principal

Samsung Galaxy Tab 2 7.0 Touch Screen Replacement

Ce dont vous avez besoin

  1. Samsung Galaxy Tab 2 7.0 Touch Screen Replacement, Preparing Your Device: étape 1, image 1 de 2 Samsung Galaxy Tab 2 7.0 Touch Screen Replacement, Preparing Your Device: étape 1, image 2 de 2
    • Power the device down completely

    • Remove the SD card from the SD card slot.

  2. Samsung Galaxy Tab 2 7.0 Touch Screen Replacement: étape 2, image 1 de 2 Samsung Galaxy Tab 2 7.0 Touch Screen Replacement: étape 2, image 2 de 2
    • Use the prying tool to separate the front and rear panels by slipping the tool underneath the screen edge and sliding it around the entire device.

    • Be sure to unclip all of the clips on the back panel or it will be difficult for you to pull it off and may damage the tablet.

  3. Samsung Galaxy Tab 2 7.0 Touch Screen Replacement: étape 3, image 1 de 2 Samsung Galaxy Tab 2 7.0 Touch Screen Replacement: étape 3, image 2 de 2
    • Remove the battery Flex Cable from its socket by placing the pry tool under the wires and gently prying it out.

    • When you are placing in the new battery, it helps to connect the socket first or else it becomes difficult to properly align once the battery is in place.

  4. Samsung Galaxy Tab 2 7.0 Touch Screen Replacement: étape 4, image 1 de 3 Samsung Galaxy Tab 2 7.0 Touch Screen Replacement: étape 4, image 2 de 3 Samsung Galaxy Tab 2 7.0 Touch Screen Replacement: étape 4, image 3 de 3
    • Using the Phillips precision screw driver remove the six 4 mm screws holding the battery in place.

    • Once the battery is loose, remove as shown.

  5. Samsung Galaxy Tab 2 7.0 Touch Screen Replacement, Motherboard: étape 5, image 1 de 1
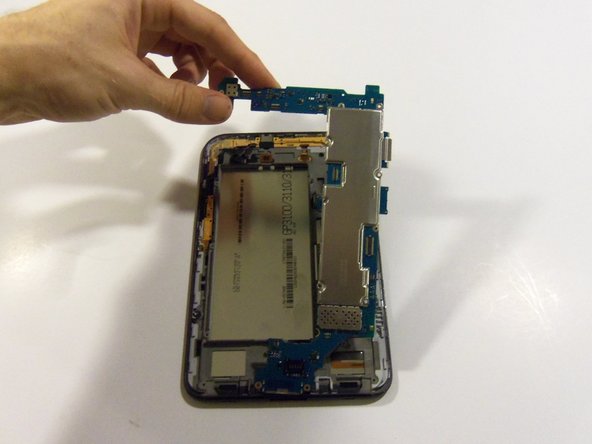
    • Using the Phillips #00 precisions screwdriver, remove the 12 4mm screws holding in the motherboard.

  6. Samsung Galaxy Tab 2 7.0 Touch Screen Replacement: étape 6, image 1 de 3 Samsung Galaxy Tab 2 7.0 Touch Screen Replacement: étape 6, image 2 de 3 Samsung Galaxy Tab 2 7.0 Touch Screen Replacement: étape 6, image 3 de 3
    • Release all flex cable connections at the bottom section of the motherboard.

    • Using the plastic pry tool release connections for both loudspeakers.

    • Once disconnected gently remove the loudspeakers from the device.

  7. Samsung Galaxy Tab 2 7.0 Touch Screen Replacement: étape 7, image 1 de 3 Samsung Galaxy Tab 2 7.0 Touch Screen Replacement: étape 7, image 2 de 3 Samsung Galaxy Tab 2 7.0 Touch Screen Replacement: étape 7, image 3 de 3
    • Release all flex cables on the right side of the device motherboard as shown.

    • Using the plastic pry tool, release the touch screen flex cable from its socket.

    • With the same tool release the LCD screen flex cable form its socket.

  8. Samsung Galaxy Tab 2 7.0 Touch Screen Replacement: étape 8, image 1 de 2 Samsung Galaxy Tab 2 7.0 Touch Screen Replacement: étape 8, image 2 de 2
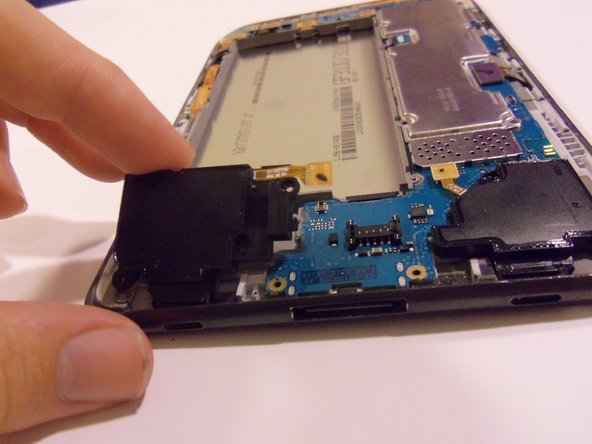
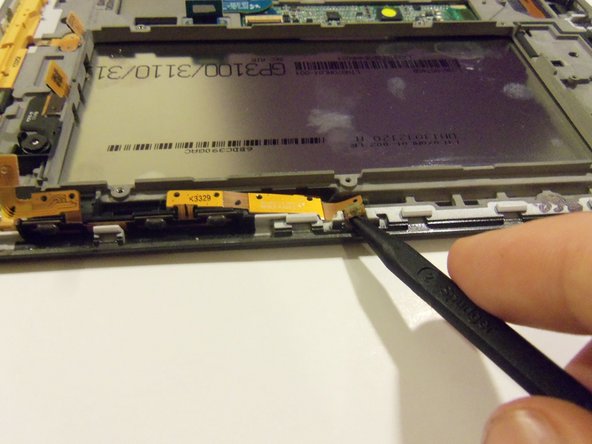
    • Release all flex cables on the upper portion of the motherboard.

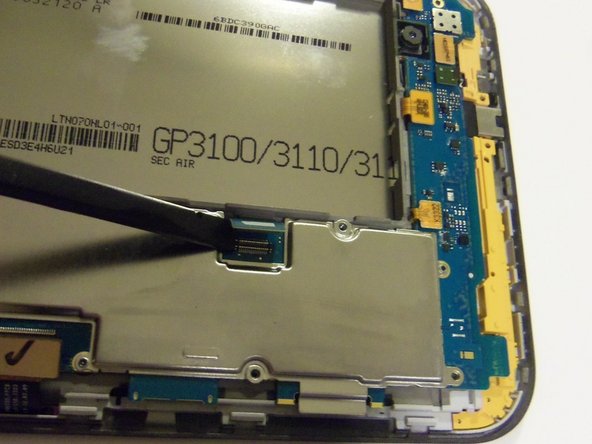
    • Using the plastic pry tool release the sensor flex cable from its socket.

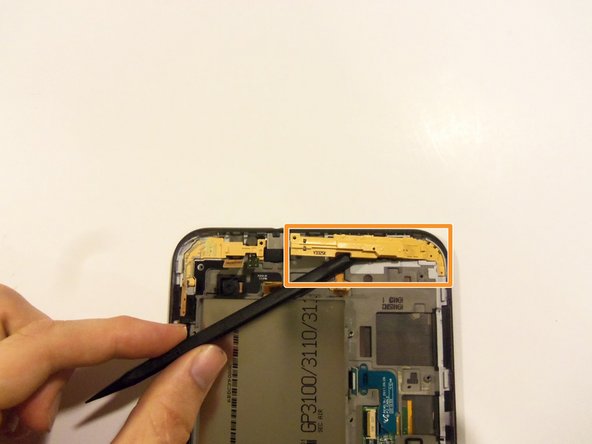
    • With the same tool release the camera flex cable from its socket.

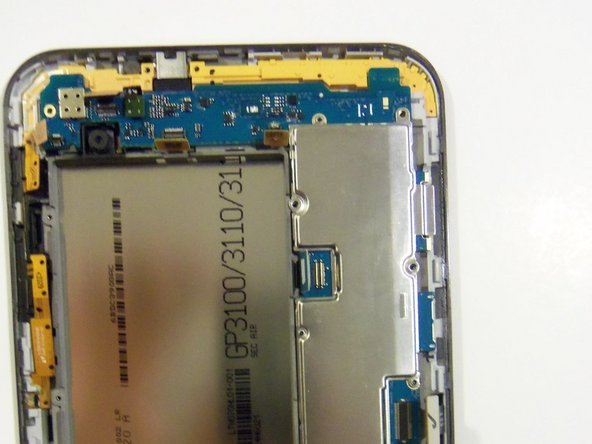
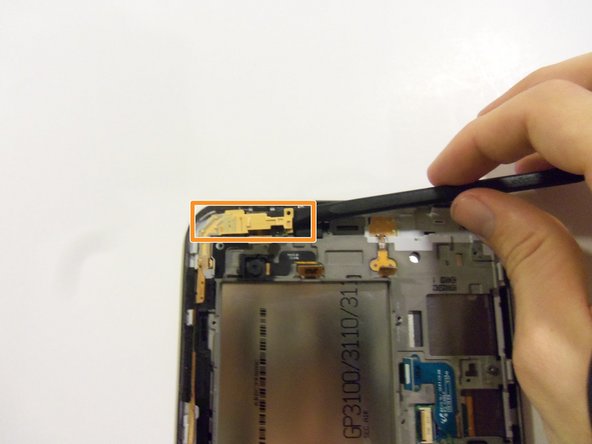
    • Release the front camera flex cable from its socket.

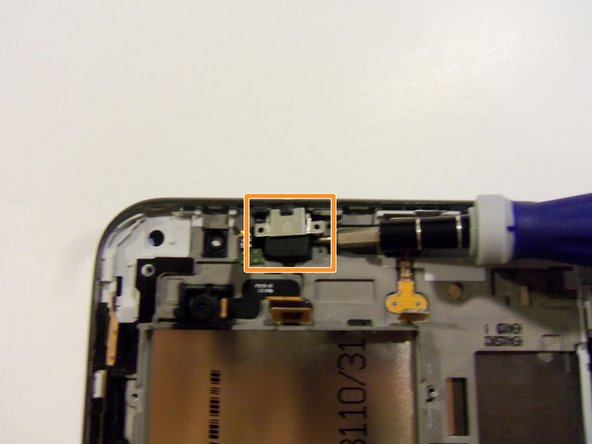
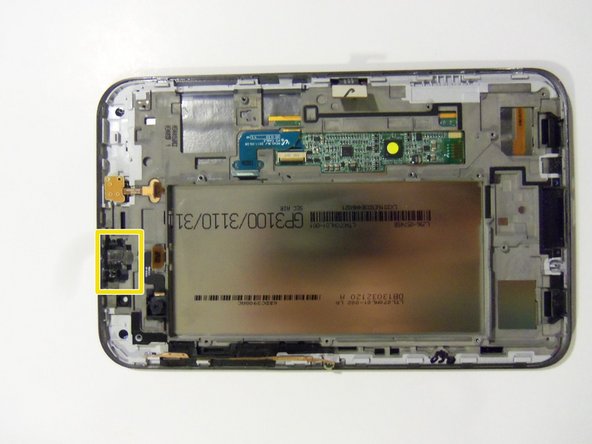
    • Release the side button's flex cable from its socket.

    • There is one more Flex cable to remove, it's to the right of the front camera connector (see previous picture with connector highlighted in yellow box). It connects the top microphone and headphone jack.

  9. Samsung Galaxy Tab 2 7.0 Touch Screen Replacement: étape 10, image 1 de 2 Samsung Galaxy Tab 2 7.0 Touch Screen Replacement: étape 10, image 2 de 2
    • Gently remove the motherboard from the device.

    • Be sure no flex cables get caught on the motherboard while you are removing it or the flex cables may become damaged.

    • It is easier to begin lifting the motherboard from the top rather than the bottom.

  10. Samsung Galaxy Tab 2 7.0 Touch Screen Replacement, Touch Screen: étape 11, image 1 de 2 Samsung Galaxy Tab 2 7.0 Touch Screen Replacement, Touch Screen: étape 11, image 2 de 2
    • Release the button flex cable using the plastic spudger tool.

    • Be careful when removing the flex cable due to how small the button flex cable is and the strong adhesive that holds it in place.

  11. Samsung Galaxy Tab 2 7.0 Touch Screen Replacement: étape 12, image 1 de 3 Samsung Galaxy Tab 2 7.0 Touch Screen Replacement: étape 12, image 2 de 3 Samsung Galaxy Tab 2 7.0 Touch Screen Replacement: étape 12, image 3 de 3
    • Remove the main camera using the plastic spudger tool.

    • Using the plastic spudger tool, remove the two main spacers.

  12. Samsung Galaxy Tab 2 7.0 Touch Screen Replacement: étape 13, image 1 de 1
    • Remove the front facing camera using the precision tweezers.

  13. Samsung Galaxy Tab 2 7.0 Touch Screen Replacement: étape 14, image 1 de 3 Samsung Galaxy Tab 2 7.0 Touch Screen Replacement: étape 14, image 2 de 3 Samsung Galaxy Tab 2 7.0 Touch Screen Replacement: étape 14, image 3 de 3
    • Remove the sensor flex cable using the flat-head screwdriver.

    • Remove the cover that is over the headphone jack using the precision flat-head screwdriver.

    • Remove the headphone jack using the precision flat-head screwdriver.

    • Be careful removing the headphone jack and take your time because the adhesive is very strong.

  14. Samsung Galaxy Tab 2 7.0 Touch Screen Replacement: étape 15, image 1 de 3 Samsung Galaxy Tab 2 7.0 Touch Screen Replacement: étape 15, image 2 de 3 Samsung Galaxy Tab 2 7.0 Touch Screen Replacement: étape 15, image 3 de 3
    • Place tape over the front of the touch screen to catch broken glass. The wider the tape the better.

    • Heat up the touch screen in some way to release the strong adhesive.

    • Using the safe pry tool, pry up the edge of the touch screen and slowly work your way around the entire device.

  15. Samsung Galaxy Tab 2 7.0 Touch Screen Replacement: étape 16, image 1 de 1
    • Congratulations, this is what your device should look like after the touch screen has been removed.

Conclusion

To reassemble your device, follow these instructions in reverse order.

4 autres ont terminé cette réparation.

Paul

Membre depuis le 03/05/15

2 183 Réputation

4 tutoriels rédigés

Équipe

Sam Houston State, Team 11-5, Blackburne Winter 2015 Membre de l'équipe Sam Houston State, Team 11-5, Blackburne Winter 2015

SHSU-BLACKBURNE-W15S11G5

3 membres

4 tutoriels rédigés

0 commentaires

Ajouter un commentaire

Nombre de vues :

Dernières 24 heures : 0

7 derniers jours : 1

30 derniers jours : 8

Total : 2,281