Aller au contenu principal

Samsung Galaxy Tab 4 10.1 Front and Rear Camera Replacement

Ce dont vous avez besoin

  1. Samsung Galaxy Tab 4 10.1 Front and Rear Camera Replacement, Battery: étape 1, image 1 de 2 Samsung Galaxy Tab 4 10.1 Front and Rear Camera Replacement, Battery: étape 1, image 2 de 2
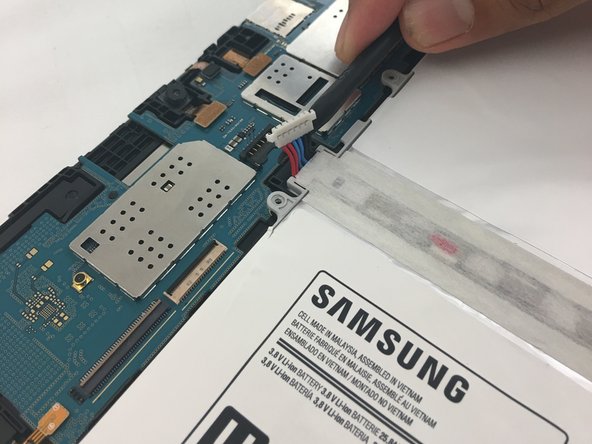
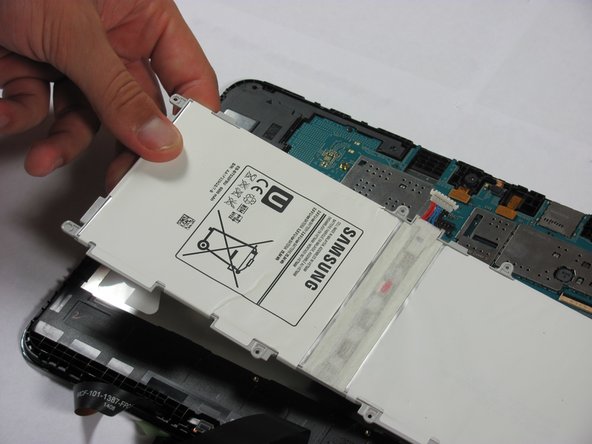
    • Insert the wedge of the nylon spudger and slide it between the front and back panels until the back comes off.

  2. Samsung Galaxy Tab 4 10.1 Front and Rear Camera Replacement: étape 2, image 1 de 1
    • Peel off the green tape that covers the connectors for the three black strips.

    • Use the tip of a spudger or your fingernail to flip up the small retaining flaps.

  3. Samsung Galaxy Tab 4 10.1 Front and Rear Camera Replacement: étape 3, image 1 de 1
    • Use a Phillips #00 screwdriver to remove the four 3.2mm screws.

  4. Samsung Galaxy Tab 4 10.1 Front and Rear Camera Replacement: étape 4, image 1 de 1
    • Detach the red, blue, and black cables by prying up on the white connector from the motherboard.

    • If using fingers instead, pull evenly on the full width of the cable so the wires are not overly strained.

    • If you pull too hard you can damage the connector on the circuit board. Use a spudger or tweezers to push down on the black connector on the board while gently prying the battery connector loose. The connector breaks VERY easily.

  5. Samsung Galaxy Tab 4 10.1 Front and Rear Camera Replacement: étape 5, image 1 de 1
    • Use the nylon spudger to remove the battery by prying up on the edges.

  6. Samsung Galaxy Tab 4 10.1 Front and Rear Camera Replacement: étape 6, image 1 de 1
    • Once the battery is loose, lift it out of the device.

  7. Samsung Galaxy Tab 4 10.1 Front and Rear Camera Replacement, Motherboard: étape 7, image 1 de 2 Samsung Galaxy Tab 4 10.1 Front and Rear Camera Replacement, Motherboard: étape 7, image 2 de 2
    • Remove the two 2.7mm Phillips #00 screws from the motherboard.

  8. Samsung Galaxy Tab 4 10.1 Front and Rear Camera Replacement: étape 8, image 1 de 2 Samsung Galaxy Tab 4 10.1 Front and Rear Camera Replacement: étape 8, image 2 de 2
    • Use the flat end of a spudger to pry up and disconnect the five press-fit connectors from the motherboard.

  9. Samsung Galaxy Tab 4 10.1 Front and Rear Camera Replacement: étape 9, image 1 de 2 Samsung Galaxy Tab 4 10.1 Front and Rear Camera Replacement: étape 9, image 2 de 2
    • Use a spudger to pry up the motherboard, and remove it from the device.

  10. Samsung Galaxy Tab 4 10.1 Front and Rear Camera Replacement, Front and Rear Camera: étape 10, image 1 de 2 Samsung Galaxy Tab 4 10.1 Front and Rear Camera Replacement, Front and Rear Camera: étape 10, image 2 de 2
    • Pull up on the cameras with a pair of tweezers to remove.

Conclusion

To reassemble your device, follow these instructions in reverse order.

2 autres ont terminé cette réparation.

Blake Klein

Membre depuis le 01/29/17

70 356 Réputation

50 tutoriels rédigés

0 commentaires

Ajouter un commentaire

Nombre de vues :

Dernières 24 heures : 1

7 derniers jours : 2

30 derniers jours : 2

Total : 521