Cette version peut contenir des modifications incorrectes. Passez au dernier aperçu vérifié.
Ce dont vous avez besoin
-
-
Insérez le coin du spudger en nylon et faites-le glisser entre les panneaux avant et arrière jusqu'à ce que le dos se détache.
-
-
-
-
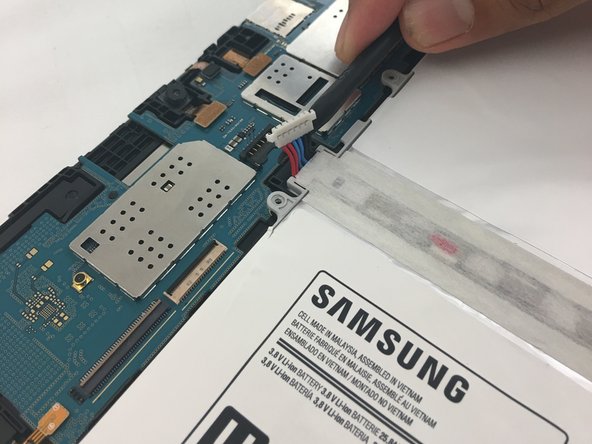
Détachez les câbles rouge, bleu et noir en soulevant le connecteur blanc de la carte mère.
-
Si vous utilisez des doigts à la place, tirez uniformément sur toute la largeur du câble afin que les fils ne soient pas trop tendus.
Take note of the red warning comment! Very easy to pull up the connector off the board!!!
Unfortunately I just that because I didn’t hold down the connectors with tweezers (or something) and then botched an attempted reflow of the solder, costing even more time and money! :(
-
-
-
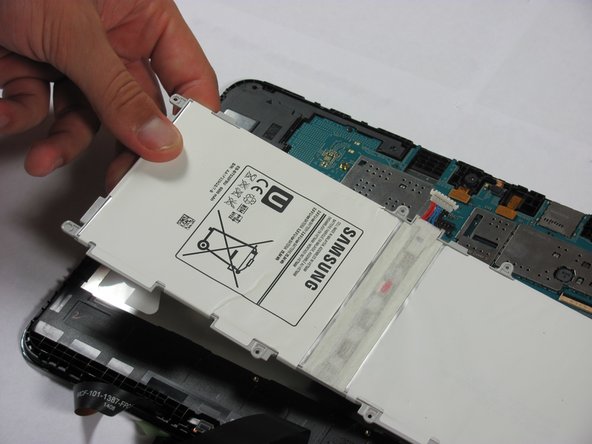
Une fois la batterie lâche, retirez-la de l'appareil.
Better disconnect battery before any repairs, therefore reducing the possibility of a short-circuit which could destroy the motherboard.
Isolation tape can also be placed over the connection after disconnecting to prevent any accidental short-circuit mishaps, thus reducing the need to remove the battery.
Cheers Wayne
-
-
Cette étape n’est pas traduite. Aidez à la traduire
-
Remove the two 2.7mm Phillips #00 screws from the micro USB port.
-
Remove the micro USB retaining bracket.
-
-
Cette étape n’est pas traduite. Aidez à la traduire
-
Use the flat end of a spudger to disconnect the micro USB port.
-
Remove the micro USB port.
-


Annulation : je n'ai pas terminé ce tutoriel.
12 autres ont terminé cette réparation.

2 commentaires
Thank you so much for simplifying this guide for us novices. I have tried watching two videos where they assume I already have some Samsung repair knowledge. I feel confident I will be able to get the tablet up and charging in no time.
There is no need to remove the battery, only detach the power connector, cheers!