Aller au contenu principal

Samsung Galaxy Tab 4 Motherboard Replacement

Ce dont vous avez besoin

  1. Samsung Galaxy Tab 4 Motherboard Replacement, Motherboard: étape 1, image 1 de 2 Samsung Galaxy Tab 4 Motherboard Replacement, Motherboard: étape 1, image 2 de 2
    • Insert the plastic opening tool into the gap between the device frame and the back panel on any side of the device.

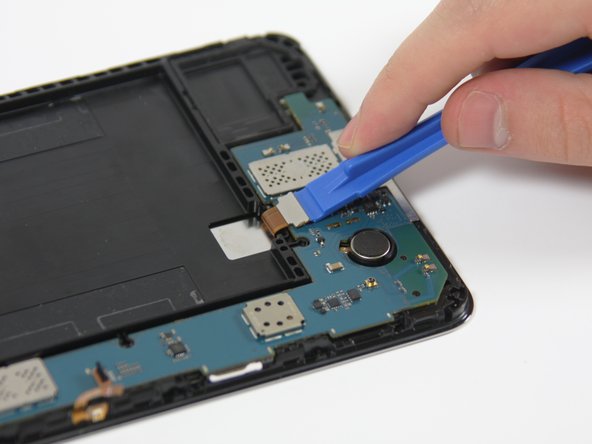
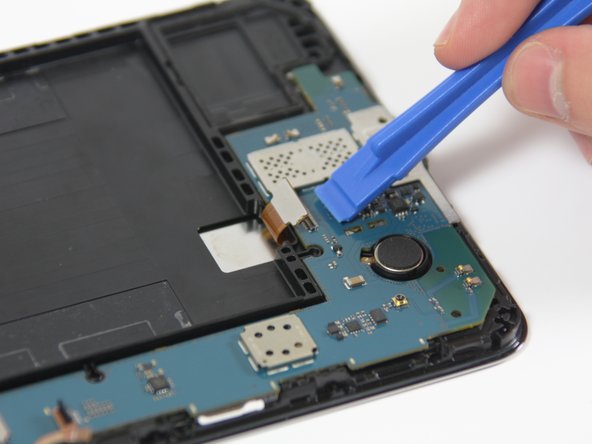
    • Slide the opening tool around the edges of the device to disconnect the back panel from the frame.

  2. Samsung Galaxy Tab 4 Motherboard Replacement: étape 2, image 1 de 3 Samsung Galaxy Tab 4 Motherboard Replacement: étape 2, image 2 de 3 Samsung Galaxy Tab 4 Motherboard Replacement: étape 2, image 3 de 3
    • Carefully remove the back panel from the frame of the device.

  3. Samsung Galaxy Tab 4 Motherboard Replacement: étape 3, image 1 de 3 Samsung Galaxy Tab 4 Motherboard Replacement: étape 3, image 2 de 3 Samsung Galaxy Tab 4 Motherboard Replacement: étape 3, image 3 de 3
    • Using a Phillips #00 Screwdriver, remove the five 4 mm screws connecting the motherboard to the frame of the device.

  4. Samsung Galaxy Tab 4 Motherboard Replacement: étape 4, image 1 de 3 Samsung Galaxy Tab 4 Motherboard Replacement: étape 4, image 2 de 3 Samsung Galaxy Tab 4 Motherboard Replacement: étape 4, image 3 de 3
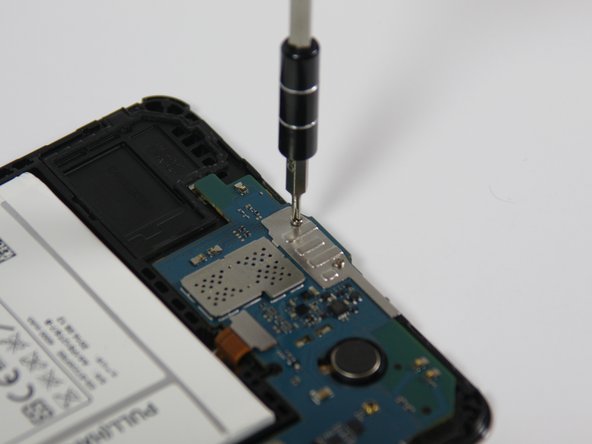
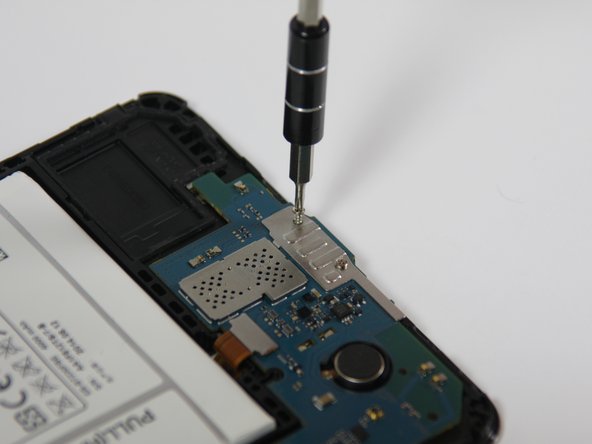
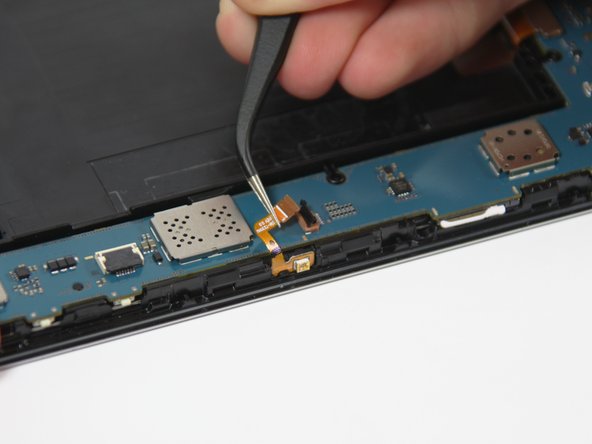
    • Use the plastic opening tool to unlock the battery wire from the motherboard by flipping-up the small retaining flap.

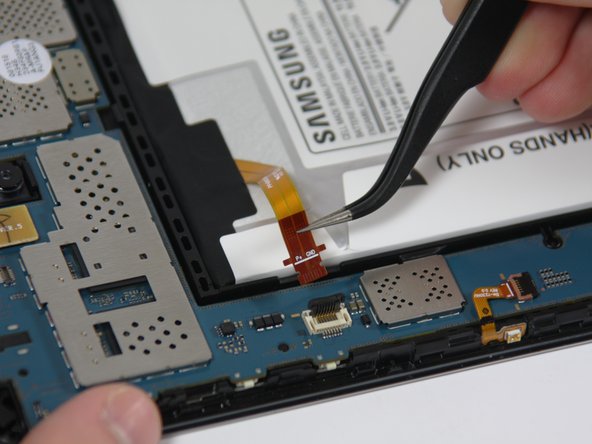
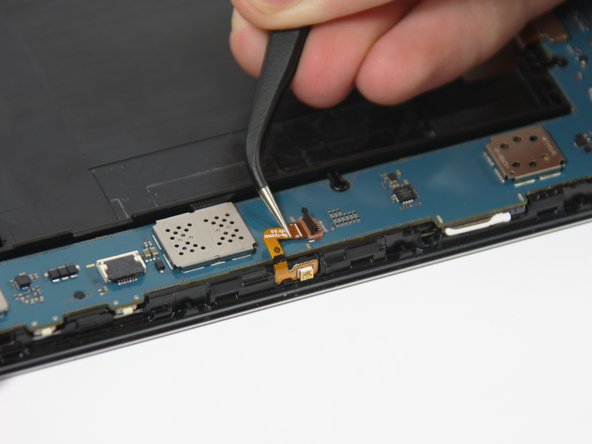
    • Use the tweezers to carefully remove the battery wire from the motherboard by pulling it away from the retainer flap.

  5. Samsung Galaxy Tab 4 Motherboard Replacement: étape 5, image 1 de 3 Samsung Galaxy Tab 4 Motherboard Replacement: étape 5, image 2 de 3 Samsung Galaxy Tab 4 Motherboard Replacement: étape 5, image 3 de 3
    • Use the plastic opening tool to unlock the wire on the narrow section of the motherboard by flipping-up the retaining flap.

    • Use the tweezers to carefully remove the wire from the motherboard by sliding it away from the retaining flap.

  6. Samsung Galaxy Tab 4 Motherboard Replacement: étape 6, image 1 de 3 Samsung Galaxy Tab 4 Motherboard Replacement: étape 6, image 2 de 3 Samsung Galaxy Tab 4 Motherboard Replacement: étape 6, image 3 de 3
    • Disconnect the wire near the bottom of the motherboard by placing the plastic opening tool under the edge of the connector to flip it up.

  7. Samsung Galaxy Tab 4 Motherboard Replacement: étape 7, image 1 de 3 Samsung Galaxy Tab 4 Motherboard Replacement: étape 7, image 2 de 3 Samsung Galaxy Tab 4 Motherboard Replacement: étape 7, image 3 de 3
    • Disconnect the wire near the top of the motherboard by placing the plastic opening tool under the edge of the connector to flip it up.

  8. Samsung Galaxy Tab 4 Motherboard Replacement: étape 8, image 1 de 3 Samsung Galaxy Tab 4 Motherboard Replacement: étape 8, image 2 de 3 Samsung Galaxy Tab 4 Motherboard Replacement: étape 8, image 3 de 3
    • Gently remove the motherboard from the frame of the device by grabbing the top and bottom ends and pulling it toward you.

    • Several plastic tabs keep the motherboard in place, so you will have to apply some force.

Conclusion

To reassemble your device, follow these instructions in reverse order.

3 autres ont terminé cette réparation.

Peter Oliver

Membre depuis le 10/03/16

227 Réputation

1 tutoriel rédigé

Équipe

Cal Poly, Team 18-3, Forte Fall 2016 Membre de l'équipe Cal Poly, Team 18-3, Forte Fall 2016

CPSU-FORTE-F16S18G3

4 membres

5 tutoriels rédigés

0 commentaires

Ajouter un commentaire

Nombre de vues :

Dernières 24 heures : 0

7 derniers jours : 1

30 derniers jours : 3

Total : 1,710