Introduction
Si votre appareil ne peut recevoir aucun type d'alimentation ou de charge, des impuretés ou autres débris peuvent se trouver dans le port de charge et endommager définitivement le port de charge. Cela pourrait empêcher l'appareil de se charger correctement. Ce guide explique comment retirer correctement le port de chargement sans endommager les autres parties de l'appareil.
Ce dont vous avez besoin
-
-
Insérez un spudger métallique entre le boîtier arrière et l'écran de l'appareil.
-
Déplacez le spudger le long du périmètre de l'appareil alors qu'il se trouve entre le boîtier arrière et l'écran pour ouvrir chaque pression.
-
-
-
Soulevez les haut-parleurs de l'appareil à ces deux points en utilisant la spatule ultra-résistante (heavy-duty spudger).
-
-
-
-
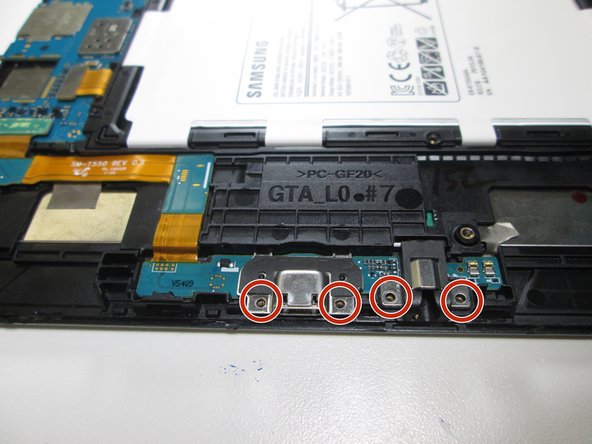
Retirez les quatre vis cruciformes de 2,8 mm # 000 qui maintiennent le port de charge et la prise casque en place.
-
-
-
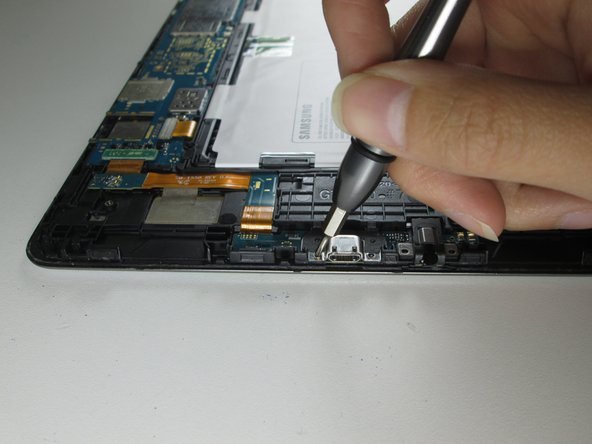
Placez la spatule ultra-résistante sous l'orifice de chargement et poussez vers le bas pour retirer l'orifice de chargement.
-


Pour réassembler votre appareil, suivez ces instructions dans l'ordre inverse.
Pour réassembler votre appareil, suivez ces instructions dans l'ordre inverse.
Annulation : je n'ai pas terminé ce tutoriel.
18 autres ont terminé cette réparation.
Merci à ces traducteurs :
100%
[deleted] nous aide à réparer le monde ! Vous voulez contribuer ?
Commencez à traduire ›
Équipe

Cal Poly, Team S1-G3, Livingston Spring 2017 Membre de l'équipe Cal Poly, Team S1-G3, Livingston Spring 2017
CPSU-LIVINGSTON-S17S1G3
1 membre
12 tutoriels rédigés
9 commentaires
Note that you have to transfer the shroud over the charge port from the old assembly to the new one, if the replacement part wasn’t supplied with it. This threw me when I was screwing the new unit in, until I inspected the old part more closely. Also, it takes a lot more effort than you would expect to undo the case in the first place!
How did you glue it on to the new board? Which glue did you use
swordart -
Taking the cover off wasn’t the easiest, but after that it went really smooth. Thanks for the instructions! It really helped a lot! Got my tablet charging again, so I am satisfied!
there was a tape glued to right part of charging assembly and also part under the right speaker. is it a conductive tape, should it be replaced ? because once peeled off old assembly part, its difficult to put it back on the new one..