Introduction
If your device is unable to receive any sort of power or charge, there could be dirt or other debris stuck in the charging port that can permanently damage the charging port. This could prevent the device from charging properly. This guide will outline how to properly remove the charging port without damaging other parts of the device.
Ce dont vous avez besoin
-
-
Insert a metal spudger between the back case and the screen of the device.
-
Move the spudger along the perimeter of the device while it is in between the back case and the screen to open each snap.
-
-
-
-
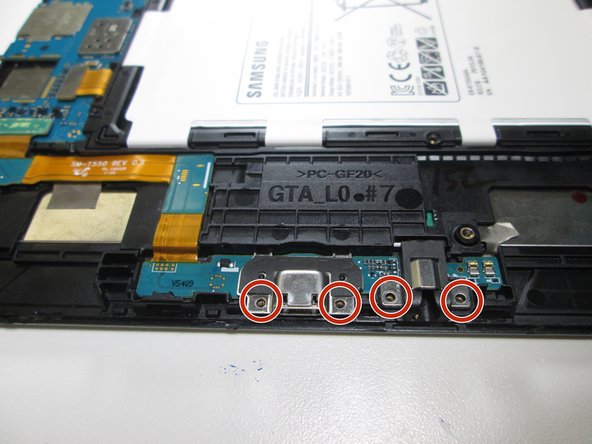
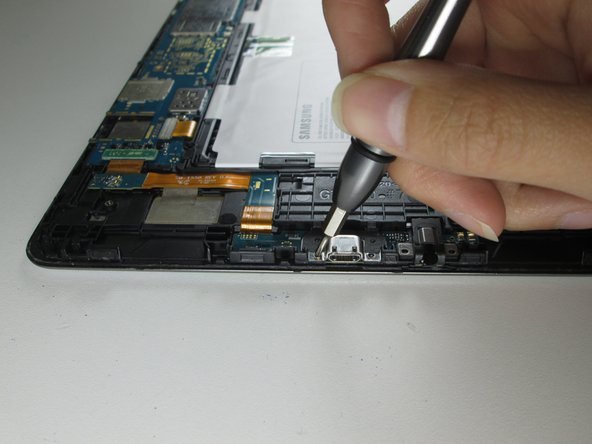
Remove the four 2.8mm #000 Phillips screws that hold the charging port and headphone jack in place.
-


To reassemble your device, follow these instructions in reverse order.
To reassemble your device, follow these instructions in reverse order.
Annulation : je n'ai pas terminé ce tutoriel.
18 autres ont terminé cette réparation.
Équipe

Cal Poly, Team S1-G3, Livingston Spring 2017 Membre de l'équipe Cal Poly, Team S1-G3, Livingston Spring 2017
CPSU-LIVINGSTON-S17S1G3
1 membre
12 tutoriels rédigés
9 commentaires
Note that you have to transfer the shroud over the charge port from the old assembly to the new one, if the replacement part wasn’t supplied with it. This threw me when I was screwing the new unit in, until I inspected the old part more closely. Also, it takes a lot more effort than you would expect to undo the case in the first place!
How did you glue it on to the new board? Which glue did you use
swordart -
Taking the cover off wasn’t the easiest, but after that it went really smooth. Thanks for the instructions! It really helped a lot! Got my tablet charging again, so I am satisfied!
there was a tape glued to right part of charging assembly and also part under the right speaker. is it a conductive tape, should it be replaced ? because once peeled off old assembly part, its difficult to put it back on the new one..