Aller au contenu principal
Pour réparer ensemble - Je crée un compte

Samsung Galaxy Tab S 10.5 Display Replacement

Ce dont vous avez besoin

  1. Samsung Galaxy Tab S 10.5 Display Replacement, Back Cover: étape 1, image 1 de 2 Samsung Galaxy Tab S 10.5 Display Replacement, Back Cover: étape 1, image 2 de 2
    • Place the plastic opening tool into the SD card slot or charge port.

    • Try in an upward motion until you see a separation between the tablet and back cover.

    Demander à FixBot

    Ajouter un commentaire

  2. Samsung Galaxy Tab S 10.5 Display Replacement: étape 2, image 1 de 1
    • Work around the entire device by sliding the plastic opening tool around the rim.

    • If this is the first time, it will be hard to separate the back cover from the tablet.

    • The clips are approximately 5 cm apart. While working around the device, the clips will make a dislocating sound when disconnected.

    Demander à FixBot

    Ajouter un commentaire

  3. Samsung Galaxy Tab S 10.5 Display Replacement: étape 3, image 1 de 1
    • Remove the back cover once all links have been separated.

    • Be careful when touching any of the internal components of the tablet.

    Demander à FixBot

    Ajouter un commentaire

  4. Samsung Galaxy Tab S 10.5 Display Replacement, Display: étape 4, image 1 de 2 Samsung Galaxy Tab S 10.5 Display Replacement, Display: étape 4, image 2 de 2
    Outil utilisé dans cette étape :
    Tweezers
    $4.99
    • After taking off the back cover, use a pair of tweezers to disconnect the two (T807) ribbons.

    • Warning : Ribbon cables are connected with ZIF connectors (Zero Insertion Force): it requires a special sequence with rotation of a plastic lever to release the pressure on contacts. Then ribbon cable can be extracted without any damage.

    Demander à FixBot

    Ajouter un commentaire

  5. Samsung Galaxy Tab S 10.5 Display Replacement: étape 5, image 1 de 2 Samsung Galaxy Tab S 10.5 Display Replacement: étape 5, image 2 de 2
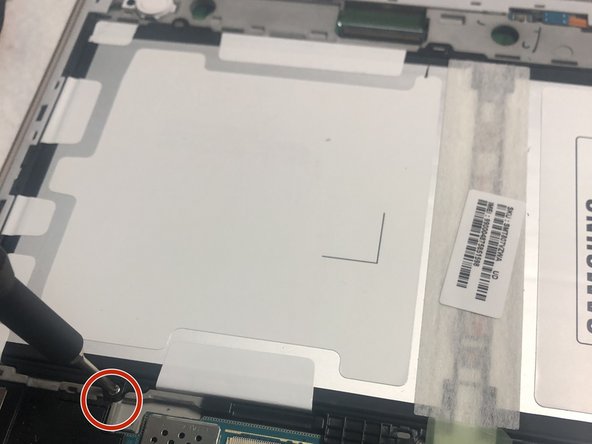
    • Remove the four screws holding down the battery using the Phillips #000 screwdriver.

    Demander à FixBot

    Ajouter un commentaire

  6. Samsung Galaxy Tab S 10.5 Display Replacement: étape 6, image 1 de 2 Samsung Galaxy Tab S 10.5 Display Replacement: étape 6, image 2 de 2
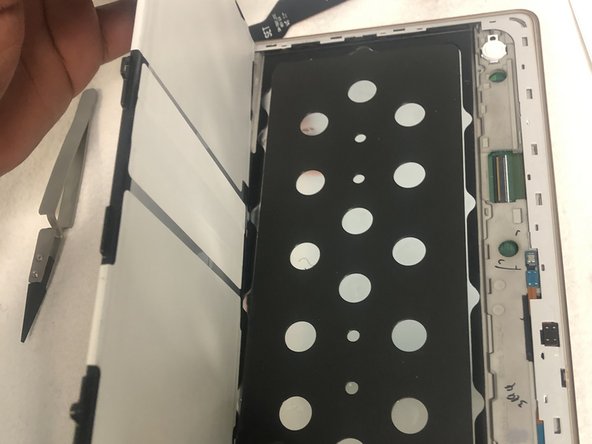
    • Gently pry the battery up from its housing using a spudger.

    • Do not use a metal spudger on the inner components of your device. The metal spudger should only be used for serious prying power as it can damage the inner components of your device.

    Demander à FixBot

    Ajouter un commentaire

  7. Samsung Galaxy Tab S 10.5 Display Replacement: étape 7, image 1 de 1
    • Use a Phillips #00 screwdriver to remove the screw holding the motherboard.

    Demander à FixBot

    Ajouter un commentaire

  8. Samsung Galaxy Tab S 10.5 Display Replacement: étape 8, image 1 de 2 Samsung Galaxy Tab S 10.5 Display Replacement: étape 8, image 2 de 2
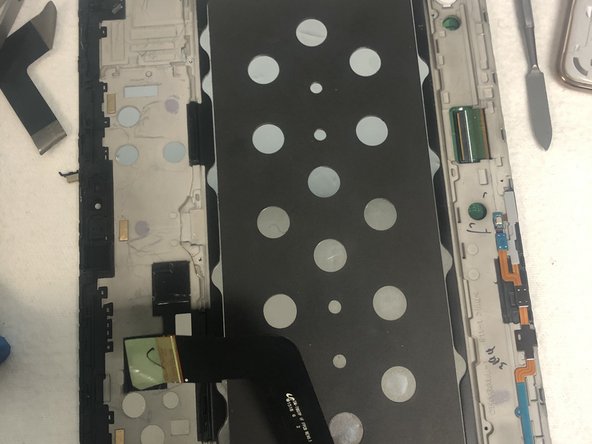
    • Using a spudger, gently pry up and remove the motherboard from the device frame.

    • With the motherboard removed, only the display assembly remains. You can now proceed with installing your new screen.

    Demander à FixBot

    Ajouter un commentaire

Conclusion

To reassemble your device, follow these instructions in reverse order.

Annulation : je n'ai pas terminé ce tutoriel.

2 autres ont terminé cette réparation.

0 commentaires de tutoriel

Ajouter un commentaire

Nombre de vues :

Dernières 24 heures : 2

7 derniers jours : 17

30 derniers jours : 69

Total : 5,844