Aller au contenu principal

Samsung Galaxy Tab S 10.5 Headphone Jack Replacement

Ce dont vous avez besoin

  1. Samsung Galaxy Tab S 10.5 Headphone Jack Replacement, Disassembling Galaxy Tab S 10.5 Back Cover: étape 1, image 1 de 2 Samsung Galaxy Tab S 10.5 Headphone Jack Replacement, Disassembling Galaxy Tab S 10.5 Back Cover: étape 1, image 2 de 2
    • Place the plastic opening tool into the SD card slot or charge port.

    • Try in an upward motion until you see a separation between the tablet and back cover.

  2. Samsung Galaxy Tab S 10.5 Headphone Jack Replacement: étape 2, image 1 de 1
    • Work around the entire device by sliding the plastic opening tool around the rim.

    • If this is the first time, it will be hard to separate the back cover from the tablet.

    • The clips are approximately 5 cm apart. While working around the device, the clips will make a dislocating sound when disconnected.

  3. Samsung Galaxy Tab S 10.5 Headphone Jack Replacement: étape 3, image 1 de 1
    • Remove the back cover once all links have been separated.

    • Be careful when touching any of the internal components of the tablet.

  4. Samsung Galaxy Tab S 10.5 Headphone Jack Replacement, Back Rim Cover: étape 4, image 1 de 3 Samsung Galaxy Tab S 10.5 Headphone Jack Replacement, Back Rim Cover: étape 4, image 2 de 3 Samsung Galaxy Tab S 10.5 Headphone Jack Replacement, Back Rim Cover: étape 4, image 3 de 3
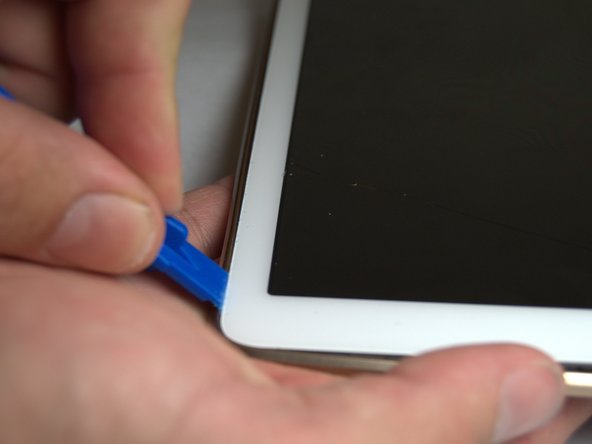
    • Place the plastic opening tool in between the outer rim.

    • Move the tool in a downward motion to separate the 2 parts.

    • Run the tool along the rim to disconnect all connectors holding the outer rim to the back of the device.

  5. Samsung Galaxy Tab S 10.5 Headphone Jack Replacement: étape 5, image 1 de 1
    • Repeat this step for all four sides, then remove the rim.

  6. Samsung Galaxy Tab S 10.5 Headphone Jack Replacement, Headphone Jack: étape 6, image 1 de 1
    • Using the Phillips #00 screwdriver, remove the two screws holding the headphone jack.

  7. Samsung Galaxy Tab S 10.5 Headphone Jack Replacement: étape 7, image 1 de 1
    • Place the hook of a spudger on the backside of headphone jack and pop the headphone jack out.

Conclusion

To reassemble your device, follow these instructions in reverse order.

2 autres ont terminé cette réparation.

0 commentaires

Ajouter un commentaire

Nombre de vues :

Dernières 24 heures : 0

7 derniers jours : 1

30 derniers jours : 4

Total : 571