Aller au contenu principal

Samsung Galaxy Tab S2 Auxiliary Port Replacement

Ce dont vous avez besoin

  1. Samsung Galaxy Tab S2 Auxiliary Port Replacement, Screen: étape 1, image 1 de 1
    • Working on your device while it is turned on may result in an electric shock. Be sure to shut down and unplug your device before you begin.

    • Removing the screen may be difficult due to strong adhesives.

    • Apply heat to all the seams of the device using an iFixit iOpener or heat gun in order to loosen the adhesive around the edges of the screen.

  2. Samsung Galaxy Tab S2 Auxiliary Port Replacement: étape 2, image 1 de 2 Samsung Galaxy Tab S2 Auxiliary Port Replacement: étape 2, image 2 de 2
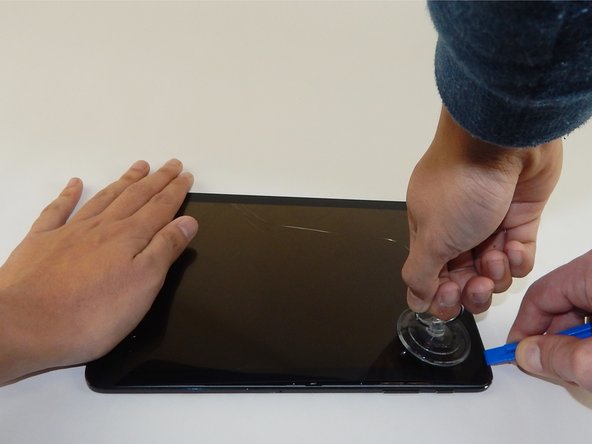
    • Insert the plastic opening tool into the gap on the side of the tablet, near a corner where you want to start removing the screen.

    • Place the small suction cup on the screen near the corner that the plastic opening tool is placed.

    • Lift the small suction cup up while pushing down with the plastic opening tool to remove screen (you may need to have someone else hold the device down for proper leverage).

    • A ribbon cable is attached to the back of the screen. Avoid lifting or moving the screen more than 3-4 inches before disconnecting the ribbon cable or you could damage the device.

  3. Samsung Galaxy Tab S2 Auxiliary Port Replacement: étape 3, image 1 de 1
    • A piece of silver tape is placed over the gold ribbon cable connecting the screen to the tablet.

    • Use the tweezers to carefully remove the silver tape.

  4. Samsung Galaxy Tab S2 Auxiliary Port Replacement: étape 4, image 1 de 2 Samsung Galaxy Tab S2 Auxiliary Port Replacement: étape 4, image 2 de 2
    • With the plastic opening tool gently lift to disconnect the gold ribbon cable that attaches the screen to the base tablet.

  5. Samsung Galaxy Tab S2 Auxiliary Port Replacement, Panel Replacement: étape 5, image 1 de 2 Samsung Galaxy Tab S2 Auxiliary Port Replacement, Panel Replacement: étape 5, image 2 de 2
    • Remove the nineteen 3mm Phillips #1 screws.

  6. Samsung Galaxy Tab S2 Auxiliary Port Replacement: étape 6, image 1 de 2 Samsung Galaxy Tab S2 Auxiliary Port Replacement: étape 6, image 2 de 2
    • Pry open the next layer of the device using the plastic opening tool.

    • Even though the device separates along the outside edge, using the inside edge (as pictured) may help with leverage.

  7. Samsung Galaxy Tab S2 Auxiliary Port Replacement, Auxiliary Port: étape 7, image 1 de 1
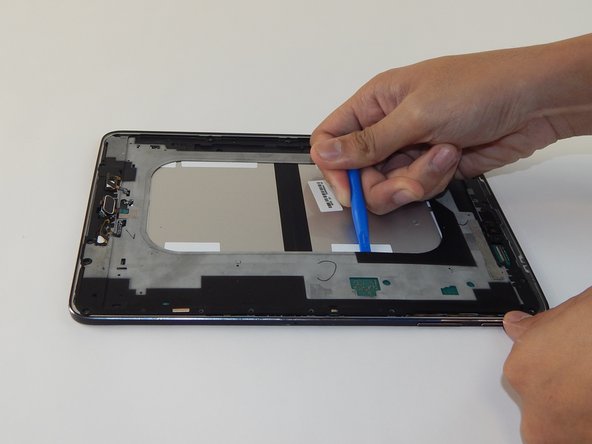
    • Locate and remove the 3 mm Phillips #1 screw holding the auxiliary port in place.

  8. Samsung Galaxy Tab S2 Auxiliary Port Replacement: étape 8, image 1 de 1
    • Use the plastic opening tool to gently lift and remove the auxiliary port connector from the device.

    • Once this is done the headphone socket can be removed with your hands.

Conclusion

To reassemble your device, follow these instructions in reverse order.

4 autres ont terminé cette réparation.

Jovina Martinez

Membre depuis le 01/20/16

2 084 Réputation

7 tutoriels rédigés

Équipe

USF Tampa, Team 10-4, Remmell Spring 2016 Membre de l'équipe USF Tampa, Team 10-4, Remmell Spring 2016

USFT-REMMELL-S16S10G4

4 membres

18 tutoriels rédigés

0 commentaires

Ajouter un commentaire

Nombre de vues :

Dernières 24 heures : 0

7 derniers jours : 1

30 derniers jours : 13

Total : 8,454