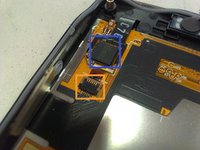
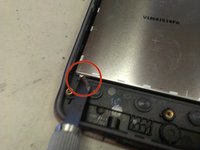
Aller au contenu principal

Samsung Galaxy Xcover GT-S5690 LCD Replacement

Ce dont vous avez besoin

  1. Samsung Galaxy Xcover GT-S5690 LCD Replacement, LCD: étape 1, image 1 de 1
    • Here is the Samsung Galaxy Xcover, with the LCD broken, that will be replaced.

  2. Samsung Galaxy Xcover GT-S5690 LCD Replacement: étape 2, image 1 de 1
    • The first step, is remove the battery door. It comes with a security lock, that has to be on open position. Start opening from bottom, and releasing from the side edges.

  3. Samsung Galaxy Xcover GT-S5690 LCD Replacement: étape 3, image 1 de 2 Samsung Galaxy Xcover GT-S5690 LCD Replacement: étape 3, image 2 de 2
    • Remove with a flat screwdriver, the volume button and the power button

    • Now, with a Phillpis Screwdriver, remove all the screws from the backcover.

  4. Samsung Galaxy Xcover GT-S5690 LCD Replacement: étape 4, image 1 de 2 Samsung Galaxy Xcover GT-S5690 LCD Replacement: étape 4, image 2 de 2
    • With a flat screwdriver or plastic opener, separate the front case from the rear case. It will be easy!

  5. Samsung Galaxy Xcover GT-S5690 LCD Replacement: étape 5, image 1 de 3 Samsung Galaxy Xcover GT-S5690 LCD Replacement: étape 5, image 2 de 3 Samsung Galaxy Xcover GT-S5690 LCD Replacement: étape 5, image 3 de 3
    • Remove the screw on the lower zone of the main board. The screw is the same of the case, so dont worry if you mix them.

    • Now, with a pliers, unplug the camera and the front speaker. Now, we are going to lift the main board, but ...

    • be careful, below is the LCD flex cable!

  6. Samsung Galaxy Xcover GT-S5690 LCD Replacement: étape 6, image 1 de 2 Samsung Galaxy Xcover GT-S5690 LCD Replacement: étape 6, image 2 de 2
    • Remove the LCD flat cable, and then, remove the 2 screws on the sides of the front cover. They are the same as the others screws...

    • Now, you can take apart the chassis from the front cover, leaving only the display and the touch.

  7. Samsung Galaxy Xcover GT-S5690 LCD Replacement: étape 7, image 1 de 2 Samsung Galaxy Xcover GT-S5690 LCD Replacement: étape 7, image 2 de 2
    • Lift up the black retainer, and take off the touch flex cable.

    • Be careful, the flex has double side tape below the IC.

    • Now, with a knife or cutter, lift carefully the LCD unit. Place the new LCD, and reassembly the phone.

    • In the near future, I´ll post how to replace the touch screen!

Conclusion

To reassemble your device, follow these instructions in reverse order.

3 autres ont terminé cette réparation.

Jaime

Membre depuis le 11/05/13

3 333 Réputation

4 tutoriels rédigés

Un commentaire

Good and clear. Pics are much better than movie, thank you very much!

pierrequivoyage - Réponse

Ajouter un commentaire

Nombre de vues :

Dernières 24 heures : 0

7 derniers jours : 0

30 derniers jours : 16

Total : 6,759