Cette version peut contenir des modifications incorrectes. Passez au dernier aperçu vérifié.
Ce dont vous avez besoin
-
Cette étape n’est pas traduite. Aidez à la traduire
-
To remove each strap, locate the metal latches on both sides of the back of the Gear.
-
Press down on the metal latch while pulling the strap away from the Gear until it is completely off.
-
-
Cette étape n’est pas traduite. Aidez à la traduire
-
Remove the four 4.0 mm screws on the back of the Gear using a T5 Torx Screwdriver.
-
-
Cette étape n’est pas traduite. Aidez à la traduire
-
Firmly holding the Gear, insert the flat side of the spudger at an angle to pry the back casing off of the device. Move the spudger along the sides of the Gear to completely detach the back and front components.
-
Pry the device open from the other side also if it does not fully disassemble from one side.
-
-
Cette étape n’est pas traduite. Aidez à la traduire
-
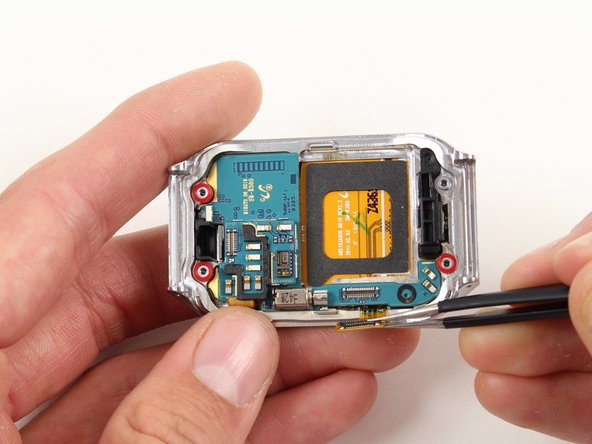
Locate the rectangular metal connector that attaches the camera to the Gear.
-
Use tweezers to gently lift and detach the metal plate of the connector.
-
-
-
Cette étape n’est pas traduite. Aidez à la traduire
-
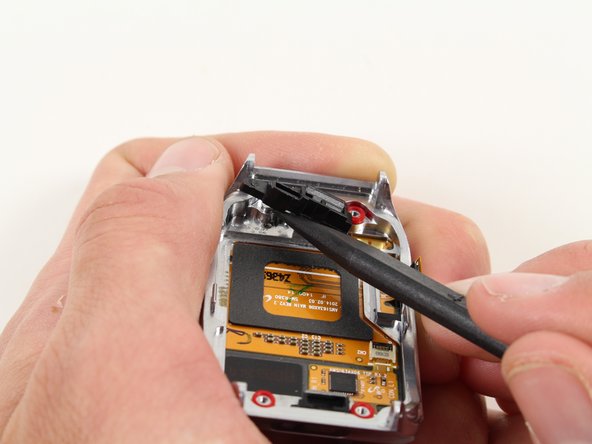
Use tweezers to carefully lift the camera from its slot out of the case.
-
-
Cette étape n’est pas traduite. Aidez à la traduire
-
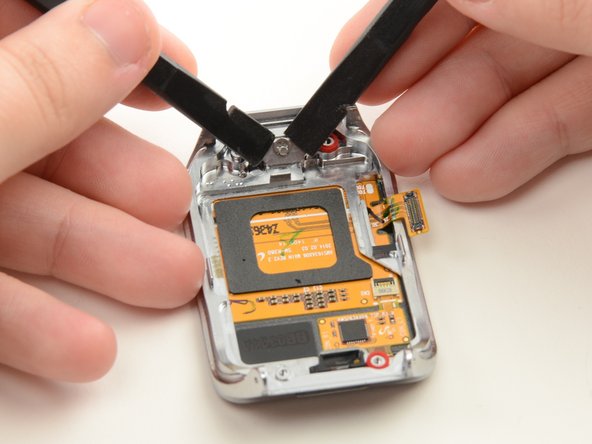
Use tweezers to grab and then gently lift up the metal plate of the safety belt.
-
-
Cette étape n’est pas traduite. Aidez à la traduire
-
Once the safety belt is removed, use tweezers to take the motherboard out of the Gear 2.
-
-
Cette étape n’est pas traduite. Aidez à la traduire
-
Insert the spudger into the small opening underneath the black home button assembly and pry it off the casing.
-
Lift up to detach the black assembly.
-
-
Cette étape n’est pas traduite. Aidez à la traduire
-
Use tweezers to grab the orange connector that is attached to side the home button assembly and lift to remove it from its adhesive.
-
-
Cette étape n’est pas traduite. Aidez à la traduire
-
Using two spudgers, place the pointed tips at each end of the U-shaped snap ring located under where the home button assembly was.
-
Remove the snap ring by pushing down with both pointed objects on each side of the ring simultaneously, it should pop off.
-
-
Cette étape n’est pas traduite. Aidez à la traduire
-
Use either the tweezers or the spudger to push the button peg out through the hole.
-


Annulation : je n'ai pas terminé ce tutoriel.
2 autres ont terminé cette réparation.

Équipe

Cal Poly, Team 13-27, Maness Spring 2014 Membre de l'équipe Cal Poly, Team 13-27, Maness Spring 2014
CPSU-MANESS-S14S13G27
4 membres
6 tutoriels rédigés