Aller au contenu principal

Samsung NP305E5A-A03US Optical Drive Replacement

Ce dont vous avez besoin

  1. Samsung NP305E5A-A03US Optical Drive Replacement, Hard Drive: étape 1, image 1 de 1
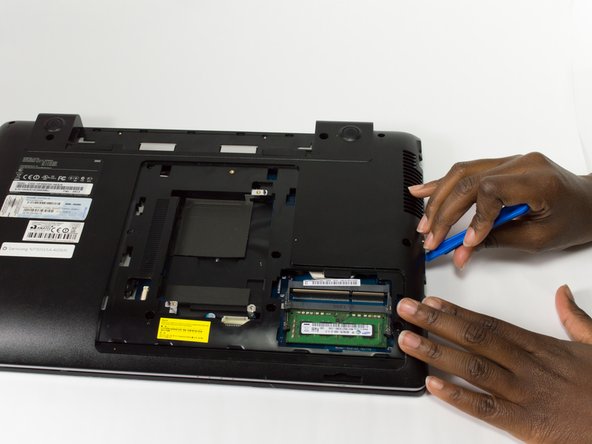
    • Unscrew the 3.5mm screws using a Phillips J0 Screwdriver by rotating the screwdriver in the counter clockwise direction.

  2. Samsung NP305E5A-A03US Optical Drive Replacement: étape 2, image 1 de 1
    • Wedge the plastic opening tool between the L-shaped back panel to slide the panel off.

    • Note this may take force. If you have difficulties using the plastic opening tool, try to use your hands to pull the panel off.

  3. Samsung NP305E5A-A03US Optical Drive Replacement: étape 3, image 1 de 2 Samsung NP305E5A-A03US Optical Drive Replacement: étape 3, image 2 de 2
    • Pull the panel towards you to remove the panel.

  4. Samsung NP305E5A-A03US Optical Drive Replacement: étape 4, image 1 de 1
    • Unscrew the three 3.5mm screws using a Phillips J0 Screwdriver by rotating the screwdriver in the counter clockwise direction.

    • Unscrew the one 4.45mm screws using a Phillips J0 Screwdriver by rotating the screwdriver in the counter clockwise direction.

  5. Samsung NP305E5A-A03US Optical Drive Replacement: étape 5, image 1 de 2 Samsung NP305E5A-A03US Optical Drive Replacement: étape 5, image 2 de 2
    • Pull the cord that connects the Hard Drive to the Motherboard to disconnect it.

  6. Samsung NP305E5A-A03US Optical Drive Replacement: étape 6, image 1 de 1
    • Remove the Hard Drive by lifting it towards you.

  7. Samsung NP305E5A-A03US Optical Drive Replacement, Optical Drive: étape 7, image 1 de 1
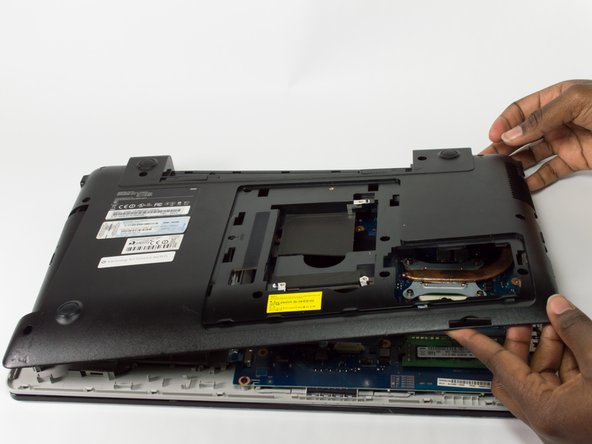
    • Unscrew the fourteen 9.5mm screws using a Phillips J0 Screwdriver by rotating the screwdriver in the counter clockwise direction.

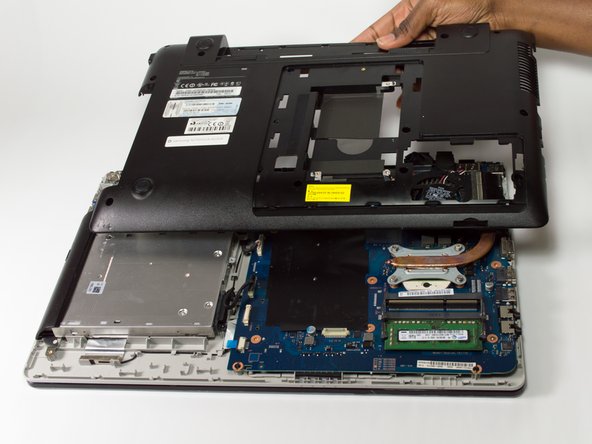
    • Unscrew the two 3.5mm screws using a Phillips J0 Screwdriver by rotating the screwdriver in the counter clockwise direction.

  8. Samsung NP305E5A-A03US Optical Drive Replacement: étape 8, image 1 de 2 Samsung NP305E5A-A03US Optical Drive Replacement: étape 8, image 2 de 2
    • Insert the plastic opening tool between the seam of the back panel and the laptop.

    • Slide the plastic opening tool along the seam to loosen the back panel from the laptop.

    • It may be difficult to slide the plastic opening tool along the seam, so you may have to apply some force.

  9. Samsung NP305E5A-A03US Optical Drive Replacement: étape 9, image 1 de 3 Samsung NP305E5A-A03US Optical Drive Replacement: étape 9, image 2 de 3 Samsung NP305E5A-A03US Optical Drive Replacement: étape 9, image 3 de 3
    • Remove the Back Panel by lifting it towards you.

    • It may take some force to remove the Back Panel.

  10. Samsung NP305E5A-A03US Optical Drive Replacement: étape 10, image 1 de 2 Samsung NP305E5A-A03US Optical Drive Replacement: étape 10, image 2 de 2
    • Remove the Optical Drive by sliding it away from the laptop.

Conclusion

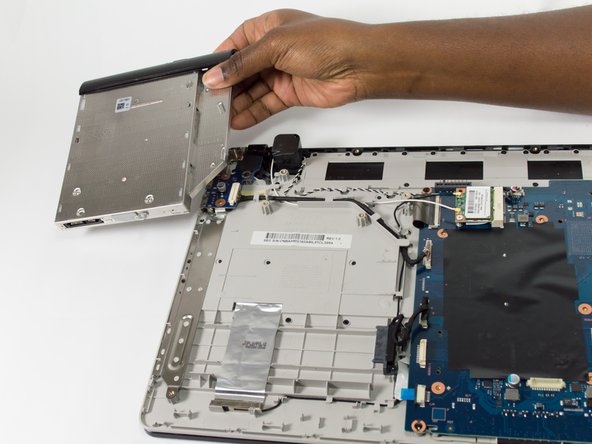
To reassemble your device, follow these instructions in reverse order.

Une autre personne a terminé cette réparation.

Kris Stobbe

Membre depuis le 10/30/16

585 Réputation

3 tutoriels rédigés

Équipe

Baylor, Team 5-7, Williams Fall 2016 Membre de l'équipe Baylor, Team 5-7, Williams Fall 2016

BU-WILLIAMS-F16S5G7

3 membres

5 tutoriels rédigés

0 commentaires

Ajouter un commentaire

Nombre de vues :

Dernières 24 heures : 1

7 derniers jours : 3

30 derniers jours : 9

Total : 312