Cette version peut contenir des modifications incorrectes. Passez au dernier aperçu vérifié.
Ce dont vous avez besoin
-
Cette étape n’est pas traduite. Aidez à la traduire
-
With the back of the DVD player facing you, remove the three 1 cm black screws on the right, left, and top sides using a Phillips #1 screwdriver.
-
-
Cette étape n’est pas traduite. Aidez à la traduire
-
Pull the top cover towards you until you can lift it up and off.
-
-
Cette étape n’est pas traduite. Aidez à la traduire
-
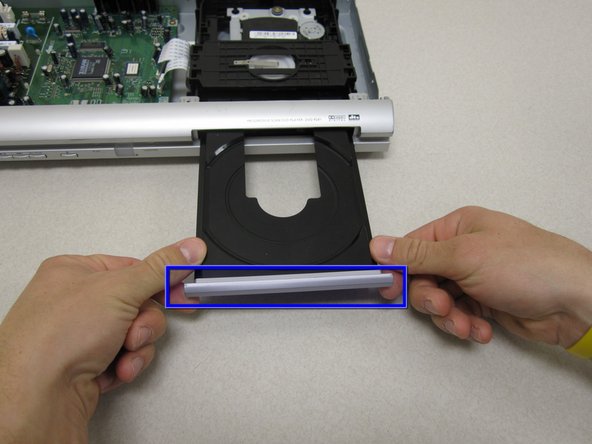
With the front of the DVD player facing you, turn the power on and eject the disc tray.
-
Press down on the disc tray with your thumbs while also pressing up with your pointer finger on the left and right edges of the silver cover. The cover should easily pop up and off the disc tray.
-
-
Cette étape n’est pas traduite. Aidez à la traduire
-
To remove the front panel, lift up the clips on the bottom, left and right sides of the DVD player.
-
-
-
Cette étape n’est pas traduite. Aidez à la traduire
-
Gently remove the front panel by pulling it forward.
-
-
Cette étape n’est pas traduite. Aidez à la traduire
-
Press the eject button again to make the disc tray slide back into place.
-
-
Cette étape n’est pas traduite. Aidez à la traduire
-
Take out the two ribbon cables adjacent to the DVD drive and the power supply in the upper left hand corner of the board (with the DVD drive oriented on the right) before attempting to remove the main board.
-
-
Cette étape n’est pas traduite. Aidez à la traduire
-
Remove each of the four 0.6 cm brass screws with a Phillips #2 screwdriver near the corners of the main board indicated by the red circles.
-
-
Cette étape n’est pas traduite. Aidez à la traduire
-
After all four screws have been completely removed, use a pair of pliers to push the two tabs of both white push fasteners located off-center left and indicated by the red circles.
-
Now that the tabs are depressed, carefully lift the main board from it's position in the case. While sliding the main board up, be mindful to pull the video and audio out ports away from the rear of the case.
-
-
Cette étape n’est pas traduite. Aidez à la traduire
-
Now replace the void in your DVD case with the functional main board.
-
Annulation : je n'ai pas terminé ce tutoriel.
Une autre personne a terminé cette réparation.


