Aller au contenu principal

Samsung POWERbot VR9000 Vacuum Motor Replacement

Ce dont vous avez besoin

  1. Samsung POWERbot VR9000 Vacuum Motor Replacement, Top Chassis: étape 1, image 1 de 2 Samsung POWERbot VR9000 Vacuum Motor Replacement, Top Chassis: étape 1, image 2 de 2
    • Turn off the emergency switch located at the bottom right of the POWERbot.

  2. Samsung POWERbot VR9000 Vacuum Motor Replacement: étape 2, image 1 de 2 Samsung POWERbot VR9000 Vacuum Motor Replacement: étape 2, image 2 de 2
    • Insert the plastic opening tool under the black cover, near the Samsung logo on the back of the device, and partially pry open.

  3. Samsung POWERbot VR9000 Vacuum Motor Replacement: étape 3, image 1 de 2 Samsung POWERbot VR9000 Vacuum Motor Replacement: étape 3, image 2 de 2
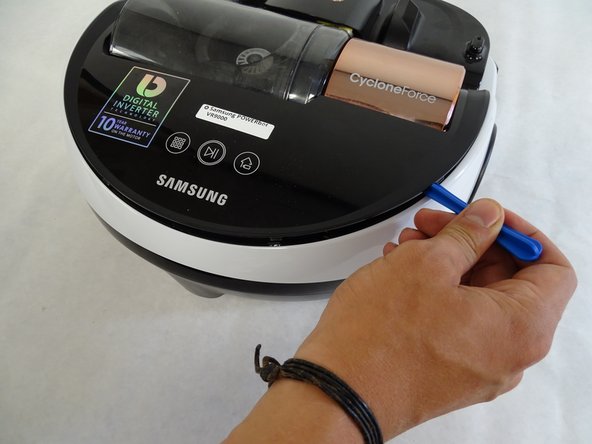
    • Slide the plastic opening tool to the left, remaining under the black cover, until two left side pins have been detached. Then slide the plastic opening tool to the right until two right side pins have been detached.

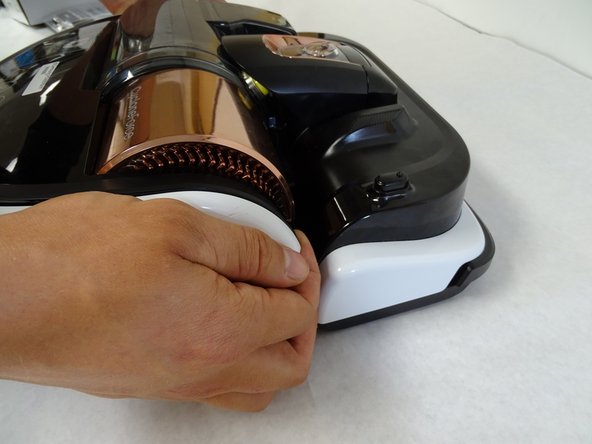
    • Grab the two clips near the front of the black cover, on in front of each wheel. Pull the clips away from the wheels.

  4. Samsung POWERbot VR9000 Vacuum Motor Replacement: étape 4, image 1 de 3 Samsung POWERbot VR9000 Vacuum Motor Replacement: étape 4, image 2 de 3 Samsung POWERbot VR9000 Vacuum Motor Replacement: étape 4, image 3 de 3
    • Remove the black cover.

  5. Samsung POWERbot VR9000 Vacuum Motor Replacement: étape 5, image 1 de 2 Samsung POWERbot VR9000 Vacuum Motor Replacement: étape 5, image 2 de 2
    • Insert the plastic opening tool under copper-colored cover, under the words "CycloneForce," and pry open, applying a small rotation, until the two pins are released .

    • Grab the underside of the cover and lift upwards while pushing forward until the cover pops off.

  6. Samsung POWERbot VR9000 Vacuum Motor Replacement: étape 6, image 1 de 2 Samsung POWERbot VR9000 Vacuum Motor Replacement: étape 6, image 2 de 2
    • Remove the three 6mm Phillips #1 screws in the holes near the back of the device.

  7. Samsung POWERbot VR9000 Vacuum Motor Replacement: étape 7, image 1 de 2 Samsung POWERbot VR9000 Vacuum Motor Replacement: étape 7, image 2 de 2
    • Remove the 6mm Phillips #1 screw in the hole that was under the copper-colored vacuum cover.

  8. Samsung POWERbot VR9000 Vacuum Motor Replacement: étape 8, image 1 de 2 Samsung POWERbot VR9000 Vacuum Motor Replacement: étape 8, image 2 de 2
    • Flip the device over and remove the 6mm Phillips #1 screw in front of the left (from this perspective, right) wheel.

  9. Samsung POWERbot VR9000 Vacuum Motor Replacement: étape 9, image 1 de 2 Samsung POWERbot VR9000 Vacuum Motor Replacement: étape 9, image 2 de 2
    • Detach the wider circuit connector by pressing down gently on the left end of the clip and pulling the connector out.

    • Pull the connector out by the top and bottom of the white piece and not by the wires.

  10. Samsung POWERbot VR9000 Vacuum Motor Replacement: étape 10, image 1 de 2 Samsung POWERbot VR9000 Vacuum Motor Replacement: étape 10, image 2 de 2
    • Remove the top chassis from the POWERbot by grabbing the wheel covers and lifting upwards.

  11. Samsung POWERbot VR9000 Vacuum Motor Replacement, Vacuum Motor: étape 11, image 1 de 2 Samsung POWERbot VR9000 Vacuum Motor Replacement, Vacuum Motor: étape 11, image 2 de 2
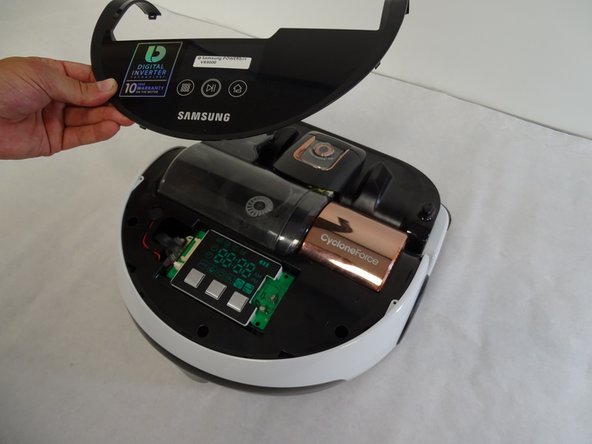
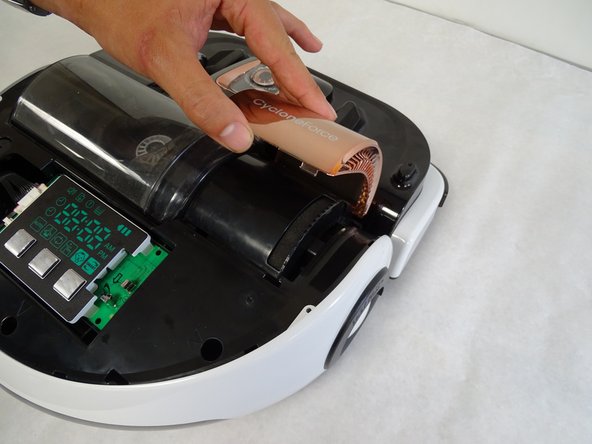
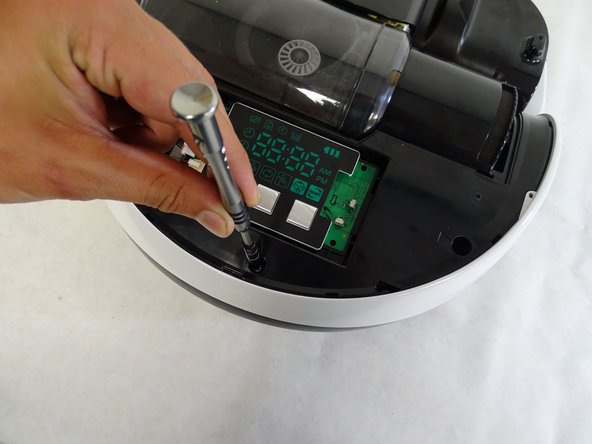
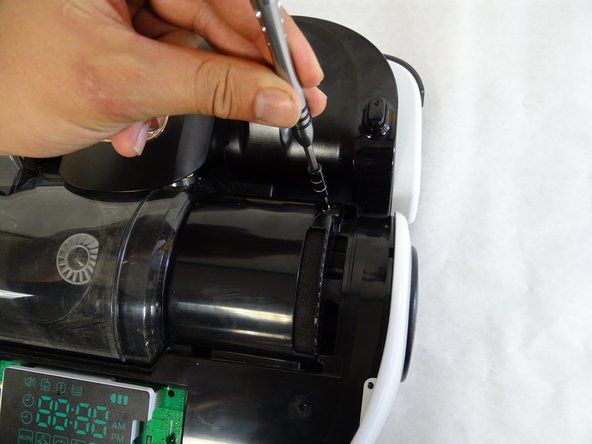
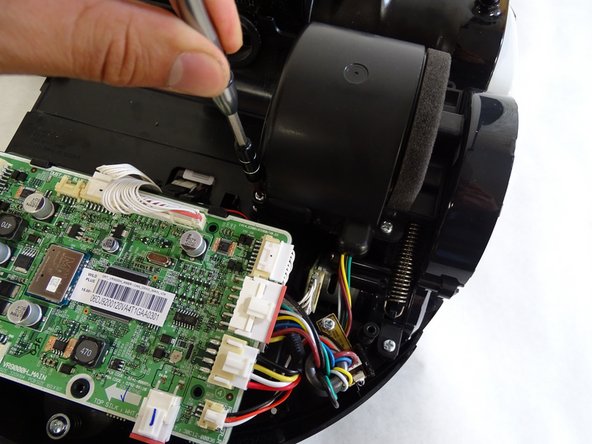
    • Remove the three 5mm Phillips #1 screws in the holes around the vacuum motor.

  12. Samsung POWERbot VR9000 Vacuum Motor Replacement: étape 12, image 1 de 2 Samsung POWERbot VR9000 Vacuum Motor Replacement: étape 12, image 2 de 2
    • Remove the 5mm Phillips #1 screw on the peg to the right of the circuit board.

  13. Samsung POWERbot VR9000 Vacuum Motor Replacement: étape 13, image 1 de 3 Samsung POWERbot VR9000 Vacuum Motor Replacement: étape 13, image 2 de 3 Samsung POWERbot VR9000 Vacuum Motor Replacement: étape 13, image 3 de 3
    • Detach the largest circuit connector on the right side by pressing down gently on the right end of the clip and pulling the connector out.

    • Pull the connector out by the top and bottom of the white piece and not by the wires.

  14. Samsung POWERbot VR9000 Vacuum Motor Replacement: étape 14, image 1 de 2 Samsung POWERbot VR9000 Vacuum Motor Replacement: étape 14, image 2 de 2
    • Remove the vacuum motor by grabbing the body of the motor and lifting upwards.

Conclusion

To reassemble your device, follow these instructions in reverse order.

8 autres ont terminé cette réparation.

Kyle Chin

Membre depuis le 04/24/17

1 919 Réputation

4 tutoriels rédigés

Équipe

Cal Poly, Team S15-G3, Banghart Spring 2017 Membre de l'équipe Cal Poly, Team S15-G3, Banghart Spring 2017

CPSU-BANGHART-S17S15G3

4 membres

14 tutoriels rédigés

0 commentaires

Ajouter un commentaire

Nombre de vues :

Dernières 24 heures : 0

7 derniers jours : 11

30 derniers jours : 34

Total : 4,065