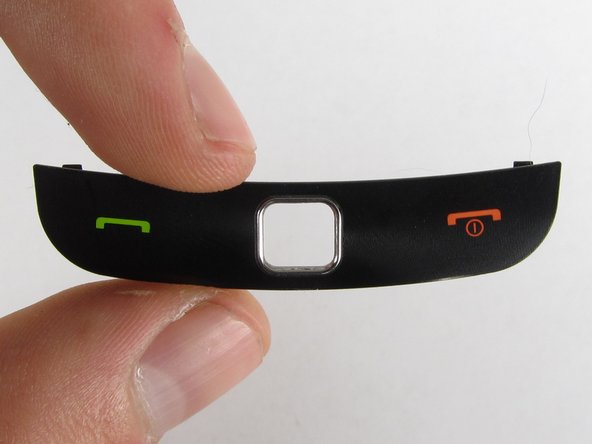
Aller au contenu principal

Samsung Rogue Front Function Keys Replacement

Ce dont vous avez besoin

  1. Samsung Rogue Front Function Keys Replacement, Battery: étape 1, image 1 de 2 Samsung Rogue Front Function Keys Replacement, Battery: étape 1, image 2 de 2
    • Before disassembling your Samsung Rogue, make sure it is powered off.

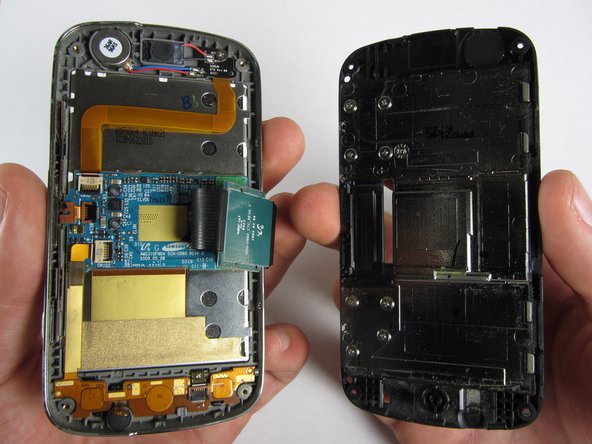
    • With your thumbs, push down on the back cover of your phone and slide it away from the camera.

  2. Samsung Rogue Front Function Keys Replacement: étape 2, image 1 de 2 Samsung Rogue Front Function Keys Replacement: étape 2, image 2 de 2
    • You can now remove the battery by prying it up with your finger.

  3. Samsung Rogue Front Function Keys Replacement, Motherboard: étape 3, image 1 de 1
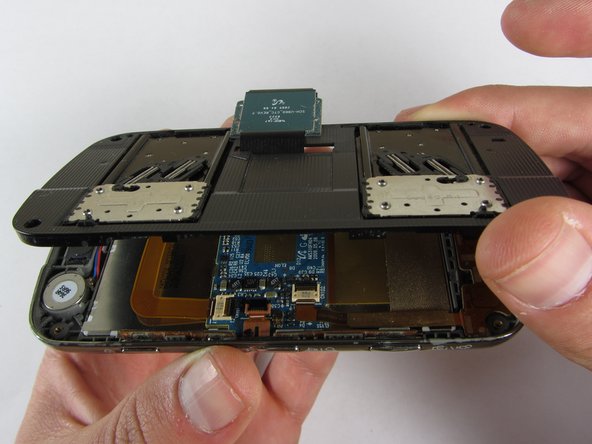
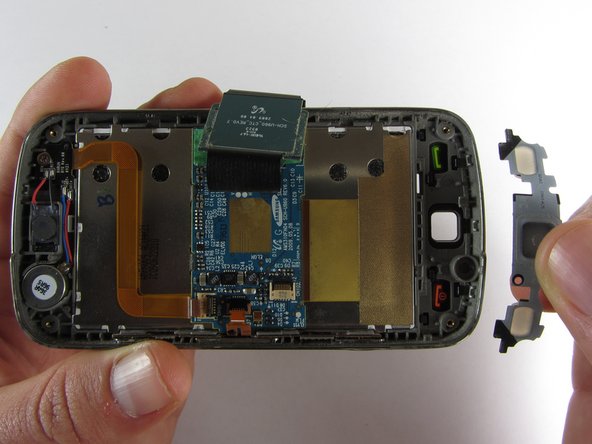
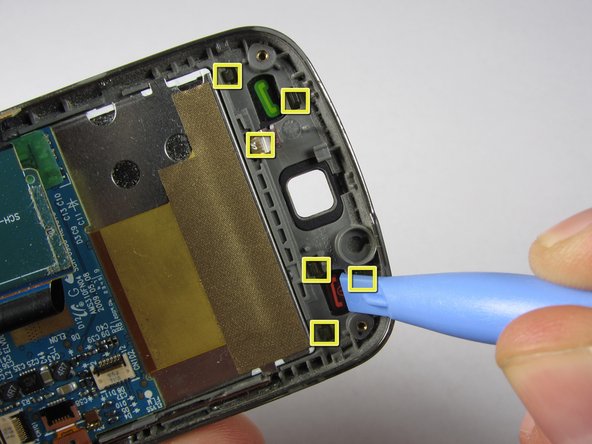
    • Use a plastic opening tool to carefully pry the back cover surrounding the camera up from the phone.

  4. Samsung Rogue Front Function Keys Replacement: étape 4, image 1 de 1
    • Remove the five 3.4mm Philips screws securing the backing of the phone.

  5. Samsung Rogue Front Function Keys Replacement: étape 5, image 1 de 3 Samsung Rogue Front Function Keys Replacement: étape 5, image 2 de 3 Samsung Rogue Front Function Keys Replacement: étape 5, image 3 de 3
    • Use a plastic opening tool to carefully pry off the back cover.

    • Make sure you are prying along the edge and not between the two halves of the phone that slide away from each other.

    • Be careful to not drop the volume changing piece, for it can easily slip out.

  6. Samsung Rogue Front Function Keys Replacement: étape 6, image 1 de 1
    • Remove the two 3.45 mm Philips screws below the white sticker.

  7. Samsung Rogue Front Function Keys Replacement: étape 7, image 1 de 2 Samsung Rogue Front Function Keys Replacement: étape 7, image 2 de 2
    • Carefully lift the motherboard up from the bottom edge.

    • The film of wires is still attached to the motherboard, so do not completely remove the motherboard just yet or you may damage it.

  8. Samsung Rogue Front Function Keys Replacement: étape 8, image 1 de 2 Samsung Rogue Front Function Keys Replacement: étape 8, image 2 de 2
    • Use a plastic opening tool to disconnect the film from the motherboard.

  9. Samsung Rogue Front Function Keys Replacement, Front Function Keys: étape 9, image 1 de 1
    • Remove the eight 1.7mm Philips screws above the keyboard.

  10. Samsung Rogue Front Function Keys Replacement: étape 10, image 1 de 1
    • Carefully remove keyboard frame from the sliding mechanisms underneath.

  11. Samsung Rogue Front Function Keys Replacement: étape 11, image 1 de 1
    • Remove the five 3.0mm Philips screws around the outside of the sliding mechanisms.

  12. Samsung Rogue Front Function Keys Replacement: étape 12, image 1 de 3 Samsung Rogue Front Function Keys Replacement: étape 12, image 2 de 3 Samsung Rogue Front Function Keys Replacement: étape 12, image 3 de 3
    • Use a plastic opening tool to pry off the upper slide plate.

    • Be careful of the film of wires when taking off the upper slide plate.

  13. Samsung Rogue Front Function Keys Replacement: étape 13, image 1 de 3 Samsung Rogue Front Function Keys Replacement: étape 13, image 2 de 3 Samsung Rogue Front Function Keys Replacement: étape 13, image 3 de 3
    • Use tweezers to open the two black gates by putting them in the "up" position.

    • With the same tweezers, carefully pull out the orange strips from the two specified gates.

  14. Samsung Rogue Front Function Keys Replacement: étape 14, image 1 de 3 Samsung Rogue Front Function Keys Replacement: étape 14, image 2 de 3 Samsung Rogue Front Function Keys Replacement: étape 14, image 3 de 3
    • Using tweezers, gently remove the bottom orange strip from the device.

    • At this point you can easily lift out the rubber function key pad as well.

  15. Samsung Rogue Front Function Keys Replacement: étape 15, image 1 de 3 Samsung Rogue Front Function Keys Replacement: étape 15, image 2 de 3 Samsung Rogue Front Function Keys Replacement: étape 15, image 3 de 3
    • There are two ways you can take out the front function keys:

    • 1) Use a plastic phone opening tool to pry out the piece from the front of the phone.

    • 2) Simply pop out the piece from the inside by pushing on its tabs.

Conclusion

To reassemble your device, follow these instructions in reverse order.

Viktoria Mikoultchik

Membre depuis le 04/15/12

25 Réputation

7 tutoriels rédigés

Équipe

Cal Poly, Team 7-32, Maness Spring 2012 Membre de l'équipe Cal Poly, Team 7-32, Maness Spring 2012

CPSU-MANESS-S12S7G32

4 membres

16 tutoriels rédigés

0 commentaires

Ajouter un commentaire

Nombre de vues :

Dernières 24 heures : 0

7 derniers jours : 1

30 derniers jours : 1

Total : 352