Aller au contenu principal

Samsung SPH-M360 Keyboard Replacement

Ce dont vous avez besoin

  1. Samsung SPH-M360 Keyboard Replacement, Battery: étape 1, image 1 de 3 Samsung SPH-M360 Keyboard Replacement, Battery: étape 1, image 2 de 3 Samsung SPH-M360 Keyboard Replacement, Battery: étape 1, image 3 de 3
    • Locate the arrow on the panel of the rear side of the phone.

    • Use one or two fingers to apply light pressure downwards on the rear panel and push or pull in the direction of the arrow.

  2. Samsung SPH-M360 Keyboard Replacement: étape 2, image 1 de 3 Samsung SPH-M360 Keyboard Replacement: étape 2, image 2 de 3 Samsung SPH-M360 Keyboard Replacement: étape 2, image 3 de 3
    • Place finger inside the small semi-spherical slot near the top of the battery.

    • Lightly pull the battery away from the phone. This should not require much effort.

  3. Samsung SPH-M360 Keyboard Replacement, Casing: étape 3, image 1 de 1
    • Remove the four screws on the corners of the casing.

    • The volume and camera buttons may fall out

  4. Samsung SPH-M360 Keyboard Replacement: étape 4, image 1 de 2 Samsung SPH-M360 Keyboard Replacement: étape 4, image 2 de 2
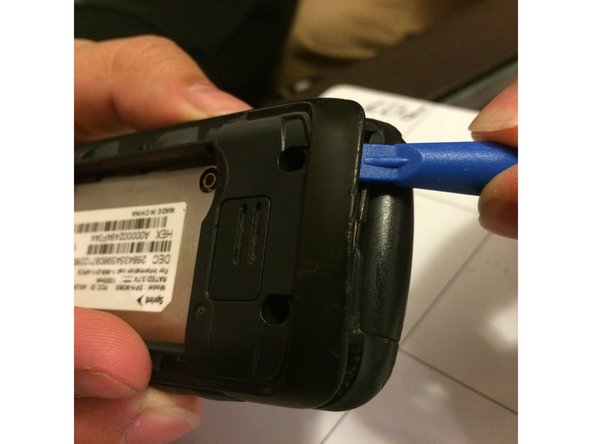
    • Starting near the top of the casing, use the plastic opening tool to gently pry the casing open.

    • The case should require some effort to pry open, but do not use excessive force for risk of breaking the rear panel.

    • Slowly work the plastic opening tool around the edge of the casing, gently prying it around at all sides.

  5. Samsung SPH-M360 Keyboard Replacement: étape 5, image 1 de 2 Samsung SPH-M360 Keyboard Replacement: étape 5, image 2 de 2
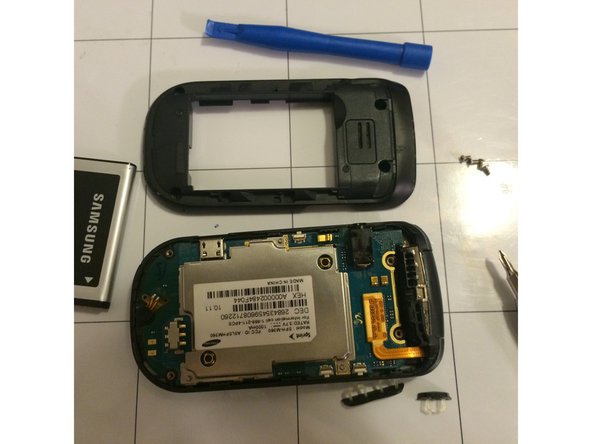
    • Once the casing has been fully pried off of the phone, it should be easily removed by hand.

    • The buttons for the camera and volume may fall out while removing the casing. Be careful not to lose the small pieces.

  6. Samsung SPH-M360 Keyboard Replacement, Keyboard: étape 6, image 1 de 1
    • Flip open the phone so that the text on the keyboard is visible.

    • Push from the text side until the keyboard comes completely out of the phone casing.

Conclusion

To reassemble your device, follow these instructions in reverse order.

Hunter Parker

Membre depuis le 10/22/15

475 Réputation

4 tutoriels rédigés

Équipe

University of Memphis, Team 3-5, Kim Fall 2015 Membre de l'équipe University of Memphis, Team 3-5, Kim Fall 2015

UM-KIM-F15S3G5

4 membres

10 tutoriels rédigés

0 commentaires

Ajouter un commentaire

Nombre de vues :

Dernières 24 heures : 1

7 derniers jours : 1

30 derniers jours : 2

Total : 73