Aller au contenu principal

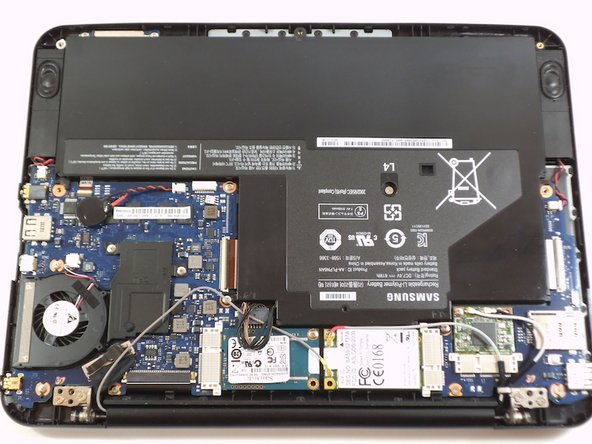
Samsung Series 5 3G Chromebook 16 GB SanDisk Replacement

Ce dont vous avez besoin

  1. Samsung Series 5 3G Chromebook 16 GB SanDisk Replacement, Back Cover: étape 1, image 1 de 2 Samsung Series 5 3G Chromebook 16 GB SanDisk Replacement, Back Cover: étape 1, image 2 de 2
    • Place the laptop on a flat surface with the bottom side facing up.

    • Remove the rubber feet from the bottom of the panel using your fingernails.

    • Remove all the seven screws from the bottom panel.

  2. Samsung Series 5 3G Chromebook 16 GB SanDisk Replacement: étape 2, image 1 de 2 Samsung Series 5 3G Chromebook 16 GB SanDisk Replacement: étape 2, image 2 de 2
    • Loosen the back cover panel using a spudger.

  3. Samsung Series 5 3G Chromebook 16 GB SanDisk Replacement: étape 3, image 1 de 2 Samsung Series 5 3G Chromebook 16 GB SanDisk Replacement: étape 3, image 2 de 2
    • Once you work your way around, you can remove the panel.

  4. Samsung Series 5 3G Chromebook 16 GB SanDisk Replacement, 16 GB SanDisk: étape 4, image 1 de 3 Samsung Series 5 3G Chromebook 16 GB SanDisk Replacement, 16 GB SanDisk: étape 4, image 2 de 3 Samsung Series 5 3G Chromebook 16 GB SanDisk Replacement, 16 GB SanDisk: étape 4, image 3 de 3
    • Remove the single screw.

    • use the plastic tool to disconnect the WWAN antennas from the board.

    • After removing its mounting screw, the 16 GB SanDisk can be removed from the motherboard.

Conclusion

To reassemble your device, follow these instructions in reverse order.

2 autres ont terminé cette réparation.

Helder Avelino

Membre depuis le 10/22/13

938 Réputation

5 tutoriels rédigés

Équipe

University of Maryland, Team 1-7, Shastany Fall 2013 Membre de l'équipe University of Maryland, Team 1-7, Shastany Fall 2013

UMD-SHASTANY-F13S1G7

2 membres

9 tutoriels rédigés

0 commentaires

Ajouter un commentaire

Nombre de vues :

Dernières 24 heures : 1

7 derniers jours : 8

30 derniers jours : 13

Total : 1,155