Aller au contenu principal

Samsung Series 9 NP900X4B-A02 I/O PCB Replacement

Ce dont vous avez besoin

  1. Samsung Series 9 NP900X4B-A02 I/O PCB Replacement, Battery: étape 1, image 1 de 2 Samsung Series 9 NP900X4B-A02 I/O PCB Replacement, Battery: étape 1, image 2 de 2
    • Ensure computer is unplugged and powered down before continuing.

    • Remove the ten screws along the base using a Phillips #000.

    • Use a Plastic Opening Tool to pry open the base .

  2. Samsung Series 9 NP900X4B-A02 I/O PCB Replacement: étape 2, image 1 de 1
    • The battery is now unobstructed from your view.

    • Before removing the battery, use the plastic opening tool to detach the ribbon wire cable that connects the battery to the motherboard.

  3. Samsung Series 9 NP900X4B-A02 I/O PCB Replacement: étape 3, image 1 de 2 Samsung Series 9 NP900X4B-A02 I/O PCB Replacement: étape 3, image 2 de 2
    • Use the Phillips #000 screwdriver to remove six screws that are holding the battery in place.

  4. Samsung Series 9 NP900X4B-A02 I/O PCB Replacement: étape 4, image 1 de 1
    • Lift and pull out the battery.

  5. Samsung Series 9 NP900X4B-A02 I/O PCB Replacement, Speaker: étape 5, image 1 de 3 Samsung Series 9 NP900X4B-A02 I/O PCB Replacement, Speaker: étape 5, image 2 de 3 Samsung Series 9 NP900X4B-A02 I/O PCB Replacement, Speaker: étape 5, image 3 de 3
    • Unplug the left speaker's cable from the motherboard.

    • Lift up and remove the left speaker.

  6. Samsung Series 9 NP900X4B-A02 I/O PCB Replacement: étape 6, image 1 de 3 Samsung Series 9 NP900X4B-A02 I/O PCB Replacement: étape 6, image 2 de 3 Samsung Series 9 NP900X4B-A02 I/O PCB Replacement: étape 6, image 3 de 3
    • Unplug the right speaker's cable from the motherboard.

    • Lift up and remove the right speaker.

  7. Samsung Series 9 NP900X4B-A02 I/O PCB Replacement, Fan: étape 7, image 1 de 2 Samsung Series 9 NP900X4B-A02 I/O PCB Replacement, Fan: étape 7, image 2 de 2
    • Next locate the two Phillips #0 2.5mm screws on both the top right and bottom left corner of the fan.

  8. Samsung Series 9 NP900X4B-A02 I/O PCB Replacement: étape 8, image 1 de 1
    • After locating the screws, using the Phillips #0 screwdriver, remove the screws from the fan.

  9. Samsung Series 9 NP900X4B-A02 I/O PCB Replacement: étape 9, image 1 de 2 Samsung Series 9 NP900X4B-A02 I/O PCB Replacement: étape 9, image 2 de 2
    • Use the plastic opening tool to remove the cable connector from its housing which is just to the right of the fan.

  10. Samsung Series 9 NP900X4B-A02 I/O PCB Replacement: étape 10, image 1 de 1
    • Once the cable has been removed from its housing you are free to remove the fan from the laptop.

    • You can either clean the fan with a computer duster or other cleaner, or replace it with a new one.

  11. Samsung Series 9 NP900X4B-A02 I/O PCB Replacement, I/O PCB: étape 11, image 1 de 1
    • Remove the five 2.5 mm Phillips #00 screws securing the I/O PCB.

  12. Samsung Series 9 NP900X4B-A02 I/O PCB Replacement: étape 12, image 1 de 1
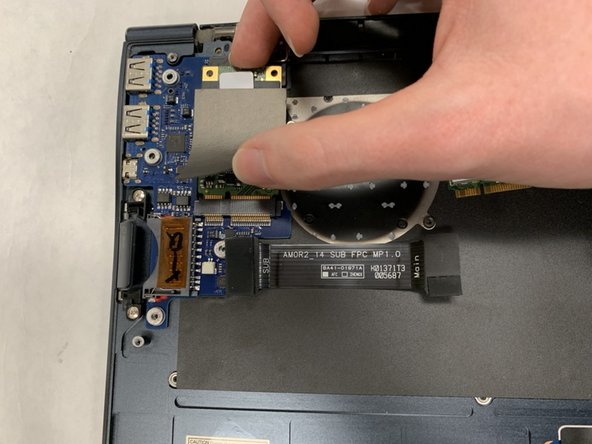
    • Lift and pull the SSD from the board.

  13. Samsung Series 9 NP900X4B-A02 I/O PCB Replacement: étape 13, image 1 de 1
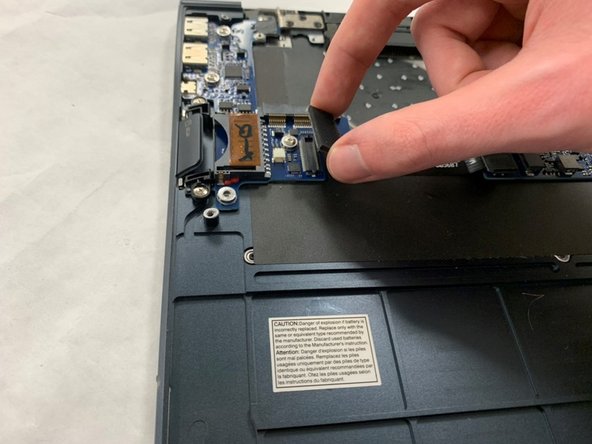
    • Disconnect the black press fit connector by gently lifting up.

  14. Samsung Series 9 NP900X4B-A02 I/O PCB Replacement: étape 14, image 1 de 2 Samsung Series 9 NP900X4B-A02 I/O PCB Replacement: étape 14, image 2 de 2
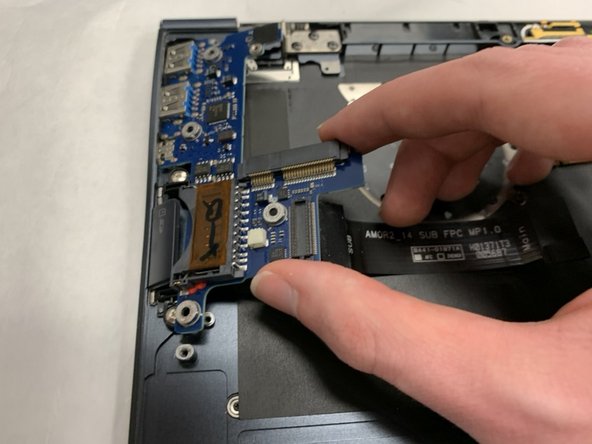
    • Lift the right side of the I/O PCB and pull to the right to remove it from the laptop casing.

Conclusion

To reassemble your device, follow these instructions in reverse order.

Brady Hildreth

Membre depuis le 11/04/19

361 Réputation

3 tutoriels rédigés

Équipe

IUPUI, Team S1-G4, Henning Fall 2019 Membre de l'équipe IUPUI, Team S1-G4, Henning Fall 2019

IUPUI-HENNING-F19S1G4

3 membres

3 tutoriels rédigés

0 commentaires

Ajouter un commentaire

Nombre de vues :

Dernières 24 heures : 0

7 derniers jours : 2

30 derniers jours : 11

Total : 271